41
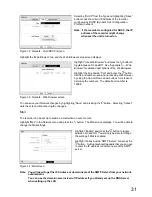
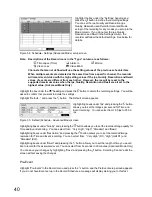
When the recorder is in the Event Record mode it is
possible to have it record images before the event
occurs. The “Pre-Event” screen allows you to define
how to handle pre-event recording.
You can turn individual cameras On or Off for pre-event
recording. The image speed can be set from 1.00 ips
to25.00 ips, image quality can be selectable from “Very
High”, “High”, “Standard” and “Basic”, and image
resolution can be selectable from “Very High” (D1),
“High” (Half D1) and “Standard” (CIF).
Figure 56 : Pre-Event screen
You can set the amount of time to record prior to the event by adjusting the “Dwell”. You can set the “Dwell”
from 5 seconds to 30 minutes. The longer the dwell set, the fewer maximum ips can be set.
Note: When the recorder is in the Time or Time & Event mode, it ignores the pre-event settings
and follows the time settings.
You can save your changes by highlighting “Save” and pressing the button. Selecting “Cancel” exits the
screen without saving the changes.
Note: The Pre-Event settings might change automatically by the constraint performance, when
you save your changes.
Event Setup
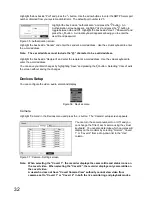
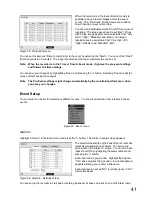
Your recorder can be set to detect many different events. You can also determine how it reacts to these
events.
Figure 57 : Event menu
Alarm-In
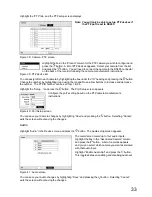
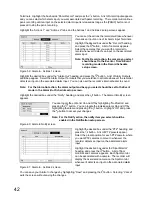
Highlight “Alarm-In” in the Event menu and press the button. The Alarm-In setup screen appears.
The alarm terminal strip on the back of the recorder has
inputs associated with each alarm. You can set up
each input on the “Alarm-In” screen. You can turn each
input On or Off by highlighting the alarm number and
pressing the button.
Each input can be given a title. Highlight the desired
“Title” box and press the button. A virtual keyboard
appears allowing you to enter a title name.
Each input can be set as “NO” (normally open) or “NC”
(normally closed).
Figure 58 : Alarm-In - Settings screen
You can set up the recorder to start panic recording whenever it senses an input on one of its Alarm Input
Summary of Contents for WJ-HL204/G
Page 77: ...76 Map of Screens ...

