44
Copy recorded images
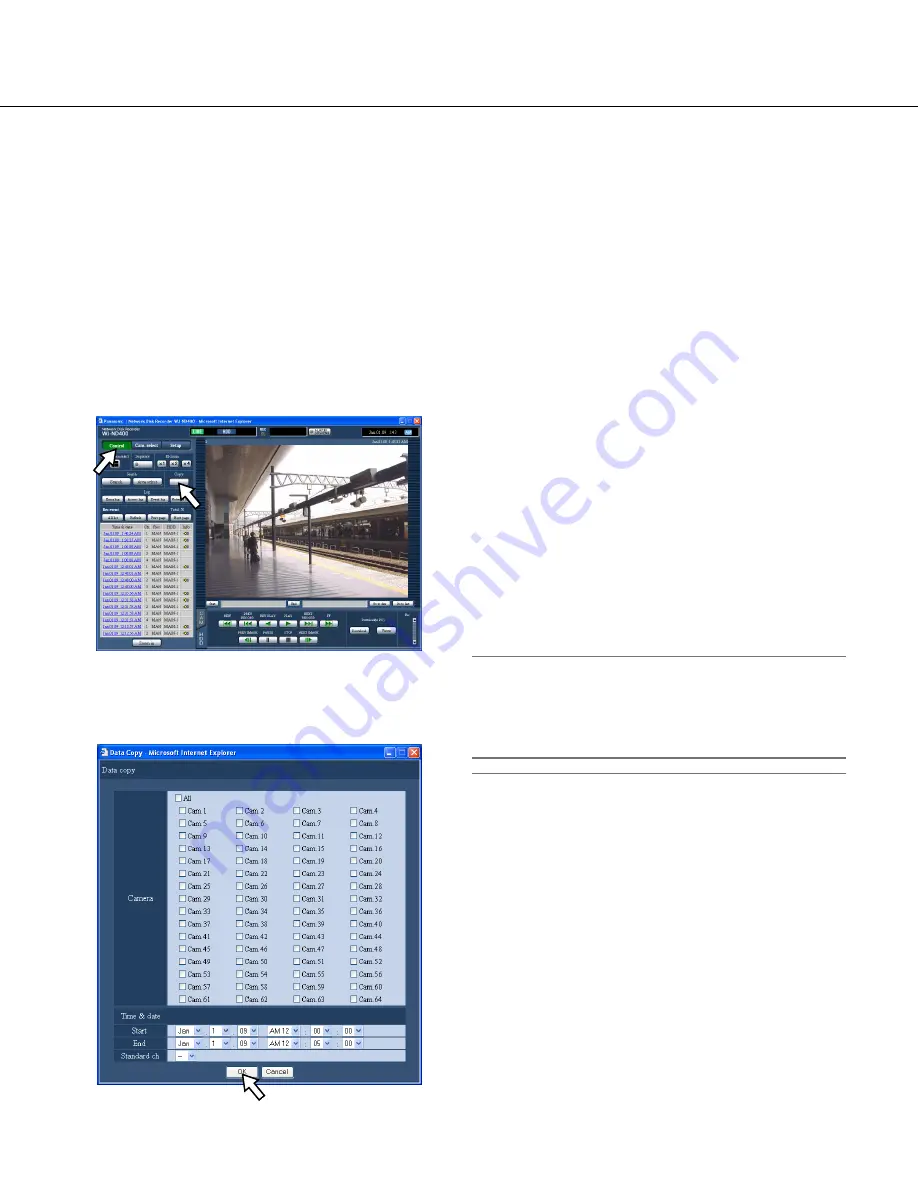
Recorded images can be copied onto the copy area on the hard disk drives.
It is recommended to make back-up copies on a regular basis for unexpected situations such as malfunction of the
hard disk drives.
Copy
Images recorded on the normal recording area/event
recording area can be copied onto the copy area during
the following.
• During displaying live images
• During pausing playback of recorded images
1
Click the [Control] button.
2
Click the [Copy] button.
The "Data copy" window will be displayed.
3
Click to select the desired camera channels used
for recording.
It is possible to select two or more camera channels.
4
Select a start time and an end time for copying
by clicking the [V] button.
5
Determine which camera channel is to be used
as a standard time zone.
It is necessary to determine the primary time and
date by selecting a camera channel when cameras
are installed in two or more countries. When both
this recorder and the camera to be used as
"Standard Ch" are installed in the same time zone,
select "--".
6
Click the [OK] button.
Copying will start and the "COPY" indication will be
displayed in the status display area.
Important:
• Images will be copied first, and then audio will be.
• Depending on the designated time range for copy
-
ing, some images and audio may sometimes not be
copied.
Note:
• In the following cases, copy will stop.
• When another user edited the settings during the
copying
• When the web browser is closed by a user who
started copying using the web browser (It will take
around 90 seconds until the copying is stopped
from the moment when the web browser is
closed.)
• It is impossible to copy recorded images in the fol
-
lowing cases. The pop-up window will be displayed
when the button in the [Copy] box is clicked.
• When another user is performing the copying
• When "Copy area" is selected on the "Area
select" window


