33
■
Auto adjustment time
Select a method of auto clock adjustment from the fol-
lowing.
Off (default):
Does not adjust clock automatically.
Slave:
Receives a signal from the master unit and
adjusts the clock of the recorder.
Master:
Supplies a signal from the ALARM/CONTROL
connector on the rear panel to the connected devic-
es and the devices will adjust their clocks with refer-
ence to the clock of the recorder.
■
Activation time
Set the time to start the auto clock adjustment.
When "Master" is selected for "Auto adjustment time",
set the time for a signal to supply from the ALARM/
CONTROL connector (time adjustment I/O, pin no. 20)
at the rear of the recorder.
When "Slave" is selected, set the time for the recorder
to receive a signal from the master unit and adjust the
clock.
■
Summer time(daylight saving)
Determine how to shift to/from the summer time from
the following. During summer time, the time will be dis-
played with an asterisk (*).
Out (default):
Summer time will not be applied.
Auto:
Applies summer time in accordance with the set-
ting of summer time.
■
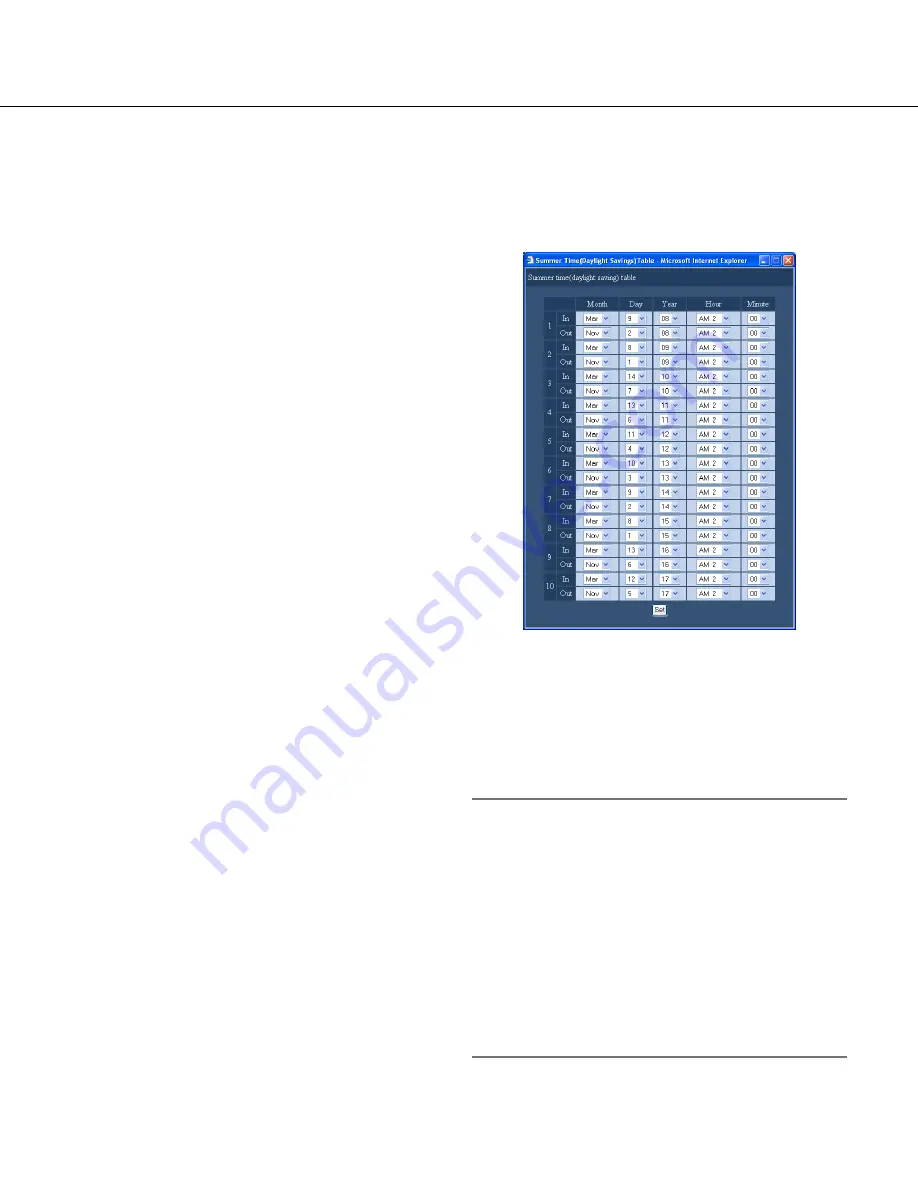
Summer time(daylight saving) table
Set the start (In)/end (Out) time and date of summer
time.
When the [Setup >>] button is clicked, the following
window will be displayed.
Set the start time and date and the end time and date
of summer time. Select the last 2 digits of the year.
Up to 10 settings can be set.
Click the [Set] button after completing the settings, and
close the window by clicking the [X] button at the top
right of the window.
Important:
• A black screen may be displayed and recording may
not be performed for around 4 seconds just after
configuring/editing the following settings.
• When the current time and date setting is con
-
figured/edited
• When the summer time is applied to the current
time
• When "Slave" is selected for "Auto adjustment
time" and the clock of the recorder is adjusted
(However, when an emergency recording or an
event recording is being performed, the clock
will not be adjusted.)


