32
33
Step 1
Display the images from the camera to search on a
1-screen. (
☞
Page 20)
Step 2
Click the [Search] button on the playback operation
panel. (
☞
Page 26)
→
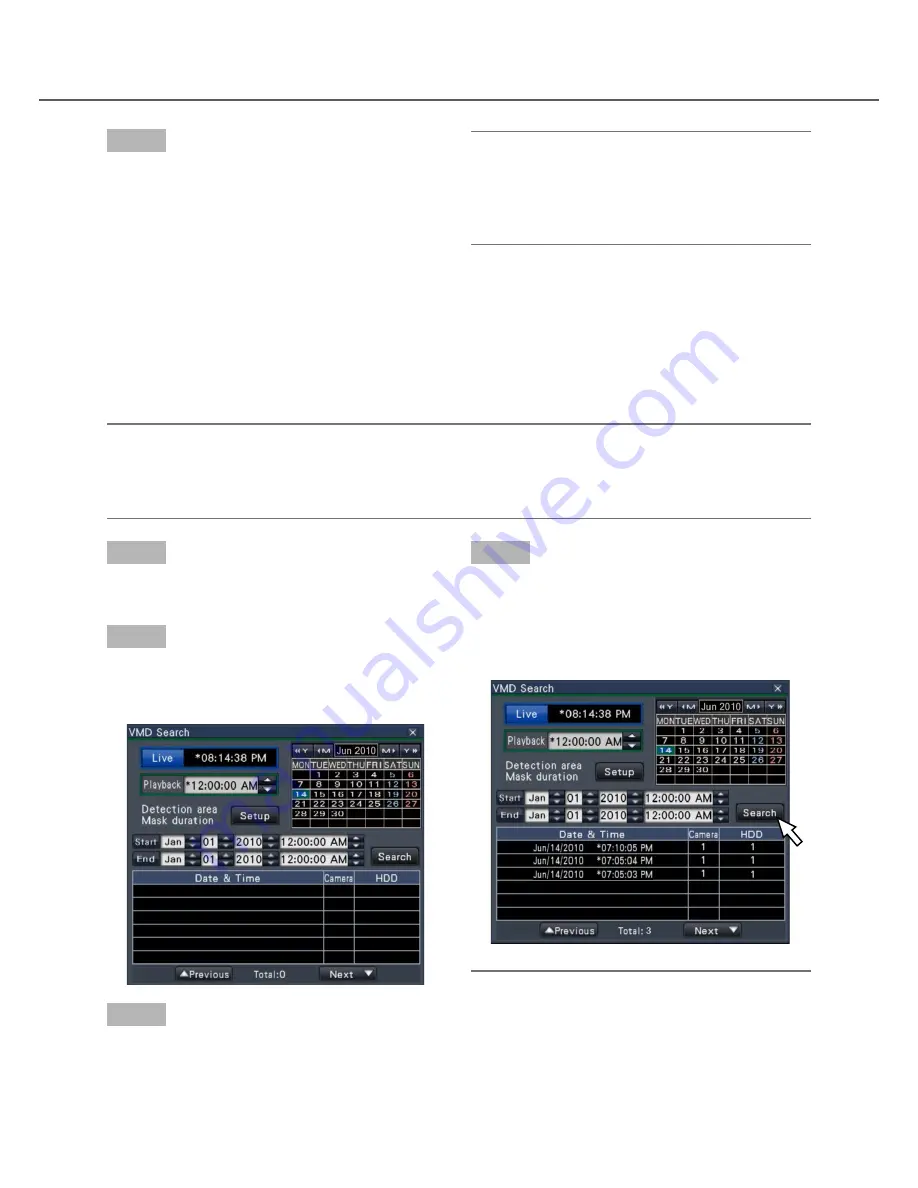
The VMD search panel is displayed.
Step 3
Designate the time range to search.
Set the year, month, day and time of the start and end
point by clicking the respective [
D
] / [
C
] buttons.
Search and play recorded images triggered by motion
detection (VMD search)
Search images recorded with a camera supporting the VMD search function by the date motion was detected
and play them. Click a date & time on the result list to play corresponding recorded images.
Important:
• To perform the motion detection search, it is necessary to configure the settings of the connected cameras
that support the motion detection search function in advance. Refer to the "readme.txt" on the provided
CD-ROM about the supported camera. Refer to the operating instructions of the camera in use for further
information.
Step 4
Click the [Search] button.
→
This will run a VMD search within the designated
search range and display a list of results. Switch
between list pages by clicking the [Previous]/
[Next] buttons.
Note:
• Up to 100 logs are saved in the list. When more
than 100 logs are filed in the search result, "> 100"
will be indicated.
Step 4
To stop playback and return to live images, click the
stop button on the playback operation panel.
(
☞
Page 26)
→
Playback will stop, and live images will be dis-
played.
Note:
• Playback can also be stopped and live images
can also be displayed by the following operations:
• Clicking the [x] button on the date & time oper
-
ation panel (playback display)
• Changing the playback medium


