116
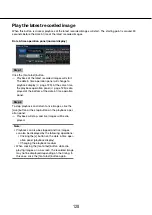
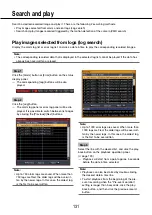
117
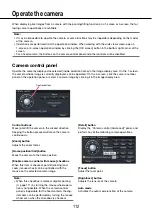
Register camera preset positions
Register the current camera position as a preset position. The preset positions can be registered only when
using a camera supporting the preset position function.
Step 1
When displaying the images on a 4-screen, select the
desired cameras.
Step 2
Click the [Detail] button.
The "Camera control [Advanced]" panel will be
→
→
displayed. (
☞
Page 112)
Step 3
Move the direction of the camera to the position to be
registered using the panning/tilting function of the
camera. (
☞
Page 113)
Step 4
Click the [
D
]/[
C
] button in the [Position] box to select
a preset number. Select a preset number (1 - 256) to
be registered.
Step 5
Click the [Regist] button.
The camera direction will be registered to the
→
→
selected preset position number.
Move camera preset positions
Move the camera to the registered preset position. It is necessary to register preset positions in advance.
Step 1
When displaying the images on a 4-screen, select the
desired cameras.
Step 2
Click the [Detail] button.
The "Camera control [Advanced]" panel will be
→
→
displayed. (
☞
Page 112)
Step 3
Click the [
D
]/[
C
] button in the [Position] box to select
a preset number. Select a preset number (0 - 256) to
be registered. Selecting preset position number 0 will
move the camera to home position.
Step 4
Click the [Call] button.
The camera direction will move to the preset posi-
→
→
tion corresponding to the selected preset position
number.
Note:
A non-registered preset number can be selected,
•
but the camera will not move even if the [Call] but-
ton is clicked.

