8
Panasonic System Solutions
HDE300_SATAConversionGuide_B
WJ-HDE300 S-ATA conversion guide
Maintenance guide
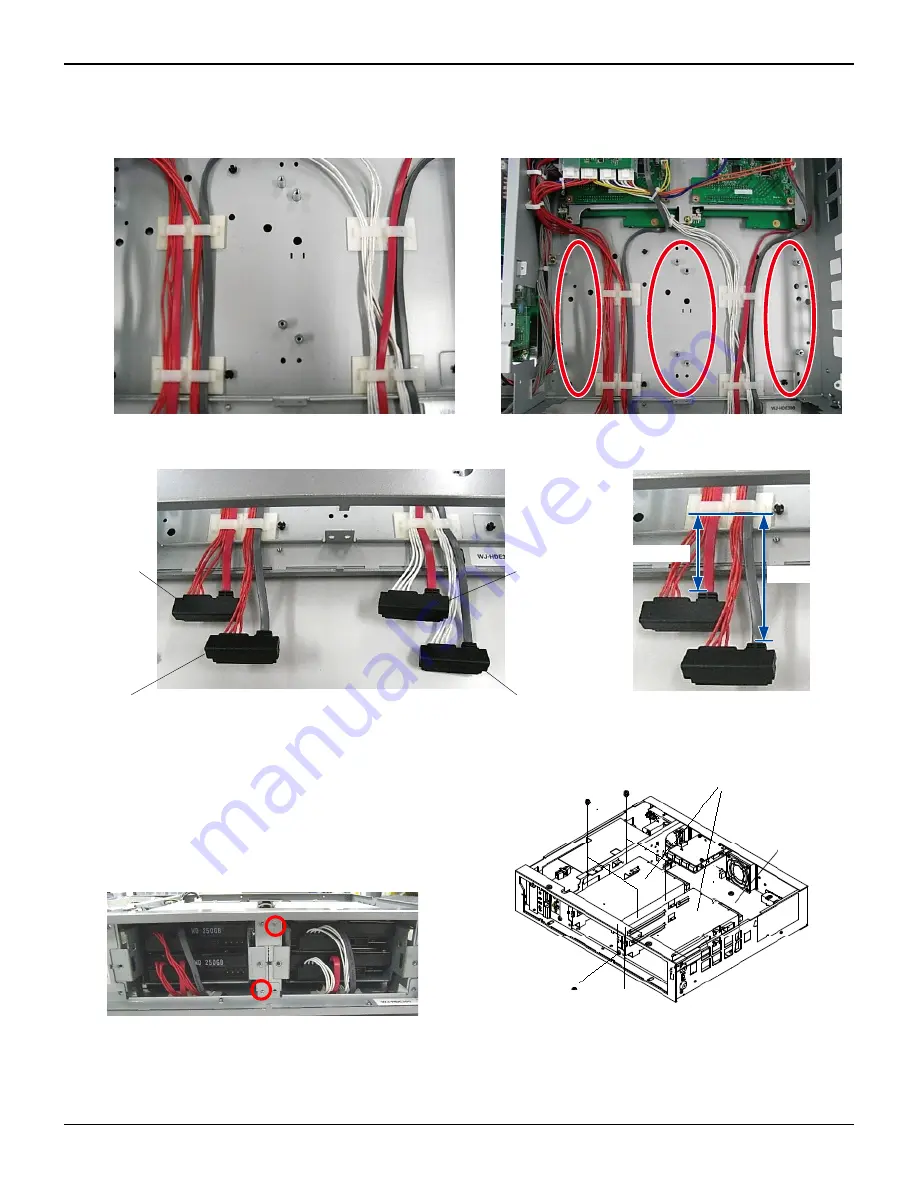
(25) Secure the S-ATA cables to the cord clamps as shown below.
Leave the red circled areas empty to install the HDD mounting chassis.
(26) Adjust the length of S-ATA cables and secure them as shown below.
(27) Fix two HDD mounting chassis to the main unit with four
screws each from the top and two screws at front. There
are four holes on the front but use top right and bottom
left. Other two holes are used in step (34).
Take care not to pinch the S-ATA cables.
Approx. 80mm
Approx. 50mm
for HDD3
Common to left and right
for HDD4
for HDD1
for HDD2
HDD mounting chassis
S-ATA board
top right and
bottom left.


