background image


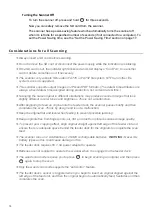
11 


Suitable and Unsuitable Original Types 

Suitable for Wand Scanning 

The scanner used as a wand scanner 

(without the feeder dock)

 is designed to obtain 

the best scanning results with photo and document originals up to 8.5”x14” size. 

Suitable for Feeder Dock 

The scanner used with the feeder dock is designed to obtain the best scanning results 
with the following types of originals: 

  Photos and documents (3”x5”, 4”x6”, 5”x7”, 8”x14”) 

  Business cards (standard 3.5”x2” (8.9x5cm) or larger) 


Unsuitable for Feeder Dock 

Do not use

 the following types of originals for scanning in the feeder dock, otherwise 

the feeder dock may malfunction or cause the original to jam in the slot. 

  Originals thicker than 1.0mm 

  Originals with either side shorter than 55mm 

  Originals with lots of black or dark colors 

  Originals with dark colors surrounding the edges 

  Printed media (newspapers, magazines, etc.) 

  Soft and thin materials (thin paper, cloth, etc.) 

 Originals that 

exceed

 the maximum acceptable size, 8.5”x14”. 


Access your Scanned Images on SD Card 

You can use the included 

Presto! PageManager

 software to view and print your scanned 

images 

(see 

Presto! PageManager

 on page 24)

, or use Windows Explorer or Mac Finder 

window to locate and open your scanned images, and then use a graphic program of your 
choice to view, edit and print. 

Remove the SD card from the scanner and connect it to a card reader attached to your 
computer. Use a Windows Explorer or Mac Finder window to locate your scanned image 
files. 

OR


With the SD card inserted in the scanner, connect the scanner to your computer via the USB 
cable. Your computer recognizes the scanner as a Removable Disk. If you have the 
Pandigital SD card inserted, the volume title is 

PD_SCAN

. Use a Windows Explorer or Mac 

Finder window to locate your scanned image files. 


Scanned Image File Naming Convention 

After your first scans, folders titled 

DCIM\100PHOTO


(JPG files)

 and 

DCIM\200DOC


(PDF 

files)

 are added to the SD card file structure, and the scanned images are saved in the 

applicable folder. 

Each scanned image is given a file name with the prefix 

PDI_

 followed by a 4- digit 

sequential number in the order the images are stored. 

For example, 

PDI_0001.JPG

PDI_0002.JPG or PDI_0001.PDF

PDI_0002.PDF

, etc.
 

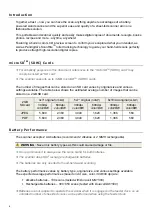
Summary of Contents for PANSCN09

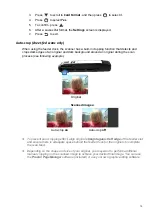
Page 1: ...PORTABLE WAND SCANNER WITH FEEDER DOCK User Guide PANSCN09 ...
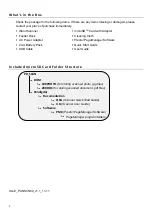
Page 2: ...Cable microSD TM Card with Adapter Cleaning Cloth Presto PageManager Software Quick Start Guide User Guide Included microSD Card Folder Structure PD_SCAN DCIM 100PHOTO for storing scanned photo jpg files 200DOC for storing scanned document pdf files Pandigital Documentation QSG Scanner Quick Start Guide UG Scanner User Guide Software PM Presto PageManager Software PageManager program folders UG E_...

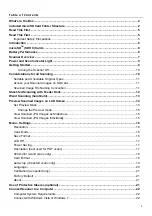
Page 3: ...on 11 Sheet fed Scanning with Feeder Dock 12 Wand Scanning hand held 13 Preview Scanned Images on LCD Screen 14 Set Preview Mode 15 Change the Preview mode 15 View Scanned JPG Images as Slideshow 15 View Scanned JPG Images Individually 15 Menu Settings 16 Resolution 16 Color Mode 16 Save Format 16 LCD Off 17 Power Saving 17 Orientation best used for PDF scans 17 Anti mirror wand scans only 18 Card...

Page 4: ...otation function 26 Using Presto Wrapper 27 Using the Optical Character Recognition OCR Function 28 Setting Preferences 28 Back up Restore Files 29 Restore Files 29 Uninstall PageManager 29 Clean the Scanner and Feeder Dock 29 Calibrate the Scanner Wand Scan mode 30 Error Messages 31 Frequently Asked Questions 31 Technical Specifications 34 Storing the Scanner 35 Limited Warranty 35 NewSoft s End ...

Page 5: ...eable parts inside this scanner and unauthorized modifications void your warranty Do not drop or apply shock vibration to this device Strong impacts may damage the components inside Do not insert objects other than compatible memory cards into the memory card slots of this scanner The metal contacts inside the slots can easily become damaged by foreign objects Do not use an unknown power adapter o...

Page 6: ...timated average number of images that can be stored on a 2GB SD card 2GB SD card 4x3 original 3 5MP 5x7 original 5 0MP 8x10 A4 original 8 MP 300dpi color BW 600dpi color BW 300dpi color BW 600dpi color BW 300dpi color BW 600dpi color BW JPEG 5 600 2 360 3 940 1 620 1 386 560 PDF 5 600 2 360 3 940 1 620 1 386 560 Battery Performance The scanner accepts 2 AA batteries recommend 2 Alkaline or 2 NiMH ...

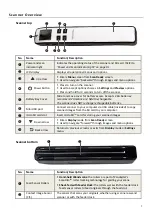
Page 7: ...s NOT recharge rechargeable batteries Mini USB port Connect scanner to your computer via USB cable included to copy scanned images from the SD card to your computer microSD card slot Insert microSD TM card for storing your scanned images Down arrow Enters Display mode from Scan Ready screen Used to navigate forward through images and menu options Back arrow Returns to previous screens or exits fro...

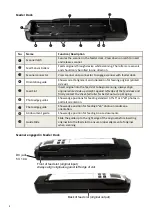
Page 8: ...lign original printed side up straight against left edge of the feed dock and firmly contact the sheet fed roller for better auto crop imaging Photo edge guides Shows edge positions for feeding standard 3 5 x5 or 4 x6 photos in portrait orientation Photo edge guide Shows edge position for feeding 4 x6 photos in landscape orientation A4 document guide Shows edge position for feeding A4 size documen...

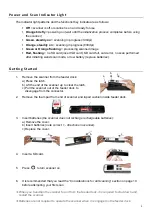
Page 9: ... from the feeder dock a Press the latch b Lift the end of the scanner up to clear the latch c Pull the scanner out of the feeder dock to disengage from the connector 2 Remove the foam pad from end of scanner and taped cushion inside feeder dock 3 Insert batteries the scanner does not recharge rechargeable batteries a Remove the cover b Insert batteries note correct directions in scanner c Replace ...

Page 10: ...ok slightly different in color tones and brightness This is not a malfunction After beginning to feed an original into the feeder dock the scanner pauses briefly and then completes the scan This is by design and is not a malfunction Keep the original flat and level when feeding to prevent possible jamming Keep originals free from finger prints oil dirt and dust for optimum scanned image quality To...

Page 11: ...SD Card You can use the included Presto PageManager software to view and print your scanned images see Presto PageManager on page 24 or use Windows Explorer or Mac Finder window to locate and open your scanned images and then use a graphic program of your choice to view edit and print Remove the SD card from the scanner and connect it to a card reader attached to your computer Use a Windows Explor...

Page 12: ...y one original at a time and insert the next original only when the previous one is done otherwise the feeder dock may malfunction CAUTION Do not scan glossy photos in humid environments humidity higher than 70 RH the surface of the photo becomes sticky and may cause the feeder dock to jam 1 Insert a SD card 2 Insert the scanner into the feeder dock a Press the latch b Place the right end of the s...

Page 13: ...he feeder dock i e pages of a book It also allows you to scan vertically or horizontally across the original which may help you scan book pages easier Our ScanRite TM roller tracking technology makes it easy to keep the scanner steady to capture a straight high quality scan For best scanning results always place your original on a clean flat surface Batteries are required to operate the scanner wi...

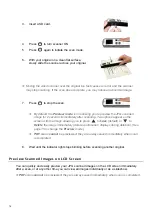
Page 14: ...anning Two options appear on the screen with the image allowing you to press to Save default or to Delete the image immediately delete confirmation displays during deletion See page 15 to change the Preview mode PDF scans cannot be previewed they are always saved immediately when scan is completed 8 Wait until the indicator light stops blinking before scanning another original Preview Scanned Imag...

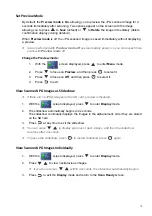
Page 15: ...t 3 Press to focus on Off and then press to select it 4 Press to exit View Scanned JPG Images as Slideshow If there are no JPEG images on the SD card preview is disabled 1 With the screen displayed press to enter Display mode 2 The slideshow automatically begins in 4 seconds The slideshow continually displays the images in the alphanumeric order they are stored on the SD card 3 Press at any time t...

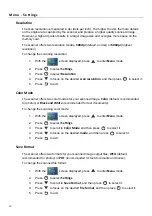
Page 16: ...lor Mode The scanner offers two color modes for your scanned image Color default recommended for photos or Black and White recommended for text documents To change the scanning color mode 1 With the screen displayed press to enter Menu mode 2 Press to select Settings 3 Press to scroll to Color Mode and then press to select it 4 Press to focus on the desired mode and then press to select it 5 Press...

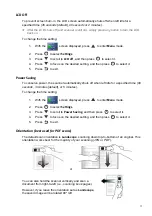
Page 17: ...matically shuts off when left idle for a specified time 90 seconds 3 minutes default or 5 minutes To change the time setting 1 With the screen displayed press to enter Menu mode 2 Press to select Settings 3 Press to scroll to Power Saving and then press to select it 4 Press to focus on the desired setting and then press to select it 5 Press to exit Orientation best used for PDF scans The default s...

Page 18: ...nd then press to select it 4 Press to focus on the desired orientation and then press to select it 5 Press to exit Anti mirror wand scans only This feature is only applicable when using as hand held wand scanner By default if you wand scan an original from bottom to top the image is actually captured upside down and backwards and then the Anti mirror feature automatically flips and rotates the ima...

Page 19: ...und an original during the scan process see following example Original Scanned images Auto crop on Auto crop off To prevent poor cropping effect align original straight against left edge of the feeder slot and ensure there is adequate space behind the feeder dock for the originals to complete the scan feed Depending on the shape and size of your original you may want to perform additional manual c...

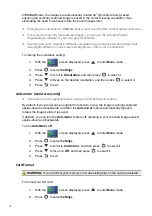
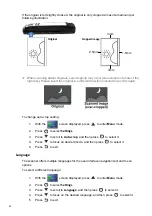
Page 20: ...ode 2 Press to select Settings 3 Press to scroll to Auto crop and then press to select it 4 Press to focus on desired mode and then press to select it 5 Press to exit Language The scanner offers multiple languages for the user interface navigation text and menu options To select a different language 1 With the screen displayed press to enter Menu mode 2 Press to select Settings 3 Press to scroll t...

Page 21: ...Press to scroll to Factory Default and then press to select it 4 Press to select Yes 5 To confirm press 6 After a successful reset the scanner automatically shuts off Press to turn the scanner back on About The About option lists the current Firmware and Calibration versions You may need this information if you contact our Customer Support 1 With the screen displayed press to enter Menu mode 2 Pre...

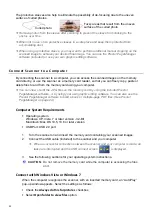
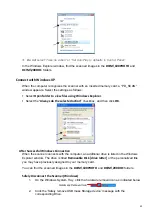
Page 22: ...Manager software or by using your own graphic editing software You can also use the Presto PageManager software to build a book or multiple page PDF files See Presto PageManager on page 24 Computer System Requirements Operating system Windows XP Vista 7 or later version 32 Bit Macintosh Mac OS 10 5 10 6 or later version USB Port USB 2 0 port 1 Turn the scanner on and insert the memory card contain...

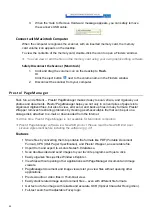
Page 23: ...lected action checkbox and then click OK After Successful Windows Connection When the scanner connects with the computer an additional drive is listed in the Windows Explorer window The drive is titled Removable Disk drive letter or the personalized title you may have previously assigned to your memory card You can find the scanned images in the DCIM 100PHOTO and DCIM 200DOC folders Safely Disconn...

Page 24: ...removes file sharing problems by creating a self executable file that can be put on a storage disk attached to e mail or downloaded from the Internet At this time Presto PageManager is not available for Macintosh computers Presto PageManager software is a NewSoft product Please read the NewSoft End User License Agreement before installing the software pg 37 Features Share files by converting them ...

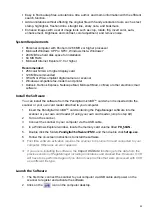
Page 25: ...igital microSD TM card when it is inserted into the scanner or your own card reader attached to your computer 1 Insert the Pandigital microSD TM card containing the PageManager software into the scanner or your own card reader if using your own card reader jump to step 4 2 Turn on the scanner 3 Connect the scanner to your computer via the USB cable 4 In a Windows Explorer window locate the memory ...

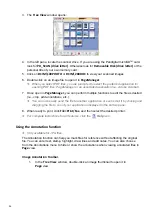
Page 26: ...it the file as desired i e crop add annotations etc You can also easily send the file to another application or even email it by clicking and dragging the file to one of your applications displayed in the bottom pane 8 When ready to print click File Print Fax and then select the desired printer For complete instructions for all features click the Help icon Using the Annotation function Only availa...

Page 27: ...sing Presto Wrapper The Presto Wrapper allows you to package supported files together into an executable file with a built in viewer 1 Export to Presto Wrapper a In the Tree View window select the files you want to include b Click File Export to Presto Wrapper c For Save in click the drop down arrow to select the folder into which you want to save the file d In the File name field enter the desire...

Page 28: ...uated and text in the image is now recognized as editable text 4 Click on any letter you want to edit 5 Pick a suggested character from the list beneath the display area or simply type the desired character 6 To insert a character before the selected one click To insert a character after the select one click To delete a character select it and then click 7 When proofing is finished click the Save ...

Page 29: ... other useful information in the Memo field 9 Click OK Restore Files 1 To restore backed up files click File Restore 2 Tap Browse to find the desired Restore target folder path 3 Tap Open to find the backup folder that you want to restore When the folder is selected the Label and Memo are automatically entered 4 Tap OK Uninstall PageManager 1 Click Start Programs or All Programs Presto PageManager...

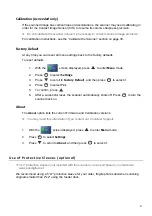
Page 30: ...attery is fully charged and a memory card is inserted 2 Remove the calibration sheet from its plastic cover and lay it on a flat surface printed side up 3 Remove the scanner from the feeder dock The calibration can only be performed using the scanner as a wand scanner 4 Place the scanner on the calibration sheet at the top of the white area Make sure the sheet is clean i e no debris or colored obj...

Page 31: ...he feeder dock Remove the scanner from the feeder dock and then gently pull the original out of the feed slot Frequently Asked Questions Scanner Q Why doesn t my scanner turn on A Possible causes The scanner may not be engaged with the feeder dock correctly The batteries may not have enough power or may not be inserted correctly Q Why aren t my images saved as I m scanning them A Make sure you hav...

Page 32: ...d and try again Is the memory card full The indicator blinks when the free space on the memory card is below 10MB Use another card if necessary Make sure the memory cards are in FAT or FAT32 file formats only not NTFS or any other file format Reformat the memory card if necessary to use it with the scanner Did you insert the next original before the scanning process of the previous one was complet...

Page 33: ...and drop the selected documents on the Outlook icon in the Application bar 4 Outlook opens a new email message window with the selected documents automatically attached Q How can I save images as multi page TIFF files A Follow these steps 1 In the Tree view window select the desired multiple documents 2 Click the Save As button 3 Select TIFF multi page TIF under the Save as type option 4 Enter the...

Page 34: ...PCX TIFF JPEG TGA PNG Other Presto Wrapper self executable EXE Q What file formats can be imported into PageManager A The following file formats can be imported Lotus Notes 5 TXT TIFF Presto Wrapper BMP GIF PCX TIFF JPEG TGA PNG Technical Specifications Portable Wand Scanner and Feeder Dock Specifications Scan Resolution 300 dpi default and 600 dpi Full color or Black White Scanner Display 1 8 dia...

Page 35: ... going to be used for a prolonged period of time store the scanner for future use 1 Disconnect the feeder dock from the power supply 2 Remove the batteries from the scanner 3 Place the scanner feeder dock and power adapter in a box or bag to keep them from accumulating dust 4 Place them in a cool and dry place inaccessible to small children 5 To avoid warping the top housing do not place heavy obj...

Page 36: ...filiates or subsidiaries shall not be liable for any incidental or consequential damages for breach of any expressed or implied warranty on this product Except to the extent prohibited by applicable law any implied warranty of merchantability or fitness for a particular purpose on this product is limited in duration to the duration of this warranty Some states do not allow the exclusion or limitat...

Page 37: ...hine readable form solely for back up purposes Notwithstanding the foregoing the Software may be used on the home laptop or other secondary computer of the same principal user of the Software and an additional copy of the Software may be made to support such use As used in this EULA the Software is in use when it is either loaded into RAM or installed on a hard disk or other permanent memory devic...

Page 38: ...e performance or results End User may obtains by using the Software or documentation nor does NewSoft warrants the Software will be uninterrupted or error free The entire risk as to the results and performance of the Software is assumed by End User Except for the express limited warranty set forth above NewSoft grants no other warranties expressed or implied regarding the Software or the media as ...

Page 39: ...is governed by the laws of the State of California USA if End User acquired or uses this Software in the United States If this Software was acquired and is used exclusively outside of the United States then local law may also apply ...

Reviews: