16
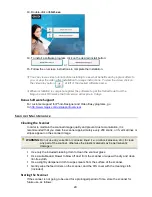
You can quickly delete image files from the scanner.
a. Click or tap in the select box next to the file name(s) that you want to delete.
b. Click or tap
Delete
.
c. The file(s) are automatically deleted (you won’t be prompted to confirm the
deletion).
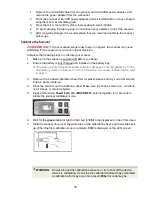
Exit Wi-Fi Mode
To exit Wi-Fi mode, simply slide the Wi-Fi button to the
OFF
position or shut off the scanner.
When Wi-Fi mode is on, the scanner does not time-out and turn off like it does normally.
Therefore, it is recommended that you connect the scanner to your computer or power
adapter, via the microUSB cable, whenever you have Wi-Fi mode on.
IMPORTANT: Be sure to re-connect your computer, tablet or phone to your normal
Wi-Fi network when you are finished with your scanner connection so
you will be able to connect to your email and other web related
locations/programs again.
Connect Scanner to a Computer
By connecting the scanner to a computer, you can directly access the scanned images on the built-
in storage disk or on a memory card. You can also use the scanner as a memory card reader
allowing you to freely copy, paste or delete files to and from the scanner using your computer.
You can view or edit the .JPG files on the memory card by using the included Presto!
PageManager software or by using your own graphic editing software. You can also use the
Presto! PageManager software to build a book or multiple-page PDF files(refer to Presto!
PageManager on page18).
Computer System Requirements for USB Connection
Operating system: Windows XP Pro SP2, Windows Vista SP2, Windows 7 SP1 (32-Bit)
Mac 10.5.8 or later (Intel based)
USB Port:
USB 2.0 port
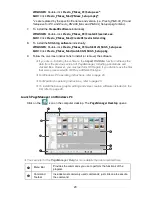
For Windows Vista Users
When the PC recognizes the scanner [with an inserted microSD Card], a pop-up
“AutoPlay” window appears.
To view photos, change the Windows Explorer’s settings as follows:
1. Check the
Always do these for pictures
checkbox.
2. Select
Open folder to view files
option.
Do not select “Take no Action” or “Set AutoPlay to defaults in Control Panel”.


