27/36
USER AND MAINTENANCE MANUAL I ENG_OMM_CD100_P07 I 2022-10-19
@Pandrol 2022
8.2.
De-Clipping - Disconnect Rail From Sleeper
8.3.
After Operation
1.
Switch off the engine and disconnect the hydraulic
hoses.
2. Let the motor cool down.
3. Disengage the working tool from the Power Unit.
4. Place the components back in their suitable boxes.
1. Setup the machine
2. Switch the ON/OFF-button on the Power Unit to the
ON-position and pull the recoil starter to start the
engine.
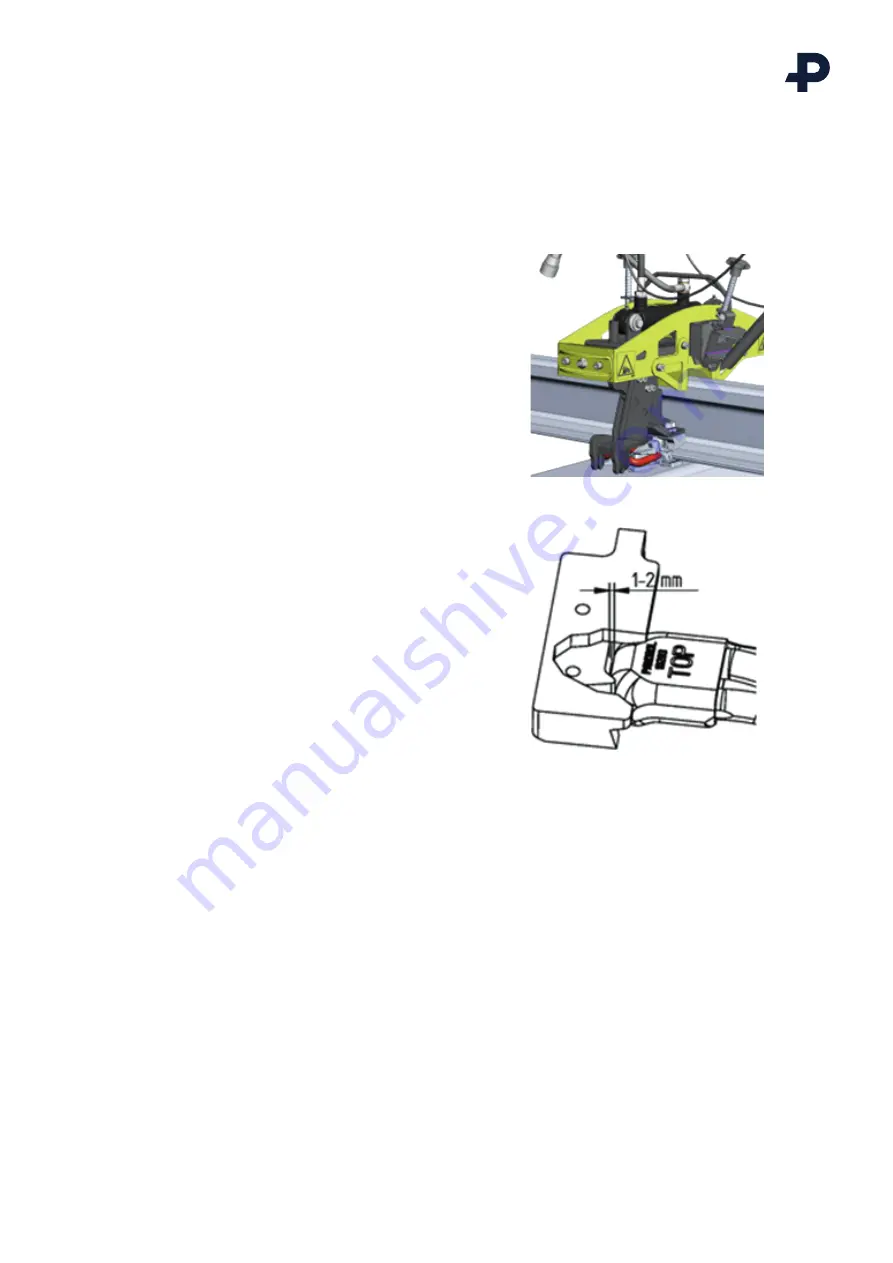
3. Push the machine forward until the claws are
correctly placed along the clips (”Fig 43.”). Make
sure that the claws are placed in a proper position
relative to the clip.
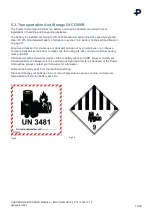
4. Make sure there is a space of 1-2 mm between the
clips and the claw when positioning the de-clipping
pads for an optimal function (”Fig 44.”).
5. Accelerate the tool with the right handle on the
handle bar. The arms now moves outwards and
release the clips.
6. When the clips are fully extracted: press the left
handle on the handle bars to run the arms back to its
initial position. Raise the machine slightly and push it
forward to the next clips and repeat instructions 4-6.
Ì
WARNING! Each time the unit is being used make sure that the hydraulic hoses
are clean before connecting them.
Ì
WARNING! Engine must be switched off and cooled before disengaging the
working tool.
Fig 43.
Fig 44.


