AT-OMNI-111-WP
10
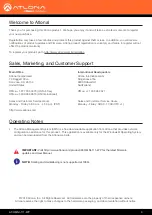
RS-232
AT-OMNI-111-WP
PWR
HDMI
LINK
RESET
TM
O
MNI
S
TREAM
HDMI IN
ETHERNET
Connection Instructions
Installation
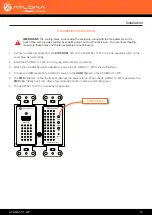
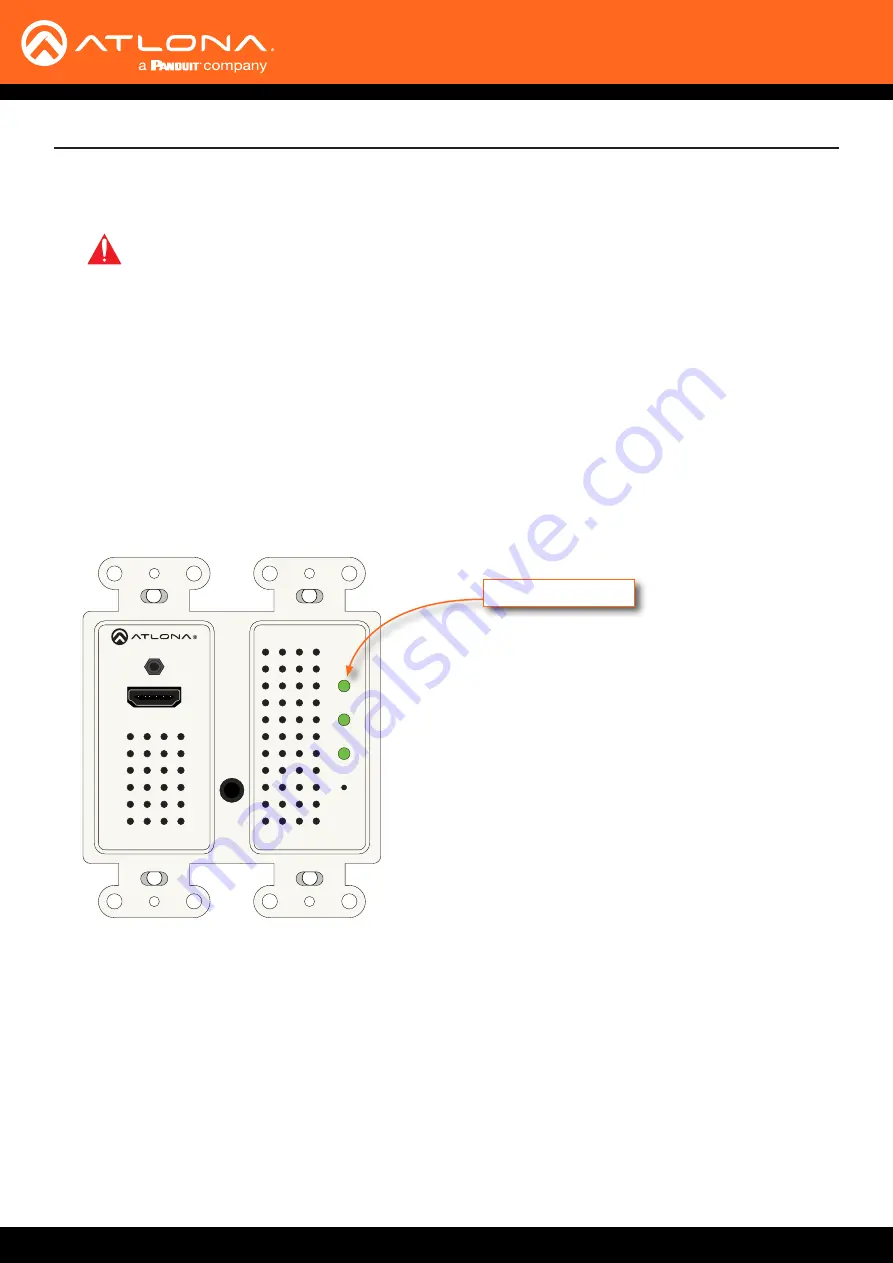
PWR indicator
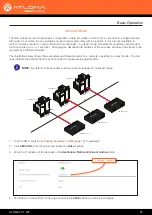
1.
Connect an Ethernet cable from the
ETHERNET
port on the AT-OMNI-111-WP to a PoE-capable switch on the
Local Area Network (LAN).
2.
Install the AT-OMNI-111-WP into a 2-gang electrical box or mud ring.
3.
Attach the included Decora® wallplate to secure the AT-OMNI-111-WP to the wall/surface.
4.
Connect an HDMI cable from a HD/UHD source to the
HDMI IN
port on the AT-OMNI-111-WP.
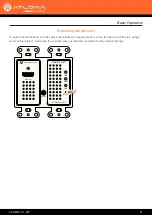
5. The
PWR
indicator, on the front panel, displays the power status. When the AT-OMNI-111-WP is powered, the
PWR
LED initially turns red. After a few moments it will turn amber, and finally green.
6.
The AT-OMNI-111-WP is now ready for operation.
IMPORTANT:
The venting holes, surrounding the enclosure, along with the fan assembly on the
back of the unit, provides cooling by expelling warm air from the enclosure. To prevent overheating,
make sure these holes and the fan assembly are not blocked.


