Installation Guide
AT-VGW-HW-3 and AT-VGW-HW-10
3
Mounting Instructions
The AT-VGW-HW can be mounted in different ways, based on the number of units that are being
installed. The AT-VGW-HW may also be mounted in a rack or on/under any flat surface.
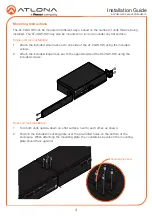
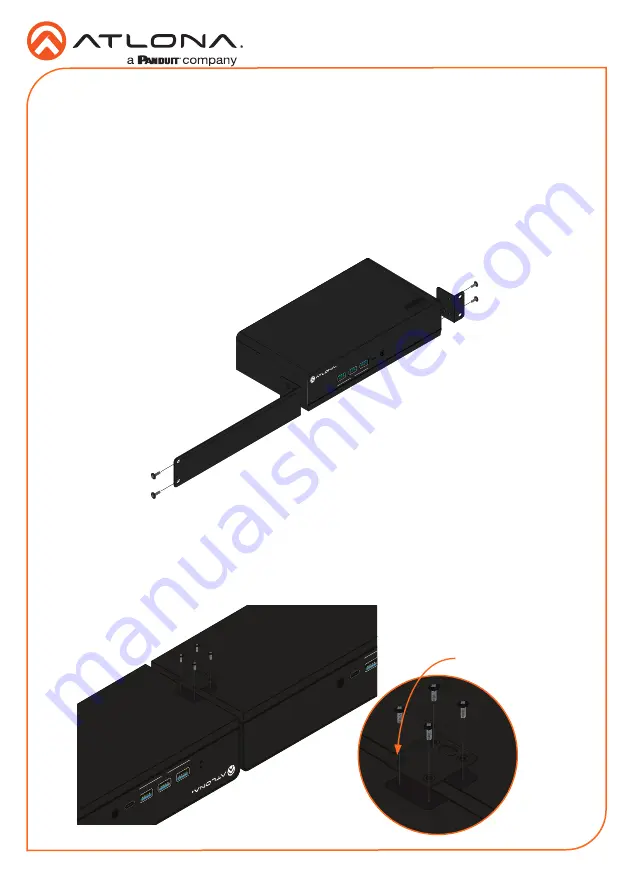
Single-unit rack installation
1
Attach the included small rack ear to one side of the AT-VGW-HW, using the included
screws.
2
Attach the included longer rack ear to the opposite side of the AT-VGW-HW using the
included screws.
USB
USB
USB
USB
USB-C
AUDIO OUT
TM
VELOCITY
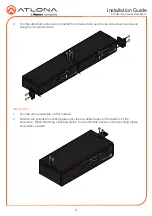
Dual-unit rack installation
1
Turn both units upside-down on a flat surface, next to each other, as shown.
2
Position the included mounting plate over the pre-drilled holes on the bottom of the
enclosure. When attaching the mounting plate, the countersink bevels on the mounting
plate should face upward.
USB
USB
USB
USB
USB-C
AUDIO OUT
TM
V
ELOCITY
USB
USB
USB
USB
USB-C
AUDIO OUT
TM
V
ELOCITY
USB
USB
USB
USB
USB-C
AUDIO OUT
TM
V
ELOCITY
USB
USB
USB
USB
USB-C
AUDIO OUT
TM
V
ELOCITY
Countersink bevel


