background image

AT-WAVE-101

22

webGUI

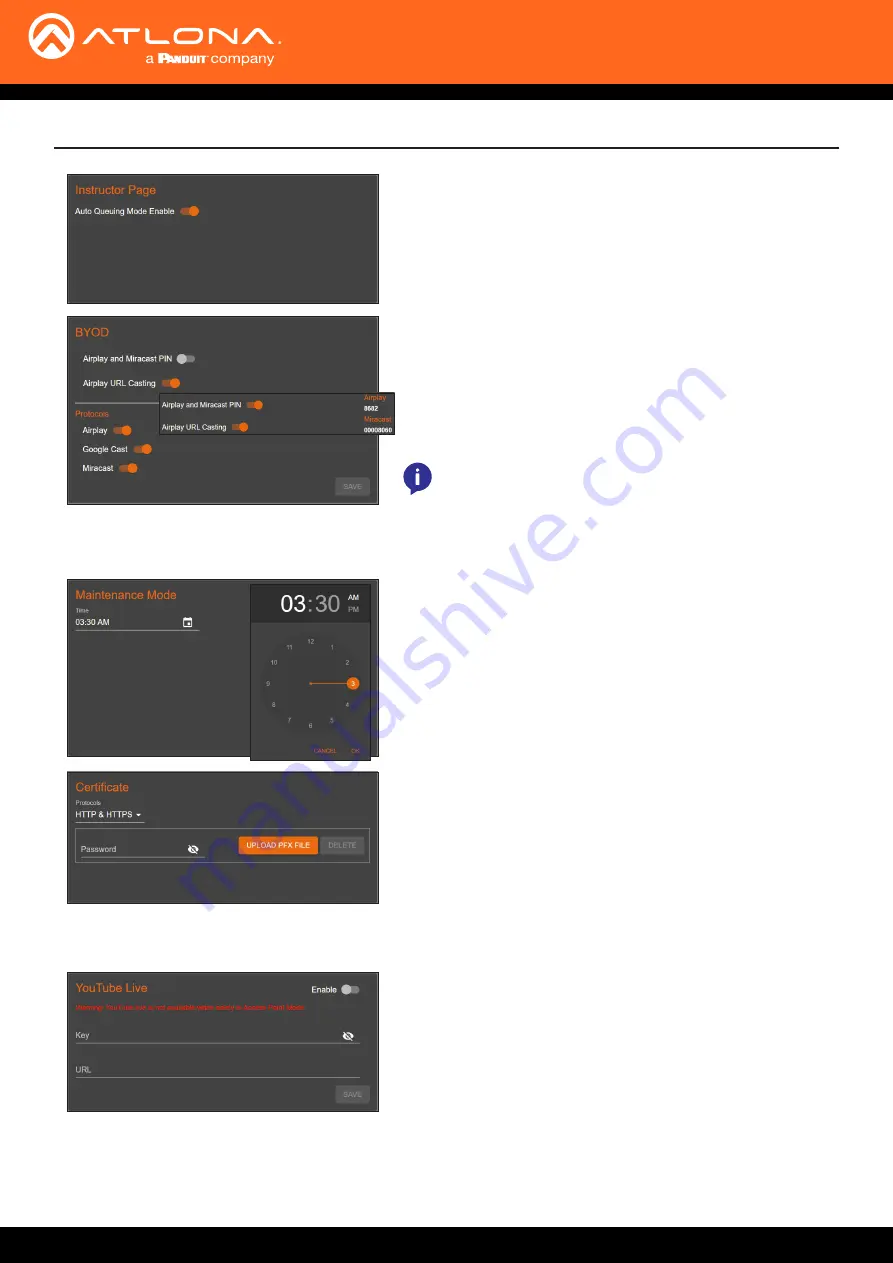
Instructor Page

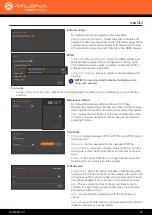
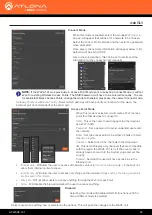
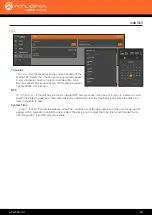
By default, Auto Queuing Mode will be disabled.

Auto Queuing Mode Enable 

- Select the slider to enable and 

disable the auto queuing mode on the instructor’s page. When 

enabled, new content will be added to the queue on the side 

of the instructor page, instead of directly to the HDMI display.

Maintenance Mode

By default, Maintenance Mode will be set to 3:30am. 

Maintenance mode will go through and clear out all erroneous 

data and left over media in the queue, then reboot the system.

Time 

- Select the time field to set the time maintenance mode 

will start. A pop up will appear with an easy to use clock for 

selecting the time.

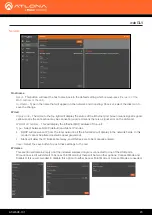
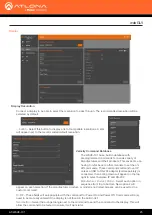
BYOD

AirPlay and Miracast PIN slider 

- Select to enable AirPlay and 

Miracast PIN support. The pin will appear on the top right 

of the Welcome Screen when an AirPlay or Miracast (P2P or 

Infrastructure) source is detected.

Airplay URL Casting 

- Select to enable or disable Airplay URL 

Casting.

Protocols

Airplay, Chromecast, Miracast 

- Select each individual slider to enable 

(orange)

 or disable 

(grey)

 each casting 

protocol.

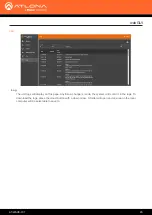
Certificate

Protocols 

- Select between HTTP & HTTPS and HTTPS only in 

this drop down.

Password 

- Set the password for the uploaded PXF file.

Upload PFX File 

- Upload an already created PFX file. A folder 

will pop up, select the file from the local computer and press 

open.

Delete 

- If the current PFX file is no longer desired, press the 

Delete button to remove it from the system.

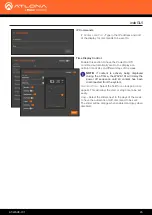
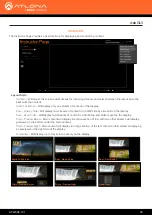
YouTube Live

Enable slider 

- Select the slider to enable or disable the ability 

to stream live through YouTube. When disabled, the option will 

not appear on the Instructor page. It is recommended to keep 

this option disabled if YouTube Live is not going to be used.

Key 

- The key will come from YouTube and takes a day to 

activate. It is best to set up the YouTube live account before 

proceeding with this step.

URL 

- Provide the URL associated with the YouTube live 

stream.

Save 

- Once all the information is entered, select this button to 

make the changes live on the WAVE.

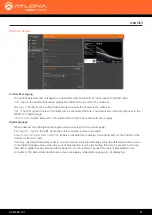
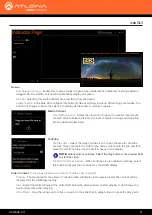
NOTE:

 It is recommended to disable this feature when 

using auto-queuing.

Summary of Contents for Atlona AT-WAVE-101

Page 1: ...AtlonaManuals Presentation AT WAVE 101 Wireless Presentation WAVE Platform...

Page 2: ...AT WAVE 101 2 Version Release Date Notes 1 Aug 2021 Release 2 Sept 2021 Updated for firmware release 1 0 1 added Miracast PIN support Version Information...

Page 3: ...t go to https atlona com registration Sales Marketing and Customer Support Welcome to Atlona Operating Notes IMPORTANT Visit https atlona com product at wave 101 for the latest firmware updates and Us...

Page 4: ...ducts 10 years from proof of purchase date for hardware electronics products purchased on or after June 1 2013 Exclusions HDVS CAM Series PTZ motor is covered for 3 years hardware electronic circuit a...

Page 5: ...al or consequential damages resulting from any breach of warranty or condition or under any other legal theory Some countries districts or states do not allow the exclusion or limitation of relief spe...

Page 6: ...r registered trademarks of HDMI licensing Administrator Inc All other trademark s copyright s and registered technologies mentioned in this document are the properties of their respective owner s 1 Re...

Page 7: ...11 Connection Diagram 12 Casting 13 Miracast 13 Method 1 13 Method 2 13 Google Cast 14 Chrome 14 Android 15 AirPlay 17 OS X Devices 17 iOS Devices 17 Control 18 Unit 18 Websocket 18 WebGUI 18 Display...

Page 8: ...r Miracast protocols Dynamic Layout ModeTM patent pending automatically adapts to incoming or disconnected source content to optimize the way the content is presented on the screen Selectable fixed st...

Page 9: ...pter purchased separately If needed the USB ports are compatible with USB hubs for expanding the amount of USB ports 3 HDMI OUT Connect to an HDMI display 4 ETHERNET Connect to a network switch for co...

Page 10: ...included screws to the bottom of the unit The screws will stick out a small amount 3 Turn the WAVE 101 so that the screws line up with the large oblong shaped holes on the VESA mount and mount the uni...

Page 11: ...5 Connect the included 12V DC power supply from the power port to a compatible power outlet If a static IP is required the WAVE 101 can be set to static IP mode within the Network section of the webG...

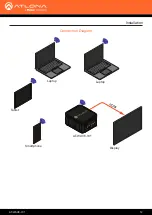
Page 12: ...AT WAVE 101 12 Installation Connection Diagram Laptop Tablet Smartphone AT WAVE 101 USB 3 0 USB 2 0 Laptop Display HDMI...

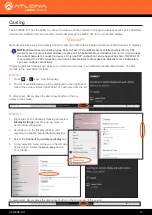
Page 13: ...ill be displayed on the right hand side of the screen Select the WAVE 101 hostname from the list 1 Right click on the Windows Desktop and select Display Settings from the pop up menu A new window will...

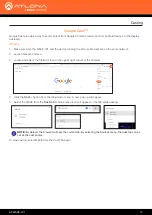
Page 14: ...option from the drop down menu A new pop up will appear 5 Select the WAVE from the Cast tab A blue screen icon will appear on the tab while casting To stop casting select WAVE from the Cast Tab again...

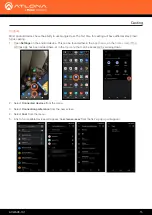
Page 15: ...t can be accessed by swiping down Most Android devices have the ability to use Google Cast The first time for casting will have different steps than future casting Android 2 Select Connected devices f...

Page 16: ...appear in the top menu for quick and easy casting Select Screen Cast and press Disconnect on the pop up to end casting 1 Swipe down from the top of the screen on the Android device Quick settings wil...

Page 17: ...in the menu bar and select the desired content to be mirrored Extending Click the AirPlay icon and select Use As Separate Display from the menu to extend the desktop to another display To turn off Ai...

Page 18: ...ility to be controlled and to schedule on off commands for the display WAVE 101 can be controlled using the built in webGUI or websocket The unit can be controlled using websocket The commands can be...

Page 19: ...rovide quick instructions for connecting to the WAVE 101 for casting This page will display instructions based on the type of device connected e g When a Windows OS device is connected it will display...

Page 20: ...Press the REBOOT button to reboot the WAVE 101 Room Name Type the name of the room here Hit the disk icon to save the name change This will appear at the top of the Welcome Screen Country Set the coun...

Page 21: ...tput if connected This process can take up to five minutes Once the firmware has been applied to the unit it will go through a reboot process this will display a Disconnected from server attempting to...

Page 22: ...Casting Protocols Airplay Chromecast Miracast Select each individual slider to enable orange or disable grey each casting protocol Certificate Protocols Select between HTTP HTTPS and HTTPS only in th...

Page 23: ...is will display the Ethernet MAC address of the unit Type Select between DHCP default and Static IP modes DHCP will receive an IP from the local network all the information will display in the network...

Page 24: ...with the region the WAVE 101 is in If the country hasn t already been set return to the System page and set the country Firewall Set what the user will have access to via the Ethernet port Internet o...

Page 25: ...ands These commands will send over IP unless a USB to RS 232 adaptor sold separately is connected then a drop down will appear on the top right to select between IP and RS 232 Manufacturer Product Mod...

Page 26: ...rent days of the week Start End Time Select the field for a clock pop up to appear This will allow the start or stop time to be set easily Days Select the sliders next to the days of the week to have...

Page 27: ...to display Digital Signage When enabled this will replace the regular welcome screen with a custom page External URL Type in the URL where the custom welcome screen is located Show Footer with Room Na...

Page 28: ...he unit has internet or internal NTP server access it can be set to sync to a server as well Select the slider to enabled it then enter the server information into the Hostname field Press the disk ic...

Page 29: ...logs will display on this page Anytime a change is made the system will record it in the logs To download the logs press the cloud button with a down arrow A folder will open and an area on the local...

Page 30: ...side split on the display Dual Over Under Will display two streams of content in a 50 50 top and bottom split on the display Triple Preview Below Main content will display in a large section of top w...

Page 31: ...ct the white triangle at the bottom left below the video preview to start playing It will change to a pause l l symbol when playing Video Slider Drag the orange dot or click on a point in the slider b...

Page 32: ...io icons on either side of the bar or dragging the volume dot across the volume bar to the desired level Mute Mute and unmute audio using the audio icon on the far right Content slots At the bottom ri...

Page 33: ...1024 1280 800 1366 768 1360 768 1152 864 1024 768 800 600 640 480 Color Space RGB Chroma Subsampling 4 4 4 System Operating System Linux Processor Intel Celeron N4120 Memory 4 GB LPDDR4 2400 Storage...

Page 34: ...ndicators Control Buttons Power 1 momentary tact type Function Indicators PWR 1 LED green Connectors HDMI OUT 1 Type A 19 pin female USB HUB 2 Type A 4 pin female LAN 1 RJ45 1000Base T Lock 1 Kensingt...

Page 35: ...on Device CE FCC RCM UKCA China RoHS Power Supply KC UL ETL RCM CE FCC TUV Safety NOM CCC EAC BSMI PSE Dimensions Inches Millimeters H x W x D 1 32 x 2 76 x 2 76 33 4 x 70 x 70 Weight Pounds Kilograms...

Page 36: ...Toll free US International atlona com 877 536 3976 41 43 508 4321 35279 R3...

Reviews: