5
Installation Guide
AT-WAVE-101
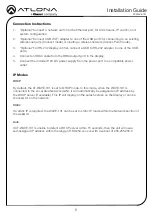
1. *Optional* Connect a network switch to the Ethernet port, for A/V streams, IP control, and
system configuration.
2. *Optional* Connect USB Wi-Fi adapter to one of the USB ports for connecting to an existing
wireless network (Connect mode) or creating a wireless network (Access Point mode).
3. *Optional* For RS-232 display control, connect a USB to RS-232 adapter to one of the USB
ports.
4. Connect an HDMI cable from the HDMI output port to the display.
5. Connect the included 12V DC power supply from the power port to a compatible power
outlet.
If a static IP is required, the WAVE-101 can be set to static IP mode within the Network section of
the webGUI.
If AT-WAVE-101 is unable to detect a DHCP server within 15 seconds, then the unit will use a
self-assigned IP address within the range of 169.254.xxx.xxx with a subnet of 255.255.255.0
By default, the AT-WAVE-101 is set to DHCP mode. In this mode, when the WAVE-101 is
connected to the Local Area Network (LAN), it will automatically be assigned an IP address by
the DHCP server (if available). This IP will display on the splash screen on the display or can be
scanned for on the network.
DHCP
Static
Auto
IP Modes
Connection Instructions


