INSTALLATION INSTRUCTIONS PN420E
© Panduit Corp. 2008
For Technical Support:
www.panduit.com/resources/install_maintain.asp
Page 1 of 2
DPoE
Compact 8 Midspan
Part Number: DPOE8S2XG
DPOE8S2XG
1.
The
PANDUIT DPoE
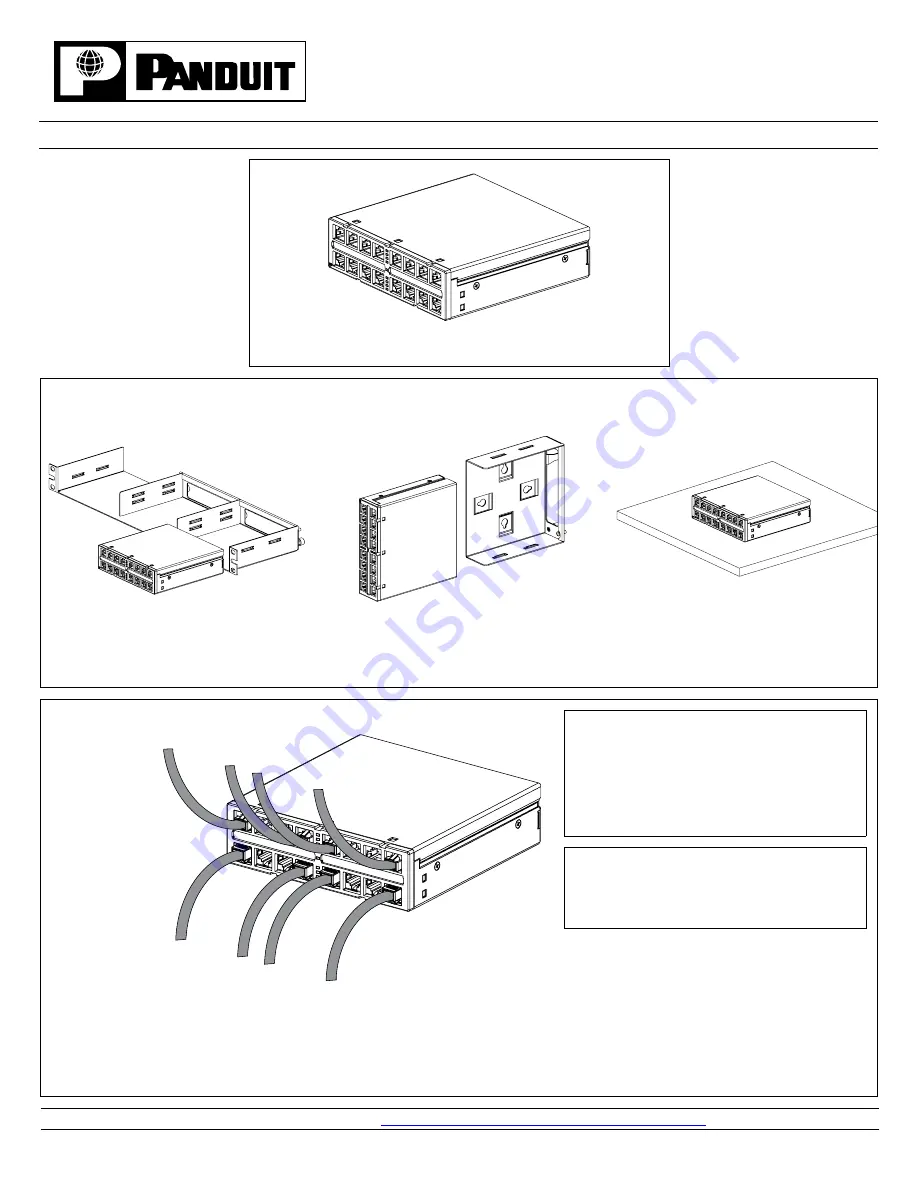
Compact 8 Midspan may be installed in a standard 19" rack with the
DPoE
1RU Shelf (
PANDUIT
part no. DPOESHELF),
on a wall with the
DPoE
Wall Mount Bracket (
PANDUIT
part no. DPOEWM8B) or directly on a tabletop with the rubber feet included in the
DPoE
Compact 8 Midspan Kit.
Rack-Mount Installation
Tabletop Installation
Wall-Mount Installation
2.
Connect patch cords from an Ethernet switch to the bottom row of RJ45 connectors on the
DPoE
Compact 8 Midspan. Complete the data path
by connecting the top row of RJ45 connectors to powered devices either directly or through a patch panel. The upper set of LED’s indicate the
status of ports 1-4. The center LED indicates the status of the power midspan. The lower set of LED’s indicate the status of ports 5-8. Label
ports using the blank
PANDUIT
U
LTIMATE
ID
labels and covers and record this information, along with unit specific information, on the
DPoE
Installation Worksheet (
PANDUIT
part no. PN377*).
* Denotes revision letter.
To Powered Ethernet Device
From Ethernet Switch
(Data Only)
(Data + Power)
INSTALLATION ADVISORY:
- Ensure that cabling to powered devices is
protected from inductive coupling from nearby
power cables and other sources.
- Ensure that powered devices are properly installed
and grounded (according to manufacturer’s
recommendations), and all the cabling and
connections are isolated from external surges.
NOTE:
When installing cabling and making connections to
the DPOE8S2XG, follow all local standards as well as
the applicable TIA-942 standards and IEEE 802.3
(Ethernet) standards.


