INSTRUCTIONS FS149A
For Technical Support: www.panduit.com/resources/install_maintain.asp
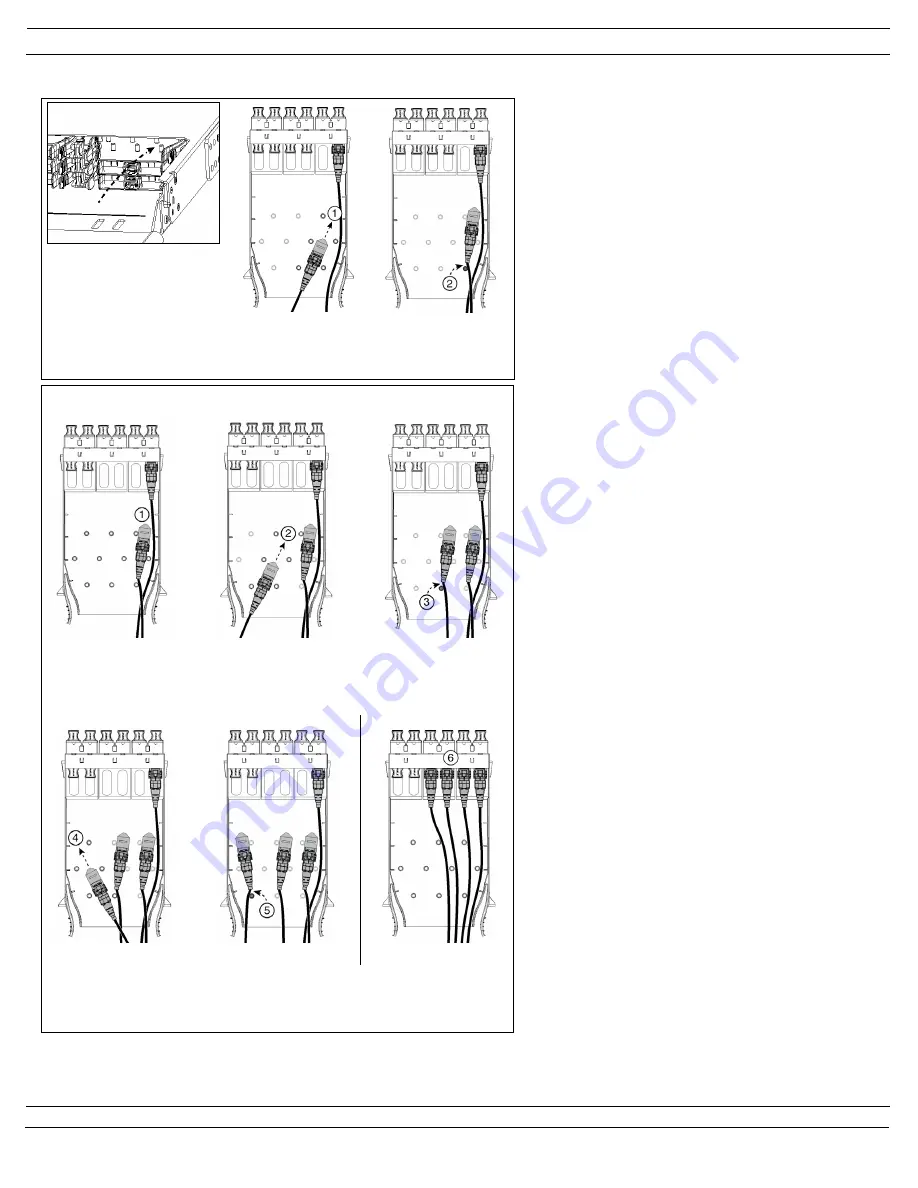
Installing Additional MPO Trunks
Figure 32
1. Insert diagonally until
rear of boot is just
past the rear post.
2. Lift cable over post.
Figure 33
2. Insert the second
connector between
the left two posts.
4. Insert the third
connector between
the left two posts.
6. Remove dust caps
and attach connectors
to the MPO ports.
1. Insert first connector
as shown in Figure 8
above.
3. Once the rear of the
boot passes the post,
lift cable over the post
to "hold" connector.
5. Once the rear of the
boot passes the post,
lift cable over the post
to "hold" connector.
(images shown in top view for clarity)
From the rear of the patch panel, select the FAP to add
additional MPO trunk cables to. Insert the MPO
connector into the rear of the FAP diagonally between
the posts (Step 1 in Figure 32). Push connector in until
the rear of the boot just passes the rear post and lift
the cable over the post to “hold” the connector in place
(Step 2 in Figure 32).
Move to the front of the patch panel and pull out the
FAP with the “held” MPO trunk cable. Remove the dust
cap and connect the MPO to the appropriate port on
the FAP.
FAP can accommodate “holding” up to 3 MPO
connectors at a time. (Follow the steps in Figure 33.)
Once all connectors are held in place, move to the
front of the patch panel and pull out the FAP. Remove
dust caps and attach the MPO connectors to the
appropriate ports (Step 6 in Figure 33).
Page 13 of 19


