INSTRUCTIONS CM372
For Technical Support: www.panduit.com/resources/install_maintain.asp
Page 2 of 8
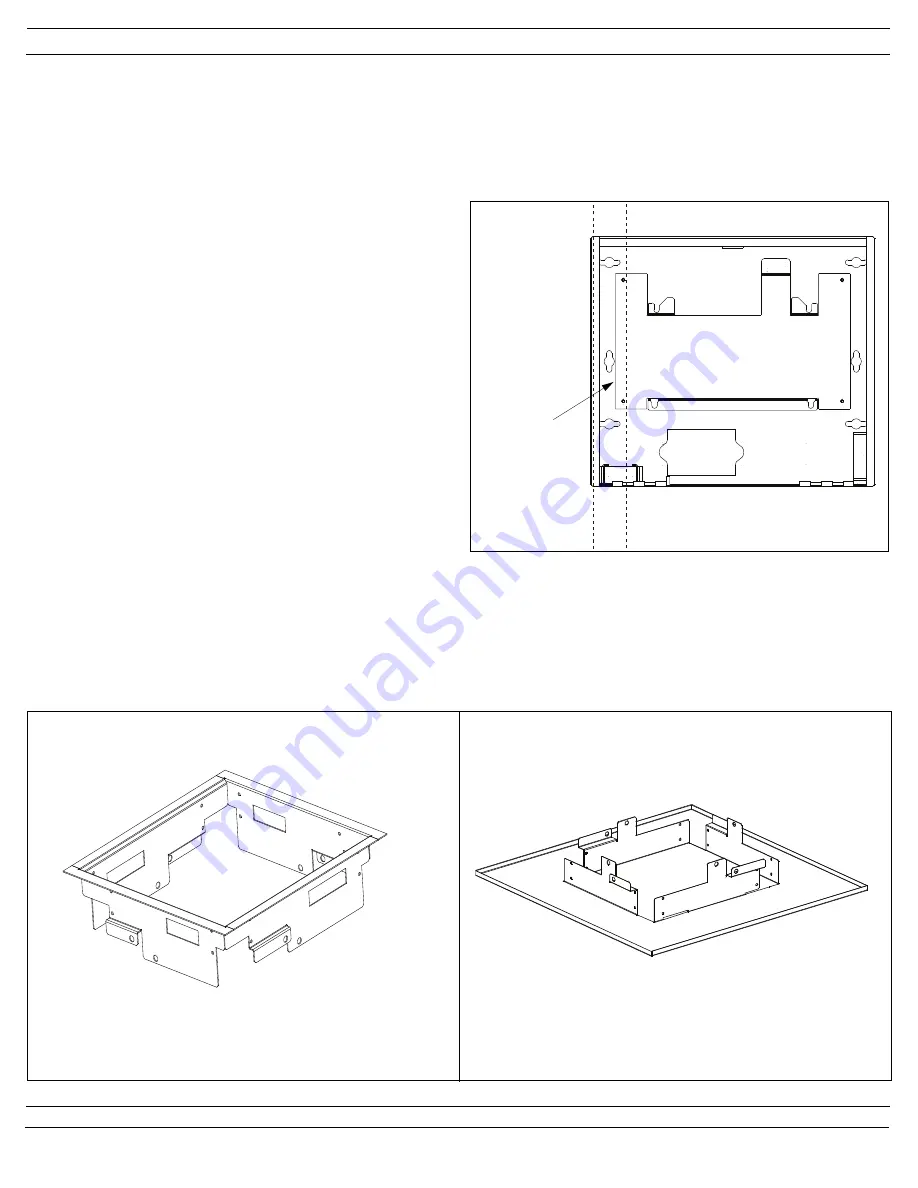
1.1 Locate the wall studs.
1.2 Hold the enclosure against the wall to mark the location of
the mounting holes.
1.3 Mount the enclosure to the wall using mounting screws and
wall anchors (not included). Enclosure designed for use with
#14 screws.
Step 1: Mount Enclosure to Wall
Wall Mount Installation
Refer to the installation and configuration guidelines provided by the manufacturer of the wireless access
point to determine the optimum enclosure installation location and antenna configuration.
Please read these instructions in their entirety prior to installing the enclosure.
2 x 4 Stud
1
PANDUIT
Part #:PZWIFIDCB
-
P
AN
Z
ONE
Wireless Access
Point In-Ceiling Bracket Kit
PANDUIT
Part #:PZW2X2DCB
-
P
AN
Z
ONE
Wireless Access Point
In-Ceiling 2’x 2’ Bracket Kit
See Step 2-3 for installation instructions
See Step 4 for installation instructions
In-Ceiling Mount Installation
Refer to the installation and configuration guidelines provided by the manufacturer of the wireless access
point to determine the optimum enclosure installation location and antenna configuration.
Please read these instructions in their entirety prior to installing the enclosure.
Note:
P
AN
Z
ONE
Enclosures Require one of the following additional part numbers for in-ceiling applications


