INSTRUCTIONS CM372
For Technical Support: www.panduit.com/resources/install_maintain.asp
Page 6 of 8
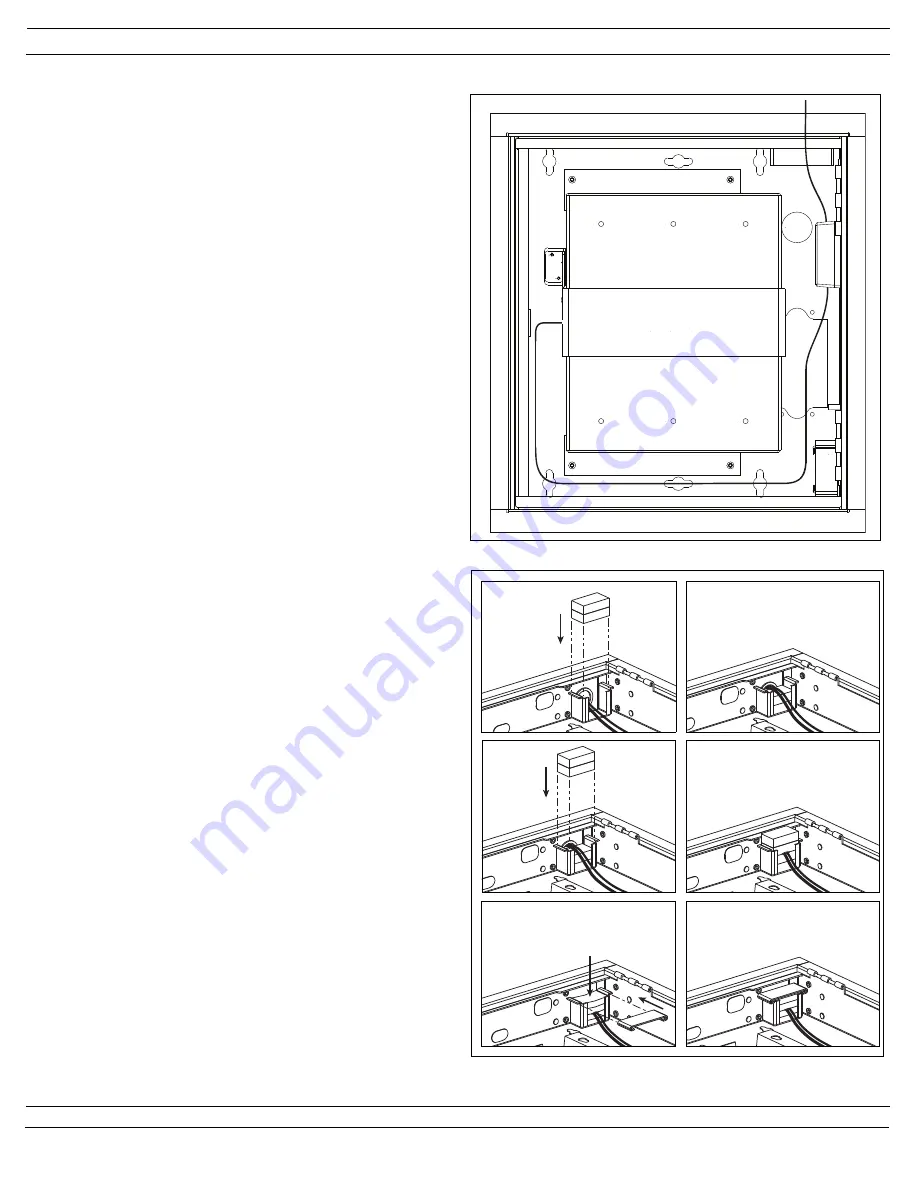
Step 9: Install Patch Cord
9.1 Insert one end of the 2' long TX6 PLUS Patch Cord into
the RJ45 port located on the WAP.
9.2 Insert the other end of the patch cord into the TX6
PLUS jack located in the surface mount box.
Note:
Fire Resistant Foam used when network cable is
routed into the enclosure without the use of conduit in
flush wall mount and in-ceiling mount applications.
10.1 Place two pieces of fire resistant foam into the foam
retention bracket. Both pieces should be underneath
the network cable and the ground cable.
10.2 Place the remaining two pieces of fire resistant foam on
top of the cables.
10.3 Press down on the foam and slide the foam retention
plate into place. The expanding foam holds the reten-
tion plate in place.
Step 10: Install Fire Resistant Foam (if needed)
8.1 Run the network cable to and into the enclosure.
8.2 Terminate the TX6 PLUS Jack Module to the network
cable. Refer to the
PANDUIT
web site for jack
termination instructions if needed.
8.3 Mount the base of the 2 Position Surface Mount Box to
the back wall of the enclosure using provided double
sided tape.
8.4 Snap the terminated jack into position “1” of the box.
Place the network cable between the two cable
retention tabs on the back of the base.
8.5 Remove the breakout tab on the back of the cover.
8.6 Snap the cover onto the base.
Note:
A second Jack Module can be installed in position “2”
of the surface mount box to provide access to the
serial port on the WAP.
1
2
3
4
5
6
Step 8: Install Surface Mount Box
Cable Routing


