PAT1M / PAT1.5M OPERATION MANUAL
PAT1M/PAT1.5M: PA22222A01_03
Page: 20 of 36
Dec., 2007
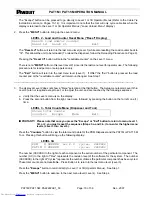
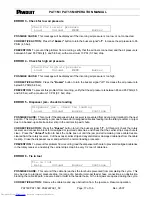
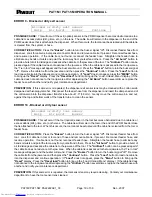
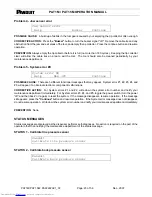
ERROR 11 - Tie stuck in exit sensor
Tie stuck in exit sensor
Help
Air burst
Buzzer
POSSIBLE CAUSE:
This will happen when the exit of the dispenser is blocked so that the cable tie cannot exit the
dispenser. It may be blocked by a cable tie that was not removed from an earlier error, or from excess debris (dirt,
grime, etc.) on the dispenser exit sensor lens. The cable tie has not exited the dispenser and must be removed
before actuating the tool.
CORRECTIVE ACTION:
Press the
"Buzzer"
button to turn the buzzer signal "off". Disconnect feeder hose from
dispenser. Look for cable tie in dispenser connector block and remove cable tie, if present. Reconnect feeder hose,
and resume operation. If cable tie is not found, reconnect feeder hose. Straighten the feeder hose to eliminate any
bends or twists and point the tool away from yourself and others. Press the
"Air burst"
button to provide a burst of
air to dislodge and advance the cable tie to the jaw area of the tool. The
"Air Burst"
button can be pressed again if
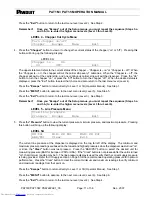
the cable tie does not advance to the jaw area. When the cable tie is advanced to the tool jaw area, the "Tie in tool"
message will appear and the buzzer will sound. Press the
"Buzzer"
button to turn the buzzer signal "off". Remove
the cable tie from the jaw area and then press the
"Continue"
button. Press the
"Load"
button to load one cable tie
into the dispenser and continue operation. (If
"Load"
does not appear, press the
"MENU"
button to bring up the
"Reset"
display. Press the
"Reset load"
button to bring up the “Load, Unload, Menu” display.) If the cable tie does
not advance to the tool jaw area after depressing the
"Air Burst"
button several times, replace the feeder hose with
another and notify your maintenance department.
PREVENTION:
If this same error is repeated, the dispenser exit sensor lens may be cleaned with a cotton swab
dampened with isopropyl alcohol. Disconnect the feeder hose from the dispenser and insert the dampened end of
the cotton swab into the end of the strap tube about 1.5" (38 mm). Gently move the cotton swab in and out, against
the top and bottom walls of the transfer tube, to clean the sensor.
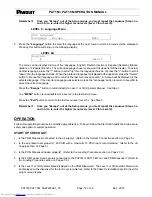
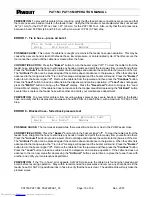
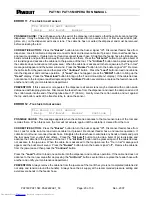
ERROR 12 - Tie stuck in tool sensor
Tie stuck in tool sensor
Help
Air burst
Buzzer
Continue
POSSIBLE CAUSE:
This message appears when the cable tie advances to the tool sensor area of the tool and
remains there. When this occurs, the tool will not actuate again until the cable tie is cleared from the tool.
CORRECTIVE ACTION:
Press the
"Buzzer"
button to turn the buzzer signal "off". Disconnect feeder hose from
tool. Look for cable tie in tool and remove cable tie, if present. Reconnect feeder hose, and resume operation. If
cable tie is not found, reconnect feeder hose. Straighten the feeder hose to eliminate any bends or twists and point
the tool away from yourself and others. Press the
"Air burst"
button to provide a burst of air to dislodge and
advance the cable tie to the jaw area of the tool. The “
Air Burst”
button can be pressed again if the cable tie does
not advance to the jaw area. When the cable tie is advanced to the tool jaw area, the "Tie in tool" message will
appear and the buzzer will sound. Press the
"Buzzer"
button to turn the buzzer signal "off". Remove the cable tie
from the jaw area and then press the
"Continue"
button.
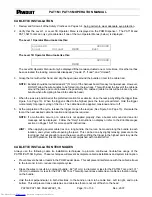
Press the
"Load"
button to load one cable tie into the dispenser and continue operation. If the cable tie does not
advance to the tool jaw area after depressing the
"Air Burst"
button several times, replace the feeder hose with
another and notify your maintenance department.
PREVENTION:
Always remove the cable tie from the jaw area of the tool if the cycle is not completed (cable tie did
not wrap and tension around the bundle). Always have the air supply at the recommended pressure setting and
avoid severe bends in the feeder hose.
electronic components distributor

