PAT1M / PAT1.5M OPERATION MANUAL
PAT1M/PAT1.5M: PA22222A01_03
Page: 30 of 36
Dec., 2007
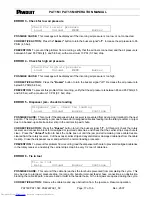
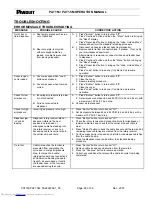
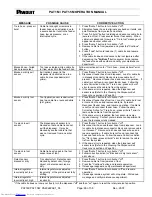
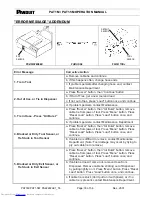
FUNCTIONAL MESSAGE TROUBLESHOOTING
MESSAGE
POSSIBLE CAUSE
CORRECTIVE ACTION
No exit sensor
seen - service
tool soon
Cable tie in feeder hose when tool was
actuated or dispenser exit sensor is
not functioning properly.
1. Resume operation.
2. If the same error is repeated, the exit sensor lens may be dirty,
or it may not be functioning properly.
3. Clean the exit sensor lens (Refer to the
Cleaning the
Dispenser Exit Sensor Lens
section on Page 26).
4. If the same error is repeated, notify your maintenance
department.
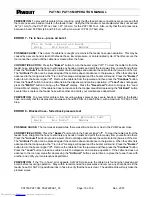
Switch #X is
stuck or broken
A switch (button #1, 2, 3, 4, or the
trigger) was held down or was stuck
when the dispenser was turned "on".
This message will remain if one of
these five switches has malfunctioned.
1. The message will disappear when the switch (button #1, 2, 3,
4, or the trigger) has been freed or released.
2. If the message does not disappear, then the specific switch
(button #1, 2, 3, 4, or the trigger) is bad. Contact your
maintenance department to have the switch replaced.
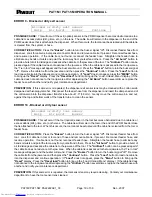
Restore past
tool count?
Tool counter is not functioning
correctly.
1. Press the "Yes" button and resume operation.
2. If the same error is repeated, notify your maintenance
department.
Jaw sensor
error
Cable tie stopped in tool gears.
1. Press "Buzzer" button to turn buzzer "off".
2. Remove the cable tie from the jaw area.
3. Press the "Continue" button and resume operation.
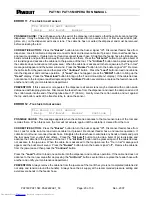
System error #X
See Page 23.
See Page 23.
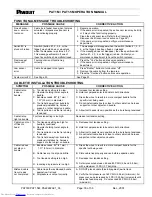
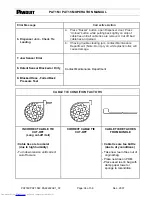
CABLE TIE INSTALLATION TROUBLESHOOTING
SYMPTOM
POSSIBLE CAUSE
CORRECTIVE ACTION
Cable tie too
loose on
bundle.
A. Tool tension setting is too low.
B. Operator holding tool at angle to
bundle.
C. Bundle exceeds .82" (21 mm) /
1.31" (33 mm) in diameter.
D. Tool is held away from bundle by
previously installed tie, harness
support, or other object on bundle.
E. Tool is pulled on as the tie is being
tensioned.
A. Increase tool tension setting.
B. Hold tool perpendicular to bundle in both directions.
C. Dress the wires to result in a more compact bundle for the
specific tool being used.
D. Do not install cable ties too close to other cable ties, harness
supports or other objects on bundle.
E. Allow tool to seek its own position as the tie is being tensioned.
Cable tie too
tight on bundle.
Tool tension setting is too high.
Decrease tool tension setting.
Cable tie not cut
off flush to
head.
A. Tool tension setting too high for
humidity conditions.
B. Operator holding tool at angle to
bundle.
C. Tool is pulled on as the tie is being
tensioned.
D. Tool is held away from bundle by
previously installed tie, harness
support or other object on bundle.
A. Decrease tool tension setting.
B. Hold tool perpendicular to bundle in both directions.
C. Allow tool to seek its own position as the tie is being tensioned.
D. Do not install cable ties too close to other cable ties, harness
supports or other objects on bundle.
Cable tie does
not stay on
bundle.
A. Bundle exceeds .82" (21 mm) /
1.31" (33 mm) in diameter.
B. Cable ties are too dry and brittle.
C. Tool tension setting is too high.
D. Incoming air pressure is too high.
A. Dress the wires to result in a more compact bundle for the
specific tool being used.
B. Store cable ties properly and use before expiration date.
C. Decrease tool tension setting.
D. Set air pressure between 65 and 85 PSIG (4,5 and 5,8 bar),
with a maximum 10 PSI (0,7 bar) drop.
Misfeed; cable
tie cycle was
not completed
A. Cable tie path was blocked; bundle
against jaw tie track.
B. Air pressure is not set correctly.
A. DO NOT place bundle forcefully against jaw tie track.
B. Verify that air pressure is at 65 PSIG (4,5 bar) (minimum). Air
pressure can be increased by 5 PSI (0,35 bar) increments until
cable ties feed properly. Do not exceed 85 PSIG (5,8 bar)
(maximum).
electronic components distributor


