BA_PH_BSB-400-900_EN_44-21.docx
36
10
Using the Rip Fence
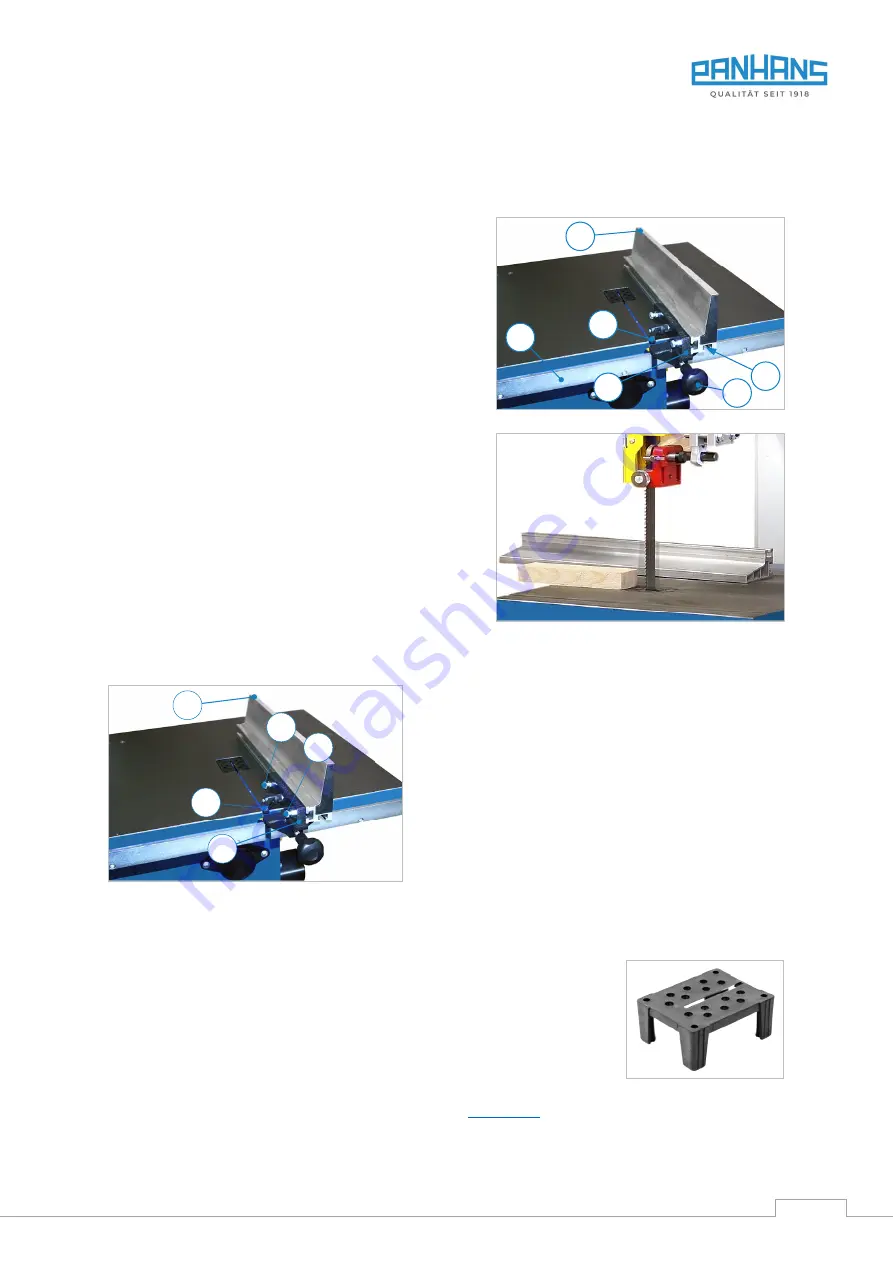
The fence is inserted into the guide rail (
F
) on the side of the machine table and clamped in the desired position
with the clamping wheel (
K
). The mechanical holding device (
V
) can be converted in a few easy steps so that the
fence is also suitable for left-handers.
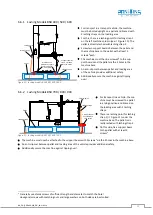
The rip fence must always allow to adjust the electromotive
driven saw blade guard as low as possible, regardless of the
respective workpiece dimensions. This ensures optimum
protection for the machine operator.
For this reason, the fence has a higher and a flatter surface.
Depending on the workpiece dimensions, the fence can be
turned by 90° in order to be able to set the ideal height for
the respective workpiece to be machined.
Convert the rip fence from high to flat:
•
Loosen the lever (
H
).
•
Pull the stop bar (
S
) sideways out of the holding
device (
V
).
•
Then turn the rail by 90° to the right and reinsert it
with the free T-slot (
N
) back into the holder (
V
).
•
Now tighten the lever (
H
) again.
•
The table stop is now set for flatter workpieces
(see
Figure 34: Fence in high position
Figure 35: Fence turned to flat position
10.1
Convert the Fence to the Right of the Saw Blade
Figure 36: Converting the fence for left-handers
To be able to use the fence on the right of the saw blade,
the following mechanical conversion is required:
•
Loosen lever (
H
) and pull out the fence rail (
S
).
•
Unscrew the lever (
H
) and the screws (
1
) and (
2
) and pull
them out of the holes of the holding device (
V
).
•
Now insert the lever and the two screws into the holes
from the other side. Then reattach the sliding blocks and
tighten the screws (
1
) and (
2
) again.
•
Turn the rail (
S
) by 180°, push it back in and clamp it with
the lever (
H
).
11
Replace Table Insert
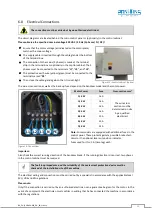
The table insert reduces the table opening of the bandsaw machine to a minimum
and ensures stable guidance of the saw blade due to its narrow incision.
Damaged table inserts must be replaced immediately!
•
Please ensure that the incision is as narrow as possible.
•
Only use table inserts made of plastic or wood.
•
The insert must be at table level and must not protrude above it.
Figure 37: Table insert
Matching table inserts can be ordered in the HOKUBEMA
(including required pin screws). The di-
mensions vary depending on wheel diameter).
Note:
Due to dimensional tolerances of the cast iron table tops,
the table inserts must be individually fitted on site.
H
K
S
N
F
V
H
2
1
S
V


