Panthera AB, Gunnebogatan 26, SE-163 53 Spånga, Sweden, +46-8-761 50 40, www.panthera.se
Mounting on Panthera X
Rearwheel
24”
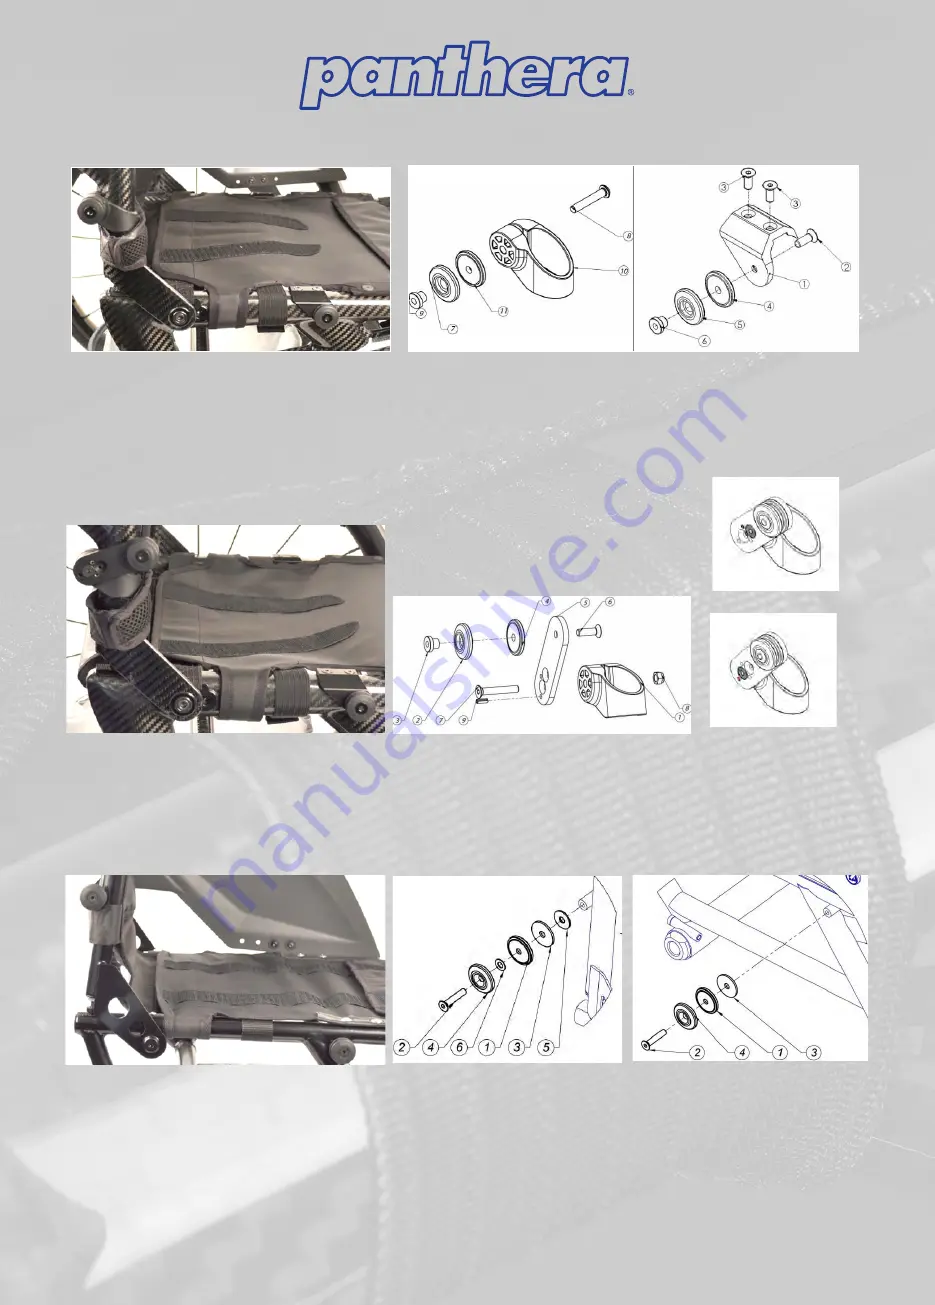
Fig. 13
Rear attachment, right
Fig. 14
Front attachment, right
The rear attachment is mounted around the backrest tube. Loosen screw (8) and clamp the bracket (10) around the
tube and reassemble the parts as in
fig. 13
. The front attachment is mounted with on the chassis tube with two screws
(3) in the predrilled holes. Use plate X (
Fig 8
) to the sideguard for rearwheel 24” on Panthera X. Adjust the plate to the
right position regarding the depth of the backrest position. See
fig 11
.
Fig. 12
Fig. 15
Fig. 17
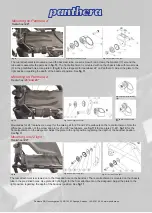
Rear attachment
25”
,
right
Fig. 18
Rear attachment
26”
,
right
Mounted as for 24” rearwheels, except for the raising kit for 25” and 26” rearwheels on the rear attachment. Note the
difference in position of the screw and pin for 25 or 26” rearwheels, see
fig 17-18
. Use plate 25”-26”,
fig 10
, for the
front attachment on the sideguard. Adjust the plate to the right position regarding the depth of the backrest position.
See
fig 11
.
Fig. 16
Rear attachment, right
Mounting on Panthera X
Rearwheel
25”and 26”
Mounting on U2 light
Rearwheel
24”
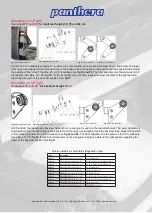
Fig. 20
Rear attachment, right
Fig. 21
Front attachment, right
The rear attachment is screwed on to the threaded hole on the backrest. The rear attachment is mounted on the chassis
tube in the pre drilled holes. Use plate U2 light,
fig 9
, for the front attachment on the sideguard. Adjust the plate to the
right position regarding the depth of the backrest position. See
fig 11
.
Fig. 19


