M
ACH
IN
E
B
A
S
IC
S
6
Setting Upper Thread Tension
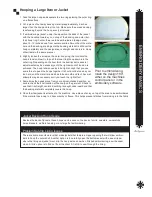
1. Adjust the tension knob until the top of the plastic knob is flush with the top of the chrome post.
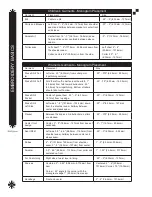
2. Follow the chart below to SET the tension knob for the type of thread you are using. Polyester threads
require nearly twice the amount of tension as rayon.
Thread Tension Adjustment
Thread Type
Solution
Metallic and polyester threads
Turn tension knob 0-1 turns counter clockwise
Light color rayon
Turn tension knob 1-2 turns counter clockwise
White rayon
Turn tension knob 1 turn counter clockwise
Medium color rayon
Turn tension knob 1-2 turns counter clockwise
Dark color rayon
Turn tension knob 2-3 turns counter clockwise
Black rayon
Turn tension knob 3 turns counter clockwise
3. After setting the upper tension knobs, stitch a 1-inch capital letter “I”. View the underside of the fabric to
determine if the bobbin tension needs adjusting.
Bobbin Tension Test
To test the bobbin tension, take the bobbin thread out of the pigtail. Hold the bobbin case in your left hand
and pinch the thread near the case with your right thumb and index finger. With your right hand, give the
bobbin a quick jerk, the thread should unwind and be pulled out of the bobbin from its own weight. There
should be about an inch and a half and still have the correct tension, the key is consistency, everybody uses a
different amount of force, therefore, the drop amount may vary. If your bobbin drop is four inches and the sew
out test shows correct tension, then use four inches as your guide. The bobbin thread should fall smoothly,
without resistance. If the bobbin case hardly moves the tension is too tight, if it drops a lot, the tension is too
loose. If the bobbin pops out of the case, the adjustment may be too loose or your bobbin drop too violent.
Note
: Only one-third of the bobbin thread should be showing down the middle of the column. If too much
bobbin is showing, loosen the upper tension slightly by turning the knob to the left; if too little bobbin thread is
showing, tighten the upper tension slightly by turning the knob to the right.
The tension settings suggested may vary by thread manufacturer. However, all brands are very similar.
When stitching on caps, thick materials or using small lettering, the bobbin tension may need to be tightened
slightly.
Excessive upper thread balled up under the fabric (birdnest) or looping on top is a sign of too loose upper ten-
sion or too tight of bobbin tension. Excessive thread breaks is a sign of too tight upper tension.
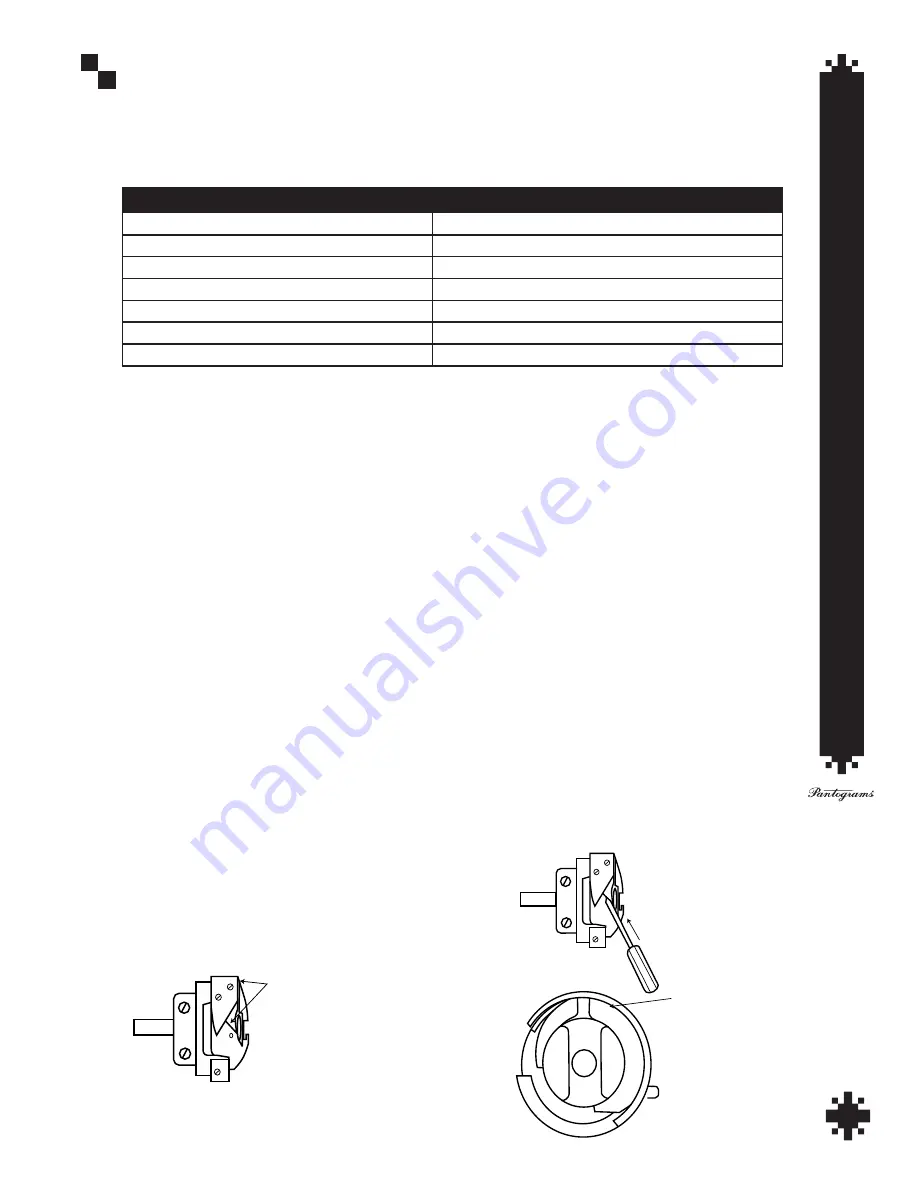
Rotary Hook Scratches
Do not remove the hook to check or polish scratches. Scratches
on the rotary hook can be the cause of excessive thread breaks.
1
2
LOOK ON THESE EDGES FOR SCRATCHES
IF SMALL SCRATCHES ARE FOUND POLISH
OUT WITH 1200 GRIT SANDPAPER OR EMERY
CLOTH. IF SCRATCHES ARE DEEP USE 240
GRIT SANDPAPER THEN POLISH WITH 1200
OR EMERY CLOTH.
TAKE A FLAT TIP SCREW DRIVER AND PUSH
ALONG THE EDGES AT AN ANGLE TO
CHECK FOR SCRATCHES.
LOOK IN THIS LOCATION FOR
BROKEN OFF NEEDLES.
Summary of Contents for GS1501
Page 30: ...GETTING STARTED 28 ...
Page 31: ...GETTING STARTED 29 The Control Panel Display ...
Page 62: ...EMBROIDERY BASICS 28 Notes ...
Page 64: ...MACHINE BASICS 2 ...
Page 65: ...MACHINE BASICS 3 ...
Page 70: ...MACHINE BASICS 8 ...
Page 71: ...MACHINE BASICS 9 ...
Page 78: ...MACHINE BASICS 16 Notes ...


