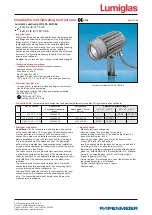
• Replacement parts:
Part no.
Screw-type lens (light aperture) 7.5 W
1774.128.00
Screw-type lens (light aperture) 4 W
1774.030.00
O-ring seal (Viton)
0862.114.00
Lamp socket, GZ10
1202.024.00
Cable gland 7-11 mm
9103.123.00
LED module 24 V AC/DC – 7.5 W
3858.032.00
LED module 110-230 V AC – 7.5 W
3858.040.00
LED module 230 V AC – 4 W
3233.004.00
Cable entry gland
complete with 2 m connecting cable
1084.013.00
complete with 5 m connecting cable
1084.015.00
complete with 20 m connecting cable
1084.017.00
• Accessories:
Claw spanner
6816.001.00
• Maintenance:
- Keep luminaire clean
- Only use original spare parts
F.H.Papenmeier GmbH & Co. KG
Talweg 2, 58239 Schwerte, Germany
Phone: +49 2304 205 0 • Fax: +49 2304 205 206
info@lumiglas.de • www.lumiglas.de
All dimensions in mm unless stated otherwise. Picture credits: ©F.H. Papenmeier GmbH & Co. KG. Subject to change without prior notice. 10.20
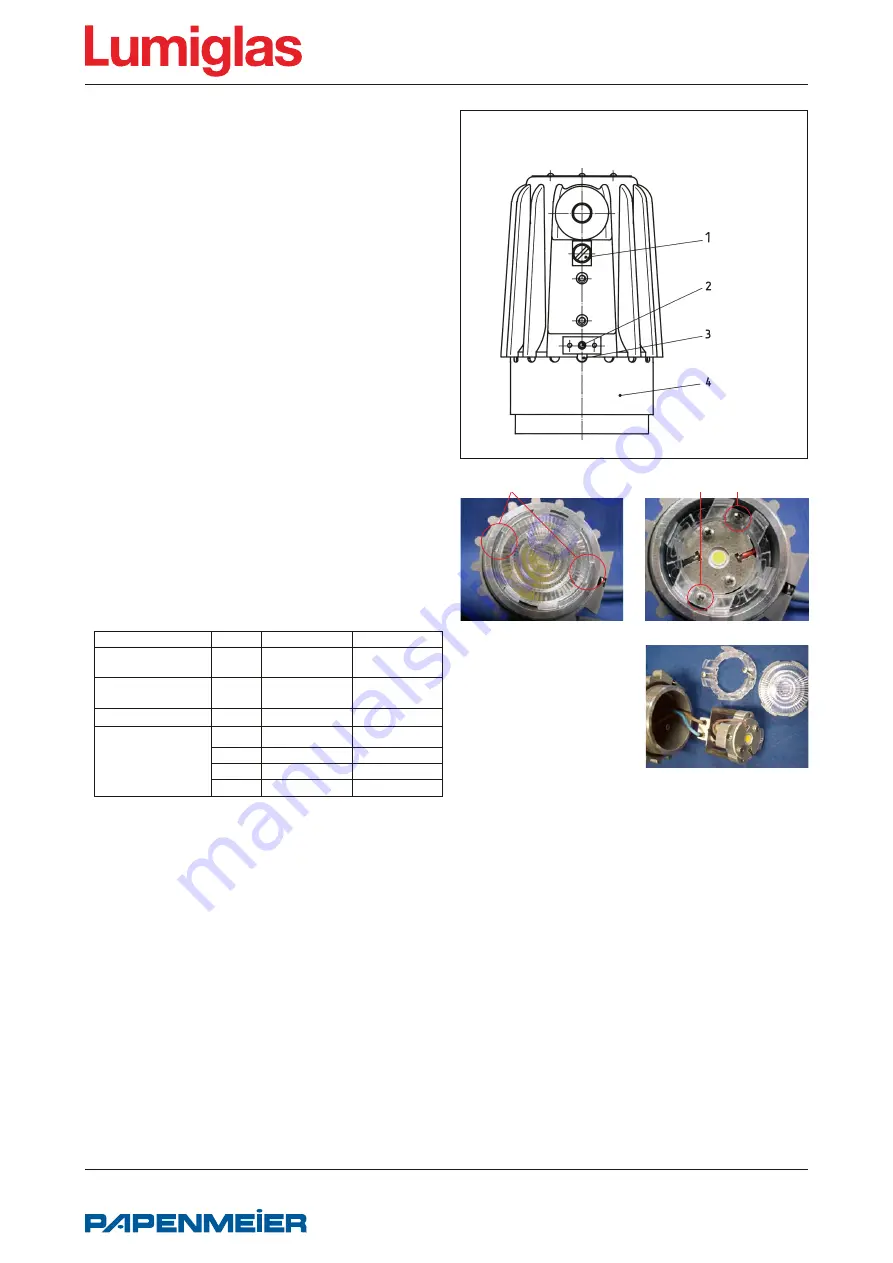
1 External protective
conductor terminal
2 Locking screw
3 Safety tab
4 Screw-in glass lens
• Connection and lens change:
- Switch luminaire voltage-free
- Observe the waiting time according to the type plate
- Loosen the locking screw (2) for the screw glass (4);
this releases the locking tab (3)
- Unscrew the screw glass with the mounting key
• Lens change:
- Press the retaining clip slightly outwards and simultaneously
push the lens up. See photo 1.
- Loosen the fastening screws from the lens holder and remove
the lens holder. See photo 2.
- Pull out the module
- Connect power supply
- Reinsert the module. See photo 3.
- Mount lens holder
- Insert lens
- Before closing the lamp, re-grease the thread of the screw-on
glass (e.g. with AEMA-SOL 6 B, manufacturer A. E. Matthes)
- Screw the screw-in glass (pos. 4) back in until tight (pressure
against the O-ring)
- Locking bracket must engage in the groove provided for this
purpose so that the screw glass is locked in place
- Retighten locking screw (pos. 2)
- apply voltage
• Mechanical installation:
In the case of the round sight glass fitting and the flow-through
sight glass, the luminaire is attached to the mating flange with
the hinged bracket. In the case of the screw sightglass fitting,
the luminaire is fastened to the slotted nut, alternatively by
means of a hinged bracket or plug-in flange.
• The Lumistar luminaire USL 05 LED-Ex is suitable for sight
glasses in the following nominal sizes, using the appropriate
mounting:
Type of fitting
from DN
Hinged bracket Flanged ad. collar
Circular sight glass
fitting DIN 28120
25
yes
no
Circular sight glass
fitting DIN 28121
40
yes
no
Tubular sight glass fitt.
50
yes
no
Screw-type sight glass
fitting
similar to DIN 11851
65
yes
yes
80
yes
yes
100
yes
no
125
yes
no
• Mounting by way of hinged bracket:
The hinged bracket is used to secure the luminaire to the
mating flange of a circular sight glass fitting (also suitable
for visual flow indicators). Alternatively, it can be attached to the
slotted cover nut of screw-type sight glass fittings to DIN 11851.
The hinged bracket is fixed in place by turning the supplied
M6 bolt into a blind hole which has previously been tapped
in the pitch circle of the mating flange face. An additional
option is to weld on the bracket.
• Mounting by way of flanged adapter collar:
The flanged adapter collar is bolted or welded to the slotted
cover nut (DIN 11851).
• Please note:
Fastening and mounting elements, claw spanner, etc. should
be ordered separately if needed.
photo 3
photo 1
photo 2
Halteklammern
Befestigungsschrauben


