Page 1: ...IBLE INJURY KEEP ALL FRAME BOLT CONNECTIONS LOOSE UNTIL INSTRUCTED IN THE ASSEMBLY STEP SEQUENCES TOSECURELY TIGHTi MAKE SURE SNAP HOOKS ARE FASTENED BEFORE DOING EXERCISES NOTE We recommend cleaning...
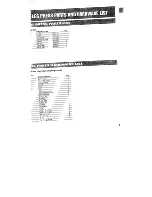
Page 2: ...3OBI 01 1 PB3236 01 l LegPress Cable 17 634 01 4 Non Skid Strip 4 x count all parts before beginning assembly ARE NAME DESCRIPTION QTY Gr p I I 4 x S 2 4 xI Oilite Bushing I Compressi ___ on Spr l Co...
Page 3: ...ck cord from the Rotary Cable and attach tothe Leg Press Cable as shown same routing ofelastic cord as on Rotary Cable ELASTIC SHOCK CORD LEG PRESS CABLE PB3236 01 D RING 1 Attach two 2 4V2 w lClev s...
Page 4: ...Y 2 PL Remove theboltused tohold the pulley inthe m boom pulley to rear ofD Ring and attach one 1 4 w l Clevis Pulley and one 1 cable retaining clipusing one I 3 if x4V Ba t and existing ks Lockwasher...
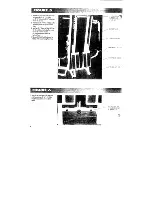
Page 5: ...into the angled tubes on the Leg Press Frame and two 2 2 Square End Caps 10 14 ga into the base tubes ofthe Leg Press Frame 4 Slide one 1 Weight Stock Cushion over the Pin Stop ofthe base ofthe Leg Pr...
Page 6: ...g CSlip e Spring and the spacer over the end ofthe plunger inthat order os D Insed the plunger through the second hole of G x5 2 k the housing EPulJ back the spacer on the plunger and inse the co er p...
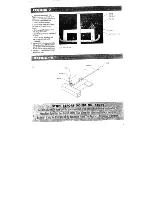
Page 7: ...See figure I 2 Securely fasten one fl 3 x1 4 Bob one 1 1 4BOLT 3 e Lockwasher and one 1 3 Nut to he hole s LOCK WASHE in e rear oftheseat adju ment tube on the W unde ide of thePendulum Frame be een t...
Page 8: ...at the top of the pendulum flame Thread two 2 sA6 xI 4 Ig set screws into both collars and tighten This ep may be pre nssembled PENDULUM FRAME 5 16 x 1 4 LG SET SCR v 2 PL PIVOT AXLE LEG PRESS FI 1 A...
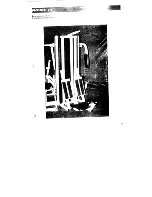
Page 9: ...e nd cap 0 14 g in thetopot he back re tuoe and one 1 square end cop intheend of thependulum frame under he back resttube 2 SQ END CAP 2 PL 3 e x11 BOLT 2PL 3 e LOCKWASHE S _ 2 PL 3 WASHER 2 PL lure F...
Page 10: ...r ten any loose connedions atthis time FACTOR 625 should be assembled as 11...