GXL-45 Operator Manual
Operating the Grill
•
35
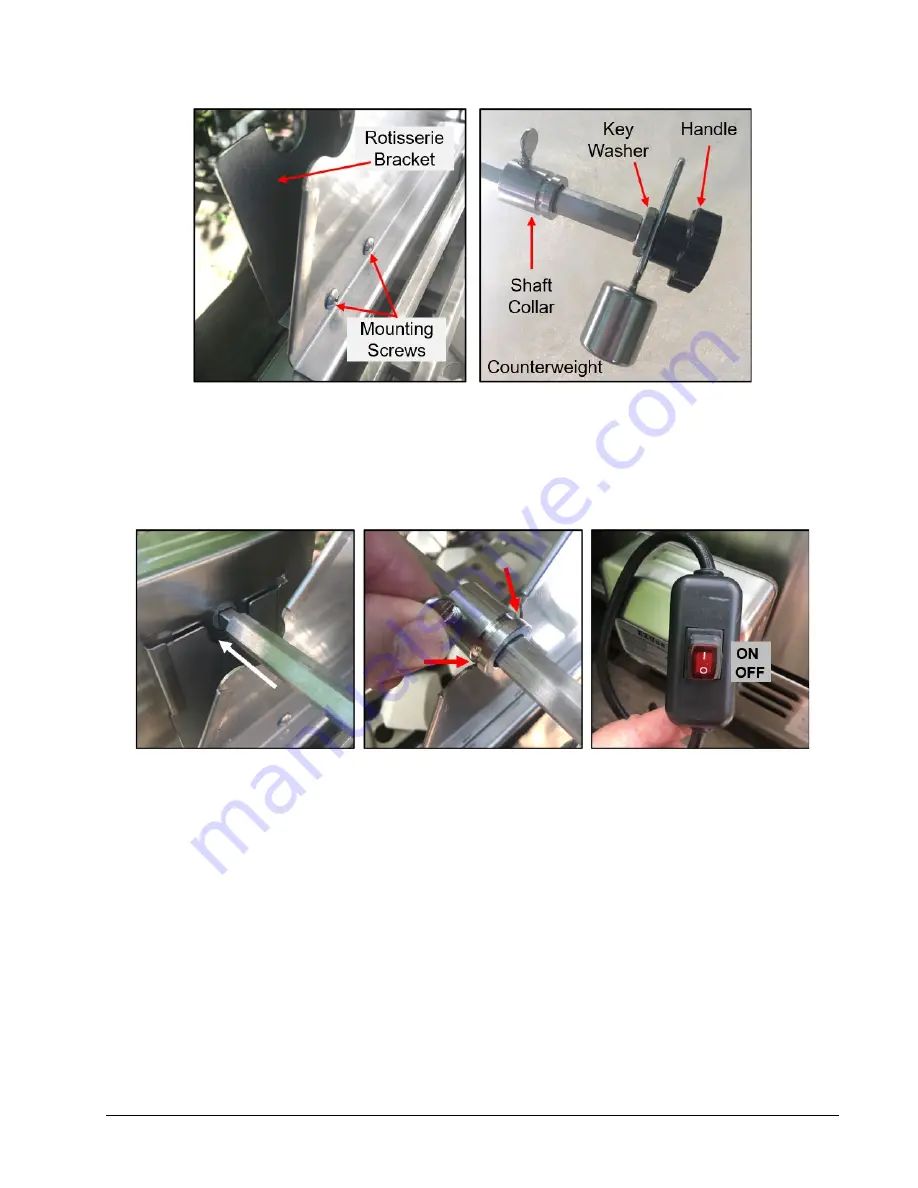
Figure 33 Rotisserie Setup 1
4.
Screw the threaded Key Washer on all the way until tight (Figure 33 right)
5.
Place the Counterweight over the threads and screw on the black handle to hold the counterweight
in place (Figure 33 right)
6.
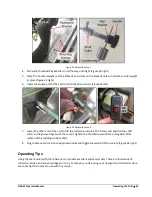
Insert the square end of the spit rod into the driver motor (Figure 34 left)
Figure 34 Rotisserie Setup 2
7.
Lower the other end of the spit rod to the rotisserie cutout in the frame, and position the shaft
collar so the groove aligns with the cutout; tighten the thumbscrew with the end against a flat
surface of the rod (Figure 34 center)
8.
Plug rotisserie motor into an approved outlet and toggle the switch ON to operate (Figure 34 right)
Operating Tips
Using the rear burner with the rotisserie can provide excellent and tasty meals. There are thousands of
rotisserie recipes, and we encourage you to try as many as you like using your new grill and rotisserie! Here
are some tips for success to use with any recipe:

