- 34 -
9.12 P
AGER
D
ELAY
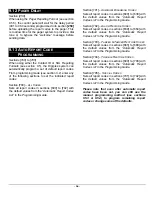
Section [259]
When using the
Pager Reporting Format
(see section
9.5.5), the control panel will wait for the delay period
(001 to 060 seconds) programmed into section
[259]
before uploading the report codes to the pager. This
is to allow time for the pager system to provide a dial
tone or to bypass the “welcome” message before
sending data.
9.13 A
UTO
R
EPORT
C
ODE
P
ROGRAMMING
Sections [790] to [795]
When using either the Contact ID or SIA
Reporting
Formats
(see section 9.5), the Digiplex system can
automatically program a set of default report codes.
From programming mode (see section 3.2) enter any
of the following sections to set the indicated report
codes:
Section [790] –
A
LL
C
ODES
Sets all report codes in sections [600] to [702] with
the default values from the
“Automatic
Report Codes
List”
in the
Programming Guide
.
Section [791] –
A
RMING
& D
ISARMING
C
ODES
Sets all report codes in sections [600] to [638] with
the default values from the
“Automatic
Report
Codes List”
in the
Programming Guide
.
Section [792] –
A
LARM
R
ESTORE
C
ODES
Sets all report codes in sections [639] to [664] with
the default values from the
“Automatic
Report
Codes List”
in the
Programming Guide
.
Section [793] –
T
AMPER
& T
AMPER
R
ESTORE
C
ODES
Sets all report codes in sections [665] to [689] with
the default values from the
“Automatic
Report
Codes List”
in the
Programming Guide
.
Section [794] –
T
ROUBLE
R
ESTORE
C
ODES
Sets all report codes in sections [690] to [700] with
the default values from the
“Automatic
Report
Codes List”
in the
Programming Guide
.
Section [795] –
S
PECIAL
C
ODES
Sets all report codes in sections [701] to [702] with
the default values from the
“Automatic
Report
Codes List”
in the
Programming Guide
.
Please note that even after automatic report
codes have been set, you can still use the
manual programming method (see sections
9.5.3 & 9.5.4) to program remaining report
codes or change some of the defaults.
Summary of Contents for Digiplex
Page 1: ...Digiplex Control Panel Reference Installation Manual ...
Page 8: ... 7 ...
Page 54: ......


