background image

Chapter 7: Troubleshooting and Maintenance

 49

To Upgrade Firmware using a Serial Connection

Before beginning the upgrade process, ensure that the serial cable is connected between the 
COM2 Port of the IPR512 Receiver and your PC. Ensure that the 

Serial 

Tab is selected from 

the In-Field Paradox Upgrade Software window.

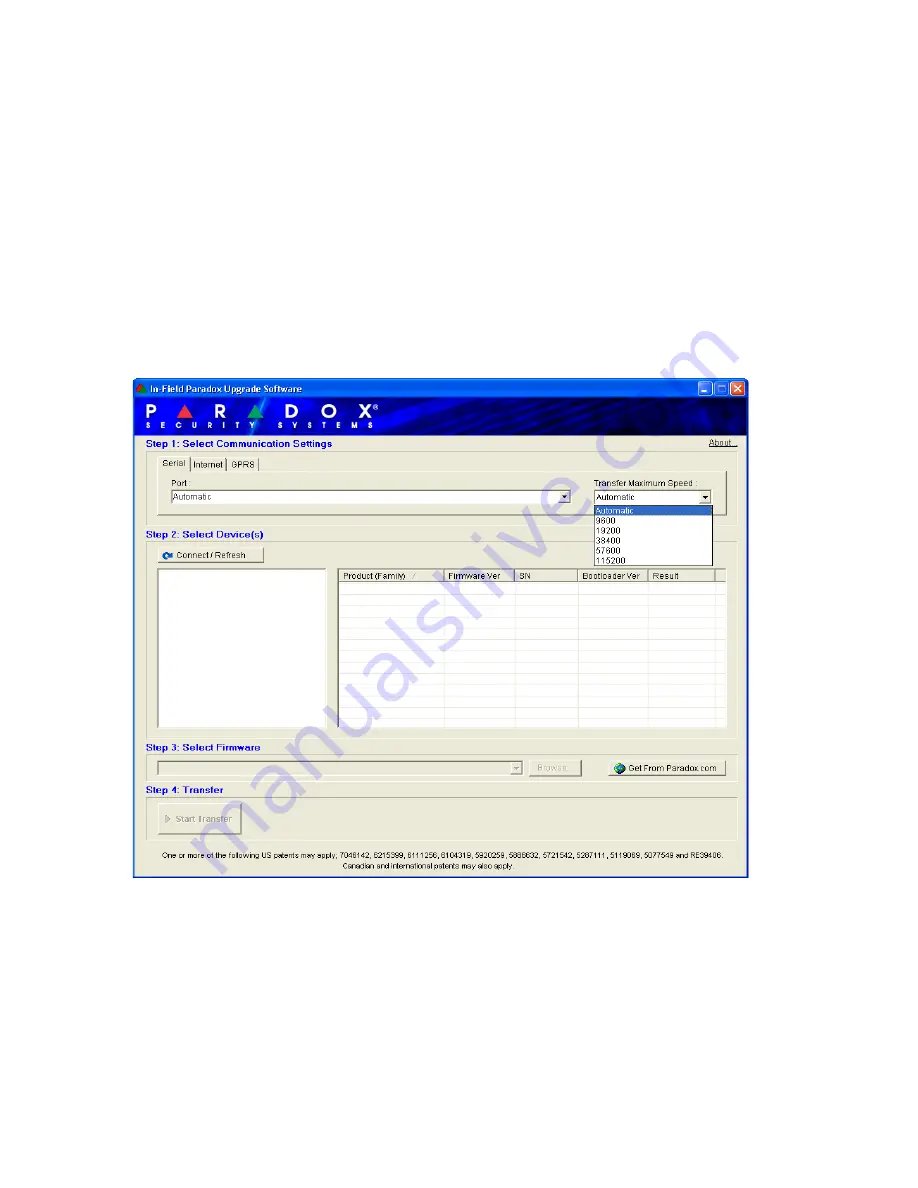
Step 1: Define Communication Settings

1. Select the communication port to be used from the Port drop-down list. 
2. Select the transfer speed from the Transfer Maximum Speed drop-down list (automatic is 

recommended).

3. Proceed to Step 2.

Figure 48: Communication Settings

Summary of Contents for IPR512

Page 1: ...IPR512 GPRS IP Monitoring Receiver V1 2 Operations Manual...

Page 2: ...and be within the warranty period In no event shall the Seller be liable to the buyer or any other person for any loss or damages whether direct or indirect or consequential or incidental including w...

Page 3: ...ting to the COM1 Port 12 Connecting to the COM2 Port 13 Connecting the LAN Interface 13 Connecting the WAN Interfaces 14 Installing the Memory Card for Data Backup 14 Connecting Power 15 Powering up t...

Page 4: ...bles Overview 44 System Backup Overview 46 Firmware Upgrade Overview 48 Accessing the In Field Paradox Upgrade Software Application 48 Chapter 8 Initiating Communication with the IPR512 Receiver 57 Re...

Page 5: ...s Paradox IPR512 GPRS IP Monitoring Receiver 2GB Memory Card 1 8 meter 6 foot power cable 3 meter 10 foot DB25 to DB9 serial cable Gender changer Rack Mounting Kit includes brackets and screws Desktop...

Page 6: ...r provides high speed supervision for up to 512 Paradox control panels using a Paradox reporting module Each Paradox reporting module can report multiple partitions Redundant ISP WAN1 WAN2 2 Ethernet...

Page 7: ...e in less than 90 seconds and features automatic update verification Automatic firmware upgrade not supported by current version Please check the web for updates Other Features Supports CID and SIA re...

Page 8: ...SAMM IPR512 Receiver System Defaults The following table provides a listing of all factory shipped default settings for the IPR512 Receiver For more information on configuring the default settings ref...

Page 9: ...Receiver Dimensions The following table provides the dimensions and weight of the IPR512 Receiver Table 3 IPR512 Receiver Dimensions Figure 2 IPR512 Receiver Dimensions Input Voltage 100 240 VAC 50 60...

Page 10: ...2 Receiver is communicating with the automation software ACK NACK 8 Trouble Status LED On when IPR512 Receiver is experiencing problems For more information on the Trouble Status LED refer to Chapter...

Page 11: ...ning a RS 232 serial communication program 5 LAN LAN port used to connect to a LAN or directly to a PC for configuration of the IPR512 Receiver 6 WAN1 Ethernet port used to receive events through an I...

Page 12: ...priate anchoring hardware should be used for your site Required Materials Rack Mounting Installation Kit included Phillips or Flat Head screwdriver Guidelines Ensure that at least 1U is allocated on t...

Page 13: ...es Ensure that at least 1U is allocated for the IPR512 Receiver Ensure surface for desk mount installation is stable Ensure a clear path behind the receiver for wiring To Desk Mount the IPR512 Receive...

Page 14: ...ort output can be supervised through the ACK NACK protocol The IPR512 Receiver is software compatible with monitoring station automation software using Radionics 6500 Ademco 685 and Sur Gard MLR2 DG r...

Page 15: ...ides the connection to the IPR512 Receiver in order to access the receiver through a Web page interface for configuration This interface allows the user to view edit and delete Paradox reporting modul...

Page 16: ...ter 6 IPR512 Receiver LCD System Configuration on page 42 Stored data includes the receiver s network option and serial configuration settings profile and user information and system account informati...

Page 17: ...p the IPR512 Receiver When all connections have been completed turn on the IPR512 Receiver by positioning the On Off switch to the On position The IPR512 Receiver will go through an initialization pro...

Page 18: ...the LAN IP address of IPR512 Receiver in the address bar of your web browser You are now presented at the Login page Speak to your network administrator to obtain an IP Address and Subnet Mask that w...

Page 19: ...is admin Password Enter the password Default password is admin Login Press to access the IPR512 Receiver Account Management System Access will only be granted when a valid username and password combi...

Page 20: ...ister your IPR512 Receiver in order to activate a fully functional version By default the IPR512 Receiver runs in Demo Mode When in Demo Mode you are limited to 10 accounts and the communication port...

Page 21: ...ion 19 3 Click on Create a Login if this is your first time registering an IPR512 Receiver If you have already registered a unit enter your Login ID and Password and then click on Login Figure 18 IPR5...

Page 22: ...Account Management system is now activated and fully functional The Registration window displays the Serial Firmware Bootloader and Hardware version of the IPR512 Receiver you are currently registeri...

Page 23: ...counts Security Profiles Allows you to access and define security profiles Receiver Configuration Allows you to configure settings for the IPR512 Receiver Event Configuration Allows you to view accoun...

Page 24: ...that the password be changed To change the password select the Change password option You are then able to enter a new password and save your settings Figure 22 Change Password Table 7 Change Password...

Page 25: ...rting module Security profile Displays the security profile assigned to the current account For more information on setting the Security profile values refer to Security Profiles Menu on page 26 Last...

Page 26: ...t 1 Select the account you wish to modify from the list 2 Click on Edit 3 Select the required Security profile from the drop down list 4 Click Save to save your changes To cancel any changes without s...

Page 27: ...System Configuration 25 To Delete an Existing Account 1 Select the account you wish to delete from the list 2 Click on Delete 3 Select Yes to delete or No to cancel your action Figure 25 Delete Existi...

Page 28: ...en a security profile is modified the IP device s assigned to the profile will automatically be updated during the next Module Polling Time The following table provides the four security profiles and...

Page 29: ...ription ID Displays the ID assigned to the Security Profile This ID is used by the field installer when programming the IP device Name Displays the name or description assigned to the Security Profile...

Page 30: ...dify from the list 2 Click Edit 3 Click Save to save your changes To cancel any changes without saving select the Cancel option Note When a security profile has been modified all accounts assigned to...

Page 31: ...urity Profile 1 Select the Security Profile you wish to delete from the list 2 Click Delete 3 Select Yes to delete or No to cancel your action Note A security profile cannot be deleted if used by one...

Page 32: ...iguration menu option provides the configuration settings for the IPR512 Receiver From this menu you can set WAN and LAN connection settings for communication with the IPR512 Receiver set COM port set...

Page 33: ...he IPR512 Receiver Receiver ID can be between 01 and 99 Line number Defines the line number assigned to the IPR512 Receiver Line numbers can be between 01 34 ACK NACK protocol An affirmative or negati...

Page 34: ...ing the date and time manually define the month MM day DD year YYYY and time HH MM 24 hour time format to ensure that date and times are properly reflected in the IPR512 Receiver Account Management Sy...

Page 35: ...ure the event codes that will be sent to the monitoring station s automation software The IPR512 Account Management System supports account related events and IPR512 receiver events From this menu you...

Page 36: ...ation please refer to the View Restore Deleted Accounts Menu on page 39 To Enable and Modify an Account Event 1 Select the Event you wish to modify from the list 2 Click Edit 3 Select whether the even...

Page 37: ...n the account database account capacity has reached 100 Account cannot register database is full sends a message to the monitoring station s automation software when an attempt to register has been do...

Page 38: ...e will be reported To not report an event uncheck the Reported check box 7 Enter or modify the Event code 8 Click Save to save your changes To cancel any changes without saving click Cancel Figure 33...

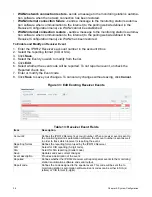
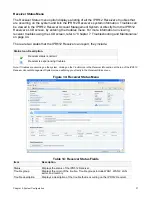
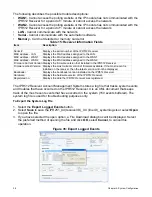
Page 39: ...4 There are two states that the IPR512 Receiver can report they include Note If troubles are occurring on the system clicking on the Trouble icon in the Receiver Info section at the top of the IPR512...

Page 40: ...the System Log File 1 Select the Export Logged Events button 2 Select Save to save the IPR251_XX receiver ID _XX line ID _systemlog xls or select Open to open the file 3 If you have selected the open...

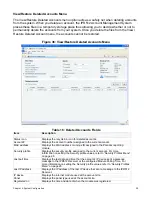
Page 41: ...mber assigned to the current account MAC address Displays the MAC address or unique ID assigned to the Paradox reporting module Security profile Displays the security profile assigned to the current a...

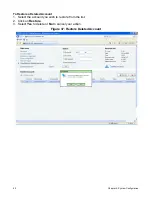
Page 42: ...5 System Configuration To Restore a Deleted Account 1 Select the account you wish to restore from the list 2 Click on Restore 3 Select Yes to delete or No to cancel your action Figure 37 Restore Delet...

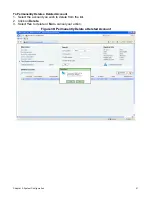
Page 43: ...guration 41 To Permanently Delete a Deleted Account 1 Select the account you wish to delete from the list 2 Click on Delete 3 Select Yes to delete or No to cancel your action Figure 38 Permanently Del...

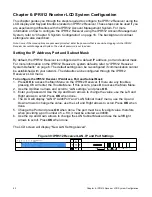
Page 44: ...faults on page 6 The default settings can be re configured if communication cannot be established with your network The defaults can be configured through the IPR512 Receiver s LCD menu To Configure t...

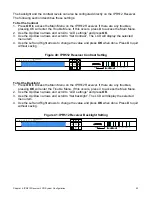
Page 45: ...lected menu item 4 Use the Left and Right arrows to change the value and press OK when done Press X to quit without saving Figure 40 IPR512 Receiver Contrast Setting To Set the Backlight 1 Press OK to...

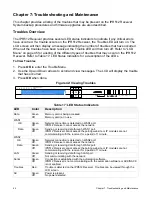
Page 46: ...done Figure 42 Viewing Troubles Table 17 LED Status Indicators LED Color Description Data Green Off Memory card is being accessed Memory card not in use WAN1 OK Green Off Network connection is detect...

Page 47: ...ss invalid enter value between 0 and 255 Copying data on memory card Do not remove memory card xxx 557Kb No backup available Press OK to continue 10 backups available Press OK to continue 2008 07 30 1...

Page 48: ...ht arrows to scroll Press OK when done 4 Select Backup data on memory card and press OK The IPR512 Receiver will then begin copying data on the memory card Do not remove the Memory Card from the Memor...

Page 49: ...hange the value use the Left and Right arrows to scroll Press OK when done 6 Use the Up Down arrows and scroll to Restore data from memory card The LCD will display the selected menu item At this poin...

Page 50: ...d Paradox Upgrade Software Application In order to access the In Field Paradox Upgrade Software Application the application must first be installed on your hard drive The In Field Paradox Upgrade Soft...

Page 51: ...rt of the IPR512 Receiver and your PC Ensure that the Serial Tab is selected from the In Field Paradox Upgrade Software window Step 1 Define Communication Settings 1 Select the communication port to b...

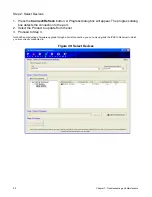
Page 52: ...og box will appear The progress dialog box detects the connection to the port 2 Select the Product to update from the list 3 Proceed to Step 3 Note When conducting a firmware upgrade through a serial...

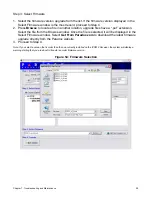
Page 53: ...e window When the file is selected it will be displayed in the Select Firmware window You can also click on Get from Paradox com to download the latest firmware upgrade files directly from the Paradox...

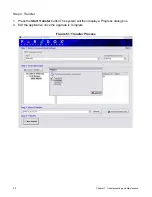
Page 54: ...Troubleshooting and Maintenance Step 4 Transfer 1 Press the Start Transfer button The system will then display a Progress dialog box 2 Exit the application once the upgrade is complete Figure 51 Tran...

Page 55: ...on and select product from the list Select ing search will display the a list of the receivers that are currently connected to the same LAN as the PC that the In Field application is installed on 2 De...

Page 56: ...Devices 1 Press the Connect Refresh button A Progress dialog box will appear The progress dialog box detects the connection to the network in order to display results 2 Select the Product to update f...

Page 57: ...have a puf extension Select the file from the Browse window Once the file is selected it will be displayed in the Select Firmware window Select Get From Paradox com to download the latest firmware upg...

Page 58: ...Troubleshooting and Maintenance Step 4 Transfer 1 Press the Start Transfer button The system will then display a Progress dialog box 2 Exit the application once the upgrade is complete Figure 55 Tran...

Page 59: ...odule However the monitoring station must provide the installer with the following information that is entered by the installer Account for each partition of the site IP Address and Port of the IPR512...

Page 60: ...Password 21 22 Code 34 36 COM Ports 31 COM1 Port 9 COM2 Port 9 Communication Settings 49 53 Confirm 22 Connections COM1 12 COM2 13 LAN Port 13 Power 15 WAN ports 14 Contrast 43 Control Keypad 8 Create...

Page 61: ...27 N Name 27 Netmask 31 New 22 New Lan Settings Saved 42 NTP server 31 NTP server failure 35 NTP server restore 35 O On Off Switch 15 Operating Temperature 7 Other Configuration 31 Output Format 31 O...

Page 62: ...ED 8 Troubles 37 44 Troubleshooting 44 U Upgrade port 31 V View Troubles 44 View Restore Deleted Accounts Menu 39 W WAN1 9 38 44 WAN1 internet connection failure 35 WAN1 internet connection restore 35...

Page 63: ......

Page 64: ...We hope this product performs to your complete satisfaction Should you have any questions or comments please visit us at www paradox com WWW PARADOX COM Printed in Canada 01 2009 IPR512 EI03...

Reviews: