background image

Index

Page 47

Index

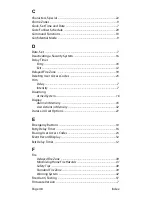
A

Access Codes

Deleting .................................................................................................. 23
Labelling ................................................................................................ 19
System Master  ...................................................................................... 18
User ......................................................................................................... 18

Access Control ..............................................................................................28
Access Control User Options

Access Control  ...................................................................................... 28
Add Tolerance Window to Schedule  ............................................... 29
Arming with Card  ................................................................................ 29
Can Disarm with Access Card ........................................................... 28
Card to Unlock and Code to Disarm  ............................................... 29
Code Follows Schedule ....................................................................... 29
Extended Unlocked Period  ................................................................ 28

Add Tolerance Window to User Schedule  .........................................29
Alarm Memory Display ..............................................................................16
Alarm,Testing ................................................................................................37
Area Access, in User Options ...................................................................28
Area Display  ..................................................................................................11
Arming ............................................................................................................12

Automatic Arming ............................................................................... 14
Keyswitch Arming ................................................................................ 14

Auditory Feedback  ....................................................................................... 6
Auto-Arming

No Movement Auto-Arming  ............................................................. 15
Timed Auto-Arming  ............................................................................ 14

B

Beep Tones

Confirmation beep  .................................................................................6
in Opened or Closed Zones, see Chime Zones
Rejection beep  .........................................................................................6

Brightness ........................................................................................................ 7
Burglar Alarms ..............................................................................................42
Buttons

One-Touch ............................................................................................. 14

Bypass

Bypass Recall  ........................................................................................ 13
Programming ....................................................................................... 12

Summary of Contents for K656 Touch Sense

Page 1: ...K656 Touch Sense LCD Keypad User Guide...

Page 2: ......

Page 3: ...view 5 Areas 11 Arming 12 Disarming 16 User Codes and Labels 18 Programming User Settings 24 Trouble Display 31 Remote Control Feedback 34 Voice Dialer SMS 35 Testing and Maintenance 37 Fire and Burgl...

Page 4: ......

Page 5: ...programming 32 character blue LCD screen Available in multiple languages Assign to one or more areas 1 addressable zone input and 1 PGM output Independently set chime zones One touch action buttons T...

Page 6: ...ection Beep When the system reverts to a previous status or when a command is incorrectly entered the keypad emits a long beep BEEEEEEEP 8 6 4 3 2 7 1 32 character blue LCD screen 2 System AC power st...

Page 7: ...gs You can modify the following keypad settings to suit your needs Scroll Speed The amount of time that a message will remain on the screen before moving to the next message Key Brightness The intensi...

Page 8: ...ll Speed Press 1 and To increase or decrease the numbers Press CLEAR to exit Key Brightness Press 2 Key Sensitivity Press 3 LCD Brightness Press 4 LCD Contrast Press 5 Mute Press 6 Dim Intensity Press...

Page 9: ...r system PGMs can be programmed to reset smoke alarms turn on light switches open or close garage doors and much more Ask your installer about this useful feature Programming Chime Zones You can progr...

Page 10: ...nerate a panic alarm press and hold the panic buttons displayed in Table 1 Your installer can program the alarm to be either silent or audible Table 1 Panic Buttons Command Functions You will only nee...

Page 11: ...allows you to see the status of the individual areas within a partitioned system Your installer can partition the system into separate areas To view the status of the areas 1 Press MENU 2 SYSTEM STAT...

Page 12: ...he open zone is closed your system will then arm that zone as well Stay Arm Stay arming will partially arm your system to permit you to remain in your home or office by arming the outer zones perimete...

Page 13: ...Press MENU 3 BYPASS ZONE 2 Enter your user code if required 3 Press 1 SELECT ZONE 4 Use one of the following methods to select a zone Enter the 3 digit zone e g 001 Use the and buttons to select a zo...

Page 14: ...h place the key in the ON position briefly then place it back in the OFF position to arm the system Repeat this process to disarm with a momentary keyswitch Auto Arming If enabled by your installer yo...

Page 15: ...to the 24 hour clock e g 9 a m is 09 00 and 9 p m is 21 00 5 Press ENTER to save and exit No Movement Auto Arming Your system can be programmed to send a report to your monitoring station and or arm...

Page 16: ...isarm the system To disarm your system If you are only assigned to one area or the system is only programmed with one area enter your user code to disarm For a system with multiple areas 1 Enter your...

Page 17: ...ew the alarms that occurred the last time the system was armed 1 When the system is disarmed the screen will display Alarm in Memory Press menu 4 2 Press MENU 4 ALARM MEMORY Zones that were breached w...

Page 18: ...ser codes We suggest that you change this code to prevent others from accessing and changing options without authorization Your installer can set the System Master Code to be either 4 or 6 digits in l...

Page 19: ...ssary assign an access card remote control and user label as described in Programming User Settings on page 24 User Labels User labels personalize user codes and can be assigned in step 10 in Programm...

Page 20: ...ble 3 Keypad Letter Assignments Special Function Keys STAY Insert Space Pressing the STAY key inserts a blank space in the current cursor position SLEEP Delete Pressing the SLEEP key will delete the c...

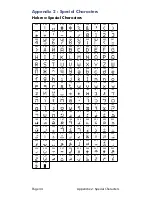
Page 21: ...e the MENU key is pressed it will switch between lower and upper case letters Special Characters After pressing the button the cursor will turn into a flashing black square Using Table 4 on page 22 en...

Page 22: ...Page 22 User Codes and Labels Table 4 Special Characters Catalogue Polish 001 002 003 004 005 006 007 Hungarian 001 002 003 Turkish 001...

Page 23: ...o program user codes using the NEware Software please contact your installer for information If the keypad emits a rejection beep at any point during the programming procedure you may have chosen an e...

Page 24: ...ions on page 28 Options that are bold are enabled by default By default all users can regular arm the system You can only assign areas to which you as a master user are assigned For example if you are...

Page 25: ...ff Master can program user codes On On Full Master can program user codes options and assignments Input Value Description 3 4 5 6 7 8 Duress Bypass Arm only Stay and Instant Force Off access keypad s...

Page 26: ...Regular arm Off On Stay arm On On Force arm Input Value Description 6 7 8 Add tolerance window to schedule User code follows schedule Off Access card unlocks door and disarms system On Access card un...

Page 27: ...e is used when someone forces a user to arm or disarm an area s By entering a user code P I N reserved for the Duress feature the system will arm or disarm the area s and then send a silent alarm to t...

Page 28: ...ion but has the Access Control option Option 1 enabled can now gain access to an access control door press MENU 8 UNLOCK DOOR and enter a user code When the option is OFF the user cannot access an Acc...

Page 29: ...s assigned schedule for the door is Monday to Friday from 9 00 a m to 5 00 p m and your installer sets the Tolerance Window at one hour the user with the Schedule Tolerance Window enabled will be able...

Page 30: ...disarm the armed area When option 8 is OFF a user can gain access to an access control door only if the door s area s is already disarmed NOTE For option 8 to function in the ON position option 5 Arm...

Page 31: ...oll through the Groups experiencing a trouble 2 Press the NUMBER of the trouble you wish to view Aside from setting the date and time clock loss if any troubles occur we strongly suggest that you cont...

Page 32: ...ck Lost 8 to view will appear in the trouble menu Refer to Setting Time Date on page 7 Group 9 GSM Troubles 1 Missing GSM Module 2 GSM RF Jam Supervision 3 No Service 5 to 8 Fail to Communicate 1 to 4...

Page 33: ...you wish to view 3 Use the and buttons to scroll through the events 4 Press the CLEAR button to exit Once you have entered the History Log you can change the order that the Event Record screens appear...

Page 34: ...Stay Arming Indicators Other Indicators NOTE For REM3 refer to the REM3 User Manual Action LED Sequence Auditory Feedback Disarming Green on Two beeps Exit delay Red green slow flash Confirmation beep...

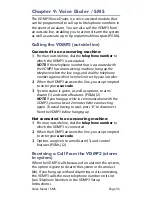
Page 35: ...answers the line you are prompted to enter your user code 3 System status is given as well as options to arm disarm 1 and control features PGMs 2 NOTE If you hang up while in communication with the VD...

Page 36: ...e will generate text messages for each phone number To program SMS options 1 Press MENU 9 SETTINGS 3 SMS MESSAGES 2 Enter the master code NOTE To see which SMS phone numbers have been programmed scrol...

Page 37: ...urning materials to test your fire detection devices Your installer will provide details on the best way to test your system System Maintenance Under normal use your system requires no maintenance oth...

Page 38: ...ill test all its connections and can send a report to your monitoring station If the system detects a problem the Trouble Display will show on the screen refer to Trouble Display on page 31 Call your...

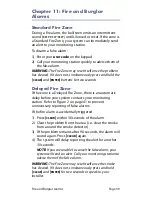
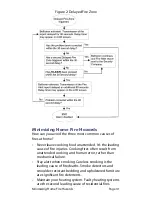
Page 39: ...Delayed Fire Zone there is an automatic delay before your system contacts your monitoring station Refer to Figure 2 on page 41 to prevent unnecessary reporting of false alarms If the fire alarm is ac...

Page 40: ...the escape plan frequently Plan two ways to escape from every room if possible Practice feeling the way out with eyes closed Instruct everyone never to stand up during a fire always crawl under the sm...

Page 41: ...ng cause of fire injuries Cooking fires often result from unattended cooking and human error rather than mechanical failure Stay alert when smoking Careless smoking is the leading cause of fire deaths...

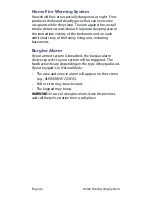
Page 42: ...and on each additional story of the family living unit including basements Burglar Alarm If your armed system is breached the burglar alarm devices specific to your system will be triggered The feedb...

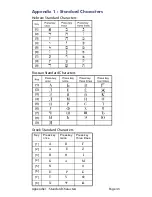
Page 43: ...tandard Characters Page 43 Appendix 1 Standard Characters Key Press key once Press key twice Press key three times 1 2 3 4 5 6 7 8 Russian Standard Characters Greek Standard Characters Hebrew Standard...

Page 44: ...098 099 100 101 102 103 104 105 106 107 108 109 110 111 112 113 114 115 116 117 118 119 120 121 122 123 124 125 126 127 160 161 162 163 164 165 166 167 168 169 170 171 172 173 174 175 176 177 178 179...

Page 45: ...1 102 103 104 105 106 107 108 109 110 111 112 113 114 115 116 117 118 119 120 121 122 123 124 125 126 127 160 161 162 163 164 165 166 167 168 169 170 171 172 173 174 175 176 177 178 179 180 181 182 18...

Page 46: ...09 110 111 112 113 114 115 116 117 118 119 120 121 122 123 124 125 126 127 128 129 130 131 132 133 134 135 136 137 138 139 140 141 142 143 144 145 146 147 148 149 150 151 152 153 154 155 156 157 158 1...

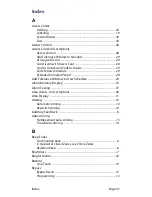
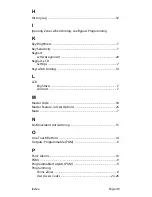
Page 47: ...s Schedule 29 Extended Unlocked Period 28 Add Tolerance Window to User Schedule 29 Alarm Memory Display 16 Alarm Testing 37 Area Access in User Options 28 Area Display 11 Arming 12 Automatic Arming 14...

Page 48: ...39 Deleting User Access Codes 23 Dim Delay 7 Intensity 7 Disarming Armed System 16 Display Alarms In Memory 16 User Actions in Memory 32 Duress in User Options 27 E Emergency Buttons 10 Entry Delay T...

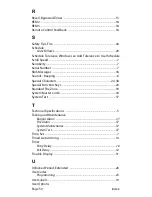
Page 49: ...tter Assignment 20 Keypad LCD Settings 7 Keyswitch Arming 14 L LCD Brightness 7 Contrast 7 M Master Code 18 Master Feature in User Options 26 Mute 7 N No Movement Auto Arming 15 O One Touch Buttons 14...

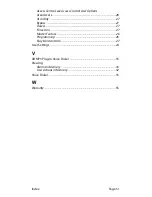
Page 50: ...7 SMS Messages 36 Sounds Beeping 6 Special Characters 22 44 Special Function Keys 20 Standard Fire Zone 39 System Master Code 18 System Test 37 T Technical Specifications 5 Testing and Maintenance Bur...

Page 51: ...Options Area Access 28 Arm Only 27 Bypass 27 Duress 27 Force Arm 27 Master Feature 26 Programming 26 Stay Instant Arm 27 User Settings 24 V VDMP3 Plug In Voice Dialer 35 Viewing Alarms In Memory 16 Us...

Page 52: ......

Page 53: ......

Page 54: ......

Page 55: ...iliates in Canada the United States and or other countries Certification For the latest information on products approvals such as UL and CE please visit www paradox com Warranty For complete warranty...

Page 56: ...K656 EU03 04 2011 PARADOX COM Printed in Canada...

Reviews: