background image

Page 12

Connections

Chapter 3: Connections

The following sections guide you through the steps required to 
connect the PCS300 Universal IP Reporting Module prior to 
mounting the unit.

GPRS12 Plug-In Communicator Module

If you will be reporting via GPRS, the GPRS12 Module is 
required. The GPRS12 Module is mounted directly onto the 
PCS300’s PCB. When using GPRS reporting, certain 
parameters must be defined in the PCS300 Web Interface 
page. For more information on system configurations, refer to 
“PCS300 Web Interface Page” on page 25.

To Install the GPRS12 Module

The following instructions are to be used only if you are 
installing the GPRS12 Module because it was purchased 
separately.

NOTE:

 Before installing the GPRS12 Module, disconnect all 

power to the unit.

1) Unscrew the two top and two bottom screws holding the 

top cover of the PCS300 into place.

2) Lift and remove the front cover of the PCS300.
3) Remove the two remaining screws holding the top plate 

into place and remove the top plate. Remove rubber 
grommet from the top plate.

4) Insert the plastic mounting rods over the holes located on 

the PCS300’s PCB. 

5) Place the GPRS12 Module directly onto the PCS300 

plastic mounting rods and align with the 18-pin female 
connector and snap into place. Slide the top plate over the 
antenna connector and secure with screws. Place back 
the PCS300 cover and secure with screws.

Summary of Contents for PCS300

Page 1: ...PCS300 Universal IP Reporting Module V1 0 Reference and Installation Manual...

Page 2: ...liates in Canada the United States and or other countries Certification For the latest information on products approvals such as UL and CE please visit www paradox com Warranty For complete warranty i...

Page 3: ...2 GPRS12 Plug In Communicator Module 12 GPRS12 Module SIM Card Connection 14 Connections for Reporting 15 Optional Power Supply Connections 16 Chapter 4 Installation 17 Wall Mount Installation 17 Ante...

Page 4: ...0 Web Interface page via a web browser From the PCS300 Web Interface page up to two separate unique reporting sequences can be defined each one linked to a specific phone number Each reporting method...

Page 5: ...unique reporting sequences Module configuration and status via the PCS300 Web Interface Support for up to two inputs with report activation capability including SMS notification Firmware upgrades via...

Page 6: ...Communicator Module optional GPRS12 Module GSM Quad Band antenna Lock washer Washer Required Optional Items Active standard GSM provider SIM card required for GPRS reporting Antenna extension optiona...

Page 7: ...t covers technical specifications light emitting diode LED functionality and an overview of the PCS300 system components Module Components Front View 1 GSM Quad Band antenna required when using the GP...

Page 8: ...Page 8 Overview Module Components Inside View 1 SIM Card slot supports standard GSM provider SIM cards 2 GPRS12 Plug In Communicator Module optional for GPRS reporting 1 2...

Page 9: ...ect the PCS300 to an external power supply such as the PS817 optional and to connect up to 2 inputs 2 Ethernet connector used to connect the PCS300 to the IP network 3 R 1 T 1 and Ring Tip Terminals u...

Page 10: ...e Green module is communicating Power Green power is present Signal Strength Indicates the quality of the signal 1 LED lit weak signal relocate module or use an antenna extension 3 LEDs lit strong sig...

Page 11: ...ain 3dBi impedance 50 ohm Input power 2W peak power Power Input 12 Vdc from control panel or external power supply Consumption Standby 150 mA Average 300 mA Peak 1 4A during GPRS GSM transmission Dime...

Page 12: ...ns are to be used only if you are installing the GPRS12 Module because it was purchased separately NOTE Before installing the GPRS12 Module disconnect all power to the unit 1 Unscrew the two top and t...

Page 13: ...nna connector followed by the washer tighten using pliers turn approximately 1 8 of a turn Screw the antenna securely into place Once the GPRS12 Module and the antenna have been installed re assemble...

Page 14: ...Personal Identification Number PIN of the SIM card be disabled Refer to your cellular phone s manual for more information on how to disable the PIN To install the SIM card Before installing the SIM ca...

Page 15: ...separately please refer to GPRS12 Plug In Communicator Module on page 12 for installation instructions To connect the module for GPRS reporting ensure that the Ring Tip terminals of the control panel...

Page 16: ...ol panel s battery is low or if power failures are anticipated an external power supply with a backup battery PS817 is highly recommended For more information on connecting to an external power supply...

Page 17: ...l or similar type surface It is important to mount the metal box as far away as possible from any electronic equipment and that the metal box is mounted as high as possible to ensure protection from i...

Page 18: ...odule The antenna extension is sold with a wall mounting bracket To Install the Antenna Extension 1 Use the mounting bracket to mark the holes onto the mounting surface 2 Drill the holes and insert th...

Page 19: ...e to upgrade and which software version to install When you confirm the update the PCS300 will be upgraded with the selected version within minutes Accessing the In Field Paradox Upgrade Software Appl...

Page 20: ...unication Settings 1 Select the Internet tab 2 Enter the IP address of the PCS300 you wish to upgrade If you do not have this information then press the Search button and select the product from the l...

Page 21: ...d the latest firmware files directly from the Paradox website Note If you select a firmware version that is older than the one currently installed on the PCS300 the system will display a warning stati...

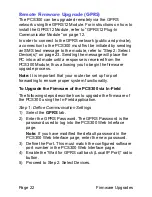
Page 22: ...o begin the firmware upgrade process Note It is important that your router be set up for port forwarding to ensure proper system functionality To Upgrade the Firmware of the PCS300 via In Field The fo...

Page 23: ...se refer to the PCS300 Operations Manual 2 Enter the SMS text information to be sent to the PCS300 as it is displayed on the screen using a cellular phone e g Pparadox A10 10 1 100 P10001 Once the con...

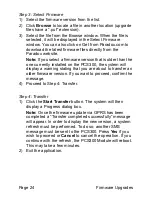
Page 24: ...he PCS300 the system will display a warning stating that you are about to transfer an older firmware version If you want to proceed confirm the message 4 Proceed to Step 4 Transfer Step 4 Transfer 1 C...

Page 25: ...Monitoring Receiver Define reporting sequences Configure inputs and set SMS notifications Define additional configuration settings In order to begin the configuration of the PCS300 a connection to a...

Page 26: ...Consumption 11 Control panel 4 6 11 14 15 16 D Dimensions 11 E Encryption 5 11 Error 10 Ethernet connector 9 Ethernet port 15 20 External power supply 16 F Firmware upgrades 5 19 G GPRS 5 6 8 10 11 12...

Page 27: ...failures 16 Power input 11 Power supply 11 16 Power input terminals 9 R R 1 T 1 terminals 9 15 Remote firmware upgrade 22 Required optional items 6 Ring Tip terminals 9 15 S Signal quality 17 Signal...

Page 28: ...__ _________________________________________________ _________________________________________________ _________________________________________________ _______________________________________________...

Page 29: ...__ _________________________________________________ _________________________________________________ _________________________________________________ _______________________________________________...

Page 30: ...__ _________________________________________________ _________________________________________________ _________________________________________________ _______________________________________________...

Page 31: ......

Page 32: ...0 791 1919 Monday to Friday from 8 00 a m to 8 00 p m EST For technical support outside Canada and the U S call 00 1 450 491 7444 Monday to Friday from 8 00 a m to 8 00 p m EST Please feel free to vis...

Reviews: