background image

Spectra Keypads 9

2.6 TROUBLE DISPLAY 

Your alarm system continuously monitors fourteen possible
trouble conditions. Most of these trouble conditions can be
reported directly to your Security Company. 

We strongly suggest that you inform your Security
Company of the trouble and allow them to service
your system.

The keypad can be programmed to emit a “

BEEP

every 5 seconds whenever a new trouble condition
has occurred. Press the 

[

TRBL

]

  button to stop the

“Trouble Beep”.

For


Spectra 1689 LED Keypad: 

When a

trouble condition occurs, the 

[

TRBL

]

 symbol

will illuminate. 

How Do I Access the Trouble Display?

1) Press the 

[

TRBL

button 

The 

[

TBL

]

 symbol will flash and number(s) 

corresponding to the trouble(s) will illuminate.

2) Read the corresponding explanation of

the trouble from the Trouble List. If no
repair instructions are given, call your
Security Company for repairs.

3) Press the 

[

CLEAR

]

 button to exit

Summary of Contents for Spectra 1641BL

Page 1: ...LCD and 16 Zone LED Keypads 1689 1641 16 Zone LED Keypad LCD Keypad User s Manual...

Page 2: ...2 6 Trouble Display 9 2 7 Partitioning 13 3 0 PROGRAMMING ACCESS CODES 14 3 1 System Master Code Default 123456 14 3 2 Master Codes 14 3 3 Duress Code 15 3 4 Programming Access Codes 15 4 0 ARMING DI...

Page 3: ...s 28 5 2 Keypad Muting 29 5 3 Panic Alarms 30 5 4 Program Time clock 30 5 5 PGM Button Programmable Outputs 31 5 6 Quick Function Keys 31 5 7 Keypad Settings For LCD Keypads only 32 6 0 FIRE ALARMS 33...

Page 4: ...ful features that anyone can use without memorizing complex and confusing codes The system consists of the Spectra Control Panel one or more Spectra Keypads various input devices i e motion detectors...

Page 5: ...ill emit a rejection beep and the action will be cancelled Refer to System Checklist in section 8 0 for details 2 1 KEYPAD INDICATOR LIGHTS The state of each light on the Spectra Keypads represents a...

Page 6: ...pads 5 2 2 VISUAL FEEDBACK 2 2 1 For the Spectra 1689 LED Keypad The numbers and symbols on the keypad s screen communicate your system s status as shown in Figure 2 2 Figure 2 2 Overview of the 1689...

Page 7: ...ion on the keypad it will guide you with beep tones You should be familiar with these Confirmation Beep When an operation i e arming disarming is successfully entered on the keypad or when the system...

Page 8: ...uminate After disarming the system press the MEM button to illuminate the number symbols corresponding to the zones that were in alarm To exit the Alarm Memory Display press the CLEAR button For Spect...

Page 9: ...Screens see Figure 2 4 Once you enter the Event List the time the event occurred and what event occurred will scroll on the screen As you press the t button the next pair will scroll Figure 2 4 Examp...

Page 10: ...emit a BEEP every 5 seconds whenever a new trouble condition has occurred Press the TRBL button to stop the Trouble Beep For Spectra 1689 LED Keypad When a trouble condition occurs the TRBL symbol wil...

Page 11: ...tery Trouble The backup battery is disconnected or the battery voltage is getting low 2 Wireless Transmitter Battery Low The battery voltage in one or more Wireless Transmitters is getting low Also th...

Page 12: ...a fuseless circuit will automatically shut down if the current exceeds a predetermined value When the system is disarmed the current is cut from the bell output and the Trouble warning may extinguish...

Page 13: ...re Zone Trouble A wiring problem on the fire zone is occurring 12 Module Loss A module is no longer communicating with your system To re program the clock press the 8 button after Step 2 from the Trou...

Page 14: ...itioning feature that can divide your alarm system into two distinct areas identified as Partition 1 and Partition 2 Partitioning can be used in installations where shared security systems are more pr...

Page 15: ...er to the System Checklist in section 8 0 3 1 SYSTEM MASTER CODE Default 123456 The System Master Code can arm or disarm any partition using any of the methods described in this section and can create...

Page 16: ...arm or disarm your system entering the Access Code assigned to User 048 will arm or disarm the system and immediately transmit a silent alert Duress Code to the Security Company 3 4 PROGRAMMING ACCESS...

Page 17: ...ODE 5 Press CLEAR to exit How Do I Delete Access Codes 1 Repeat steps 1 to 3 see above 2 Press the FORCE button once for each digit in the Access Code 4 or 6 times until the keypad emits a CONFIRMATIO...

Page 18: ...d may beep during the Exit Delay 4 2 DISARMING DEACTIVATING AN ALARM To disarm an armed system or an alarm enter your access code An entry point like the front door will be programmed with one of two...

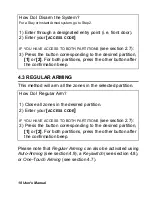
Page 19: ...gh a designated entry point i e front door 2 Enter your ACCESS CODE IF YOU HAVE ACCESS TO BOTH PARTITIONS see section 2 7 3 Press the button corresponding to the desired partition 1 or 2 For both part...

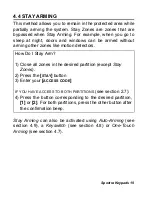
Page 20: ...nes like motion detectors Stay Arming can also be activated using Auto Arming see section 4 9 a Keyswitch see section 4 8 or One Touch Arming see section 4 7 How Do I Stay Arm 1 Close all zones in the...

Page 21: ...Therefore any armed zone that is breached will immediately generate an alarm If you have access to both partitions To Instant Arm one partition 1 Press the STAY button 2 Enter your ACCESS CODE 3 Choos...

Page 22: ...y a keypad For example when arming and the motion detector is a Force Zone the system will allow you to arm even if the zone is open Force Arming can also be activated by using One Touch Force Arming...

Page 23: ...ra 1689 LED Keypad When zones are bypassed the BYP symbol will illuminate Manual Bypass Programming can also be activated by using One Touch Bypass Programming see section 4 7 7 To remove the Bypass f...

Page 24: ...desired partition 1 or 2 4 6 2 Bypass Recall Feature After disarming the system the bypass entries are erased The Bypass Recall Feature reinstates the previous bypass entries saved in memory This elim...

Page 25: ...access to any other alarm system operations For details on Regular Arming refer to section 4 3 4 7 4 One Touch Stay Arming Press and hold the STAY button for 3 seconds see Note1 p 23 to arm all zones...

Page 26: ...will switch to Regular Arming see section 4 3 Exit and Force Arm Press and hold the FORCE button for 3 seconds see Note1 p 23 to start the Exit Delay see section 4 1 When the Exit Delay elapses the s...

Page 27: ...Maintained Keyswitch set the keyswitch to the on position To disarm the system set the keyswitch to the off position To arm the system using a Momentary Keyswitch set the keyswitch to the on position...

Page 28: ...Arming Your panel can be programmed to arm the system and or send a report if no zone activity occurs for a pre programmed amount of time This is a particularly useful feature when supervising an ind...

Page 29: ...number again so the number extinguishes or press FORCE to remove Chiming from all zones programmed to Chime When you program Chime Zones once you press and hold the 9 button the ARM1 STAY1 ARM2 STAY2...

Page 30: ...n a button is pressed Therefore when muted the keypad will not beep during an alarm Press and hold the CLEAR button for 3 seconds to enable or disable Keypad Muting If the keypad emits a confirmation...

Page 31: ...ilent alarms and can communicate specific messages to your monitoring station For instance pressing 1 3 can mean call the police or anything you require Press hold buttons 1 and 3 for the police Press...

Page 32: ...ssed and held for 3 seconds 5 6 QUICK FUNCTION KEYS Upon request of your installer or Security Company you may have to perform one of the following Press 5 6 1 Test Report ENTER MASTER CODE MEM If you...

Page 33: ...TTINGS For LCD Keypads only You can modify the keypad s setting to suit your needs 1 Press hold 6 for 3 seconds 2 Choose one Press 1 Backlight the keypad s light 7 is the brightest 2 Contrast characte...

Page 34: ...ent unnecessary reporting of false alarms If there is no fire condition contact your Security Company immediately to avoid an unnecessary response What do I do if a Delayed Fire Zone was set off accid...

Page 35: ...ated Transmission of the report delayed for 30 seconds Has CLEAR been pressed within 30 seconds Bell siren silenced Report transmission delayed an additional 90 seconds Problem corrected Generate alar...

Page 36: ...han in apartments since the heating systems in single family homes are often not professionally maintained Fire Safety Tips In the event of a fire remember time is the biggest enemy and every second c...

Page 37: ...ght Fires produce smoke and deadly gases that can overcome occupants while they sleep To warn against fire smoke detectors should be installed outside each separate sleeping area in the immediate vici...

Page 38: ...ise you of the best way to test your particular system Do not use open flame or burning materials to test your fire detection devices Contact your installer for safe methods of testing your system Und...

Page 39: ...rtition 1 or 2 Byp Stay Force 24Hr Entry Delay 01 _______________ ____ l l l l l 02 _____________ Keyswitch Y l N l Type ____________ ____ l l l l l 03 ______________ Fire Zone Y l N l Delayed Y l N l...

Page 40: ...__ l l l l l 14 _______________ ____ l l l l l 15 _______________ ____ l l l l l 16 _______________ ____ l l l l l User and Name Partition 1 or 2 Byp Stay Force Arm Only PGM Only 001 ____________ Syst...

Page 41: ...l l l l l 014 _____________ ____ l l l l l 015 _____________ ____ l l l l l 016 _____________ ____ l l l l l 017 _____________ ____ l l l l l 018 _____________ ____ l l l l l 019 _____________ ____ l...

Page 42: ..._ l l l l l 034 _____________ ____ l l l l l 035 _____________ ____ l l l l l 036 _____________ ____ l l l l l 037 _____________ ____ l l l l l 038 _____________ ____ l l l l l 039 _____________ ____...

Page 43: ...________ l Silent l Audible l Off 4 6 Aux or ___________ l Silent l Audible l Off 7 9 Fire or ___________ l Silent l Audible l Off PGMs PGM 1 ___________________________________________ PGM 2 ________...

Page 44: ..._____sec time to disarm before alarm enter through zone ___________ Alarm will activate siren or bell for ______ min Other Information Installed by __________________ Date ______________ Serviced by _...

Page 45: ...e following programmed digit will illuminate and so forth For example if you wish to change User Code 004 from 123456 to 454545 after entering section 004 number 1 will turn on Press the 4 button and...

Page 46: ...onjunction with products not manufactured by Seller Seller cannot guarantee the performance of the security system Seller obligation and liability under this warranty is expressly limited to repairing...

Page 47: ......

Reviews: