background image

 18

!

Important Safety Instructions

1. Read and follow all warning notices and instructions marked on the product or

included in the manual.

2. This product is intended to be used with a 3-wire grounding type plug – a plug

which has a grounding pin. This is a safety feature. Equipment grounding is vital to
ensure safe operation. Do not defeat the purpose of the grounding type plug by
modifying the plug or using an adapter.

Prior to installation, use an outlet tester or a voltmeter to check the ac receptacle
for the presence of earth ground. If the receptacle is not properly grounded, the
installation must not continue until a qualified electrician has corrected the
problem.

If a 3-wire grounding type power source is not available, consult a qualified
electrician to determine another method of grounding the equipment.

3. Slots and openings in the cabinet are provided for ventilation. To ensure reliable

operation of the product and to protect it from overheating, these slots and
openings must not be blocked or covered.

4. Do not allow anything to rest on the power cord and do not locate the product

where persons will walk on the power cord.

5. Do not attempt to service this product yourself, as opening or removing covers

may expose you to dangerous high voltage points or other risks. Refer all servicing
to qualified service personnel.

6. General purpose cables are provided with this product. Special cables, which may

be required by the regulatory inspection authority for the installation site, are the
responsibility of the customer.

7. When installed in the final configuration, the product must comply with the

applicable Safety Standards and regulatory requirements of the country in which it
is installed. If necessary, consult with the appropriate regulatory agencies and
inspection authorities to ensure compliance.

8. A rare phenomenon can create a voltage potential between the earth grounds of

two or more buildings. If products installed in separate buildings are
interconnected, the voltage potential may cause a hazardous condition. Consult a
qualified electrical consultant to determine whether or not this phenomenon exists
and, if necessary, implement corrective action prior to interconnecting the products.

Summary of Contents for FrameSaver SLV 9626

Page 1: ...m Select Library Technical Manuals FrameSaver Frame Relay Devices Select the following document 9024 A2 GB20 FrameSaver SLV 9x24 User s Guide To request a paper copy of a Paradyne document Within the U S A call 1 800 PARADYNE 1 800 727 2396 Outside the U S A call 1 727 530 8623 Package Checklist Verify that your package contains the following FrameSaver SLV service level verifier 9626 unit Power c...

Page 2: ...able to connect to and set up the FrameSaver unit Node IP Addresses and Subnet Masks see your network administrator for this information IP Addresses of trap manager s An RJ11 cable for the modem See the User s Guide for additional information on Troubleshooting Technical Specifications Cables Connectors and Pin Assignments Cables You May Need to Order If connecting to a Order a Model Feature Numb...

Page 3: ...plug with the notch above the POWER jack Make sure the locking tab snaps securely into the jack POWER COM DBM MDM NET 99 16478 Power Cord Transformer Insert the 3 prong plug into an ac outlet O K A L M The front panel OK LED lights 2 3 3 Prong Grounded AC Outlet Locking Tab POWER 2 3 4 Plug the power cord into the grounded power outlet Verification Check Did any LEDs light If yes the FrameSaver un...

Page 4: ...Flow Control set to None 2 Insert the DB25 end of the EIA 232 cable into the FrameSaver unit s COM port POWER COM DBM MDM NET To Connect to a PC or Async Terminal COM Port 99 16348 3 Insert the other end of the cable into the terminal or PC 4 Tighten the screws on each side of the connector to secure them 5 Press Enter on the keyboard or Return depending upon your keyboard to display the Main Menu...

Page 5: ... the cursor is on Configuration 2 Press Enter to display the Configuration menu The Load Configuration From menu appears 3 Press Enter to select Current Configuration the cursor is already on this selection The Configuration Edit Display menu appears This sequence of steps would be shown as the menu selection sequence Main Menu Configuration To save a configuration option change 1 Press Ctrl a to ...

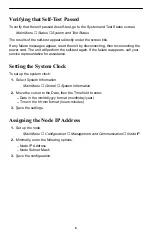
Page 6: ...ain If the failure reappears call your service representative for assistance Setting the System Clock To set up the system clock 1 Select System Information Main Menu Control System Information 2 Move the cursor to the Date then the Time field to enter Date in the mm dd yyyy format month day year Time in the hh mm format hours minutes 3 Save the settings Assigning the Node IP Address 1 Set up the ...

Page 7: ... is the default setting 3 Save the configuration Setting Up Call Directories if Trap Dial Out Is Desired 1 Set up directory phone numbers Main Menu Control Modem Call Directories 2 Select Directory Number A for Alarm 3 Enter the phone number s Valid characters include ASCII text B for blind dialing W for wait for dial tone P for pulse dialing unless B specified T for tone dialing unless B specifie...

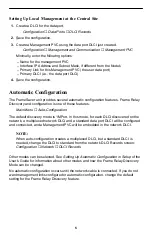
Page 8: ... these features Main Menu Auto Configuration The default discovery mode is 1MPort In this mode for each DLCI discovered on the network a multiplexed network DLCI and a standard data port DLCI will be configured and connected and a Management PVC will be embedded in the network DLCI NOTE When auto configuration creates a multiplexed DLCI but a standard DLCI is needed change the DLCI to standard fro...

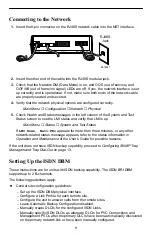
Page 9: ... Down Net1 FR1 appears for more than three minutes or any other network related status message appears refer to the status information in Operation and Maintenance of the User s Guide for possible reasons If the unit does not have ISDN backup capability proceed to Configuring SNMP Trap Managers and Trap Dial Out on page 13 Setting Up the ISDN DBM These instructions are for units with ISDN backup c...

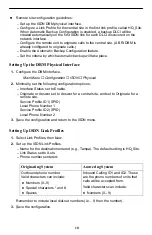
Page 10: ...t the following configuration options Interface Status set to Enable Originate or Answer set to Answer for a central site and set to Originate for a remote site Service Profile ID1 SPID Local Phone Number 1 Service Profile ID2 SPID Local Phone Number 2 3 Save the configuration and return to the ISDN menu Setting Up ISDN Link Profiles 1 Select Link Profiles then New 2 Set up the ISDN Link Profiles ...

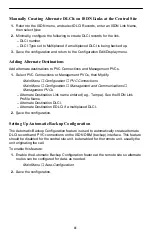
Page 11: ...ns Main Menu Configuration Management and Communications Management PVCs Alternate Destination Link name entered e g Tampa See the ISDN Link Profile Name Alternate Destination DLCI Alternate Destination EDLCI if a multiplexed DLCI 2 Save the configuration Setting Up Automatic Backup Configuration The Automatic Backup Configuration feature is used to automatically create alternate DLCI records and ...

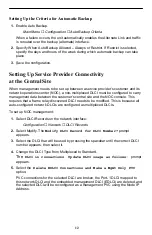
Page 12: ...tral site and the NOC console This requires that a frame relay discovered DLCI needs to be modified This is because all auto configured network DLCIs are configured as multiplexed DLCIs To set up NOC management 1 Select DLCI Records on the network interface Configuration Network DLCI Records 2 Select Modify The Modify DLCI Record for DLCI Number prompt appears 3 Select the DLCI that will be used b...

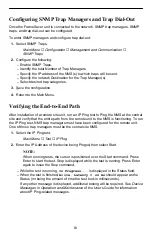
Page 13: ...e and verify that the entire path from the remote unit to the NMS is functioning To run the IP Ping test NMS trap managers must have been configured for the remote unit One of those trap managers must be the central site NMS 1 Select the IP Ping test Main Menu Test IP Ping 2 Enter the IP Address of the device being Pinged then select Start NOTE When running tests the cursor is positioned over the ...

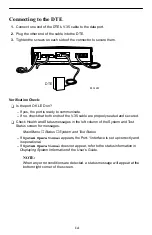
Page 14: ...t both ends of the V 35 cable are properly seated and secured Check Health and Status messages in the left column of the System and Test Status screen for messages Main Menu Status System and Test Status If System Operational appears the Port 1 interface is set up correctly and is operational If System Operational does not appear refer to the status information in Displaying System Information of ...

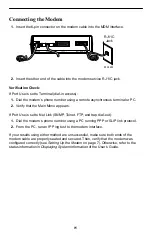
Page 15: ... PC 2 Verify that the Main Menu appears If Port Use is set to Net Link SNMP Telnet FTP and trap dial out 1 Dial the modem s phone number using a PC running PPP or SLIP link protocol 2 From the PC run an IP Ping test to the modem interface If your results using either method are unsuccessful make sure both ends of the modem cable are properly seated and secured Then verify that the modem was config...

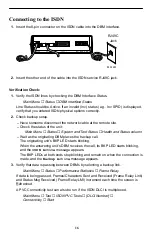
Page 16: ...ystem and Test Status Health and Status column Wait as the originating DBM places the backup call The originating unit s BKP LED starts blinking When the answering unit s DBM receives the call its BKP LED starts blinking and the ISDN Active message appears The BKP LEDs at both ends stop blinking and remain on when the connection is made and the Backup Active message appears 3 Verify that data is p...

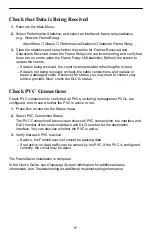
Page 17: ...ed to contact your service provider Next check the DLCI s status Check PVC Connections Check PVC connections to verify that all PVCs including management PVCs are configured and to see whether the PVC is active or not 1 Press Esc to return to the Status menu 2 Select PVC Connection Status The PVC Connection Status screen shows all PVC connections the interface and DLCI number of the source interfa...

Page 18: ...or covered 4 Do not allow anything to rest on the power cord and do not locate the product where persons will walk on the power cord 5 Do not attempt to service this product yourself as opening or removing covers may expose you to dangerous high voltage points or other risks Refer all servicing to qualified service personnel 6 General purpose cables are provided with this product Special cables wh...

Page 19: ...gainst harmful interference when the equipment is operated in a commercial environment This equipment generates uses and can radiate radio frequency energy and if not installed and used in accordance with the instruction manual may cause harmful interference to radio communications Operation of this equipment in a residential area is likely to cause harmful interference in which case the user will...

Page 20: ...t can be connected to the line as determined by the total RENs contact the local telephone company If your unit causes harm to the telephone network the telephone company may discontinue your service temporarily If possible they will notify you in advance But if advance notice is not practical you will be notified as soon as possible You will be advised of your right to file a complaint with the F...

Page 21: ...pability Package I 2B service This feature is only required if all remote systems will call the same phone number Busy Fixed Call Forwarding forwards a call to the BRI B2 channel when the BRI B1 channel is busy Make the modem connection using a USOC type RJ11C jack The modem cannot be used on public coin phone service provided by the telephone company Connection to party line service is subject to...

Page 22: ...lier Any repairs or alterations made by the user to this equipment or equipment malfunctions may give the telecommunications company cause to request to disconnect the equipment Users should ensure for their own protection that the electrical ground connections of the power utility telephone lines and internal metallic water pipe system if present are connected together This precaution may be part...

Page 23: ... representative Within the U S A call 1 800 870 2221 Outside the U S A call 1 727 530 2340 Document Feedback We welcome your comments and suggestions about this document Please mail them to Technical Publications Paradyne Corporation 8545 126th Ave N Largo FL 33773 or send e mail to userdoc paradyne com Include the number and title of this document in your correspondence Please include your name a...

Reviews: