Wireless Data Gateway
5-2
November 1996
3981-A2-GN31-20
Mount the AAC Chassis
Mount the AAC chassis in the cabinet before inserting
the different cards. Always remove all cards before
removing the chassis from the cabinet.
In this manual the AAC is shown at the top of the
cabinet, but this is not required.
Install the Power Supply
A power supply (Model 25802) may be inserted or
removed while power is on or off.
.
Procedure
1. Remove the front panel covering the power slots.
2. Holding the power supply by its metal handle,
slide it into either power slot (F1 or F2), and push
it firmly into place.
3. Secure the lower retaining screw.
4. Replace the front panel.
The screw connectors on the terminal block at the back
of the chassis require Size 6 (0.3-inch) insulated ring-type
connectors. See the ACCULINK Access Controller
Reference Guide for more information.
Install the Plug-In Module
The Dual T1/E1 Link WAN card (Model 25812 or
25813) contains two separate line interface modules that
are connected to the T1 looparound trunks on the mobile
switch.
•
WAN1-1 is the T1 looparound trunk from the
mobile switch.
•
WAN1-2 is the T1 looparound trunk back to the
mobile switch.
The WAN card requires a plug-in module for each link:
•
A DSX/CEPT plug-in module (Model 25887) or
•
A CSU plug-in module (Model 25815).
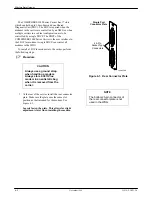
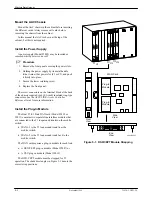
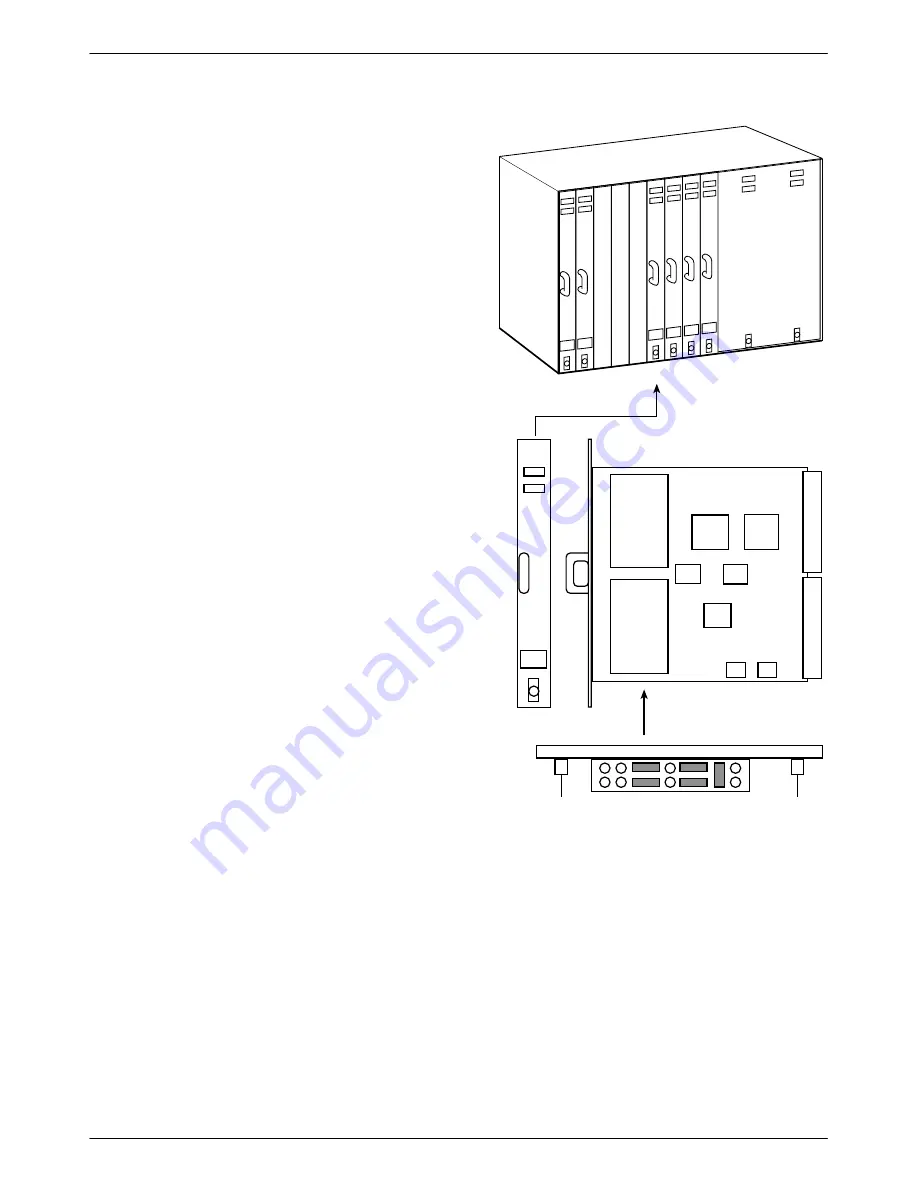
The DSX/CEPT module must be strapped for T1
operation. The shaded rectangles in Figure 5-1 denote the
correct strap positions.
End
View
496-14790-02
WAN Card
WAN WA
N WAN
WAN
CPU
CPU
W1
W2
W3
W4
C1
C2
WAN
Front
View
Plug-In
Module
Plug-In
Module
Side
View
Figure 5-1. DSX/CEPT Module Strapping

