


ASSEMBLY CONTINUED
7
8.
Place the winch on the mounting plate at the back of the HANGPRO™, with the gear side
of the winch near the mast.
9.
Insert three 7/8” x 3/8” bolts down through the winch base and mounting plate and attach
the 3/8” Nylock nuts from beneath. Tighten with two 9/16” wrenches or adjustable wrench.
10.
Attach the Winch Handle by pushing in and turning clockwise.
11.
Secure the handle with the bolt, washer, spacer and spring provided with the winch as
shown. Also noted in the accompanying Winch Manual. Tighten with a 3/8” wrench.
11a.
It may be necessary to place a flathead screwdriver into the winch gears to prevent
them from turning as you tighten the winch handle and winch handle bolt.
12.
Unwrap the cable and string the loose end over the sheave at the top of the Mast. If the
Cable Keeper is in place you may need to remove it by loosening the nut visible in fig.15
and 16. DO NOT REMOVE THE BOLT.
13.
Run the cable over the Cable Roller and down through the opening in the upper handle
as shown in the Image above.
14
. From inside the winch spool, thread the loop anchor of the cable through the round hole
in the sidewall of the spool. Secure the loop with the carriage bolt, washer and nut
provided.
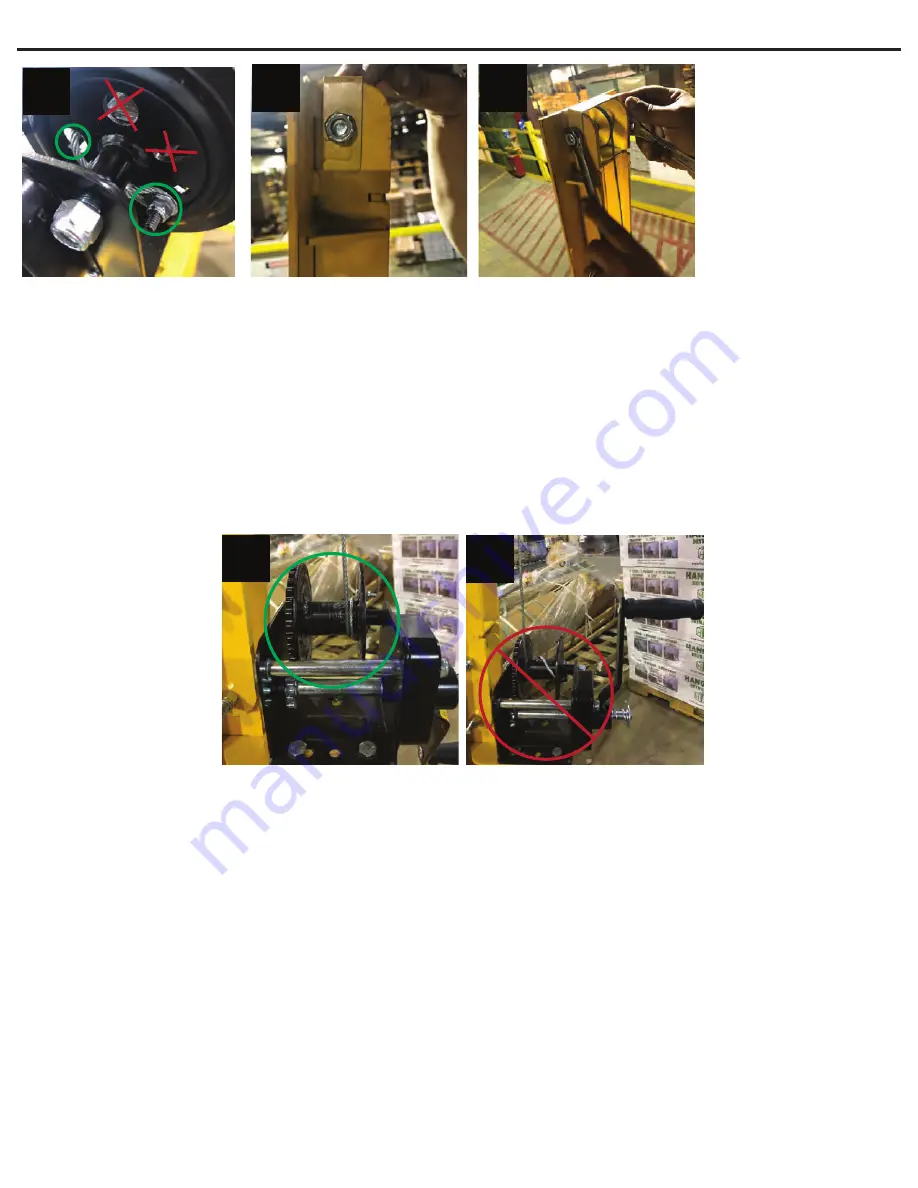
17a:
Manually guide the cable so it begins wrapping at the right side of the spool as pictured. As you
turn the winch, the cable will wind to the le�.
17b:
The image shown above shows the cable in an improper star�ng posi�on at the le� side of the
spool.
14a.
The carriage bolt head must be positioned through a square hole on the inside of the
winch spool with the washer and nut on the outside of the spool wall. Tighten with 3/8”
wrench.
15.
Attach the Cable Keeper to the top of the Upper Mast.
16.
Tighten the Cable Keeper with a 5/8 wrench and an adjustable wrench so the nut is firmly
secured to the bolt. DO NOT OVERTIGHTEN! THE SHEAVE MUST BE ABLE TO TURN
FREELY.
14a
15
16
17a
17b


