background image

Copyright 2010 DTX International
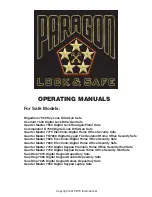
OPERATING MANUALS

For Safe Models:

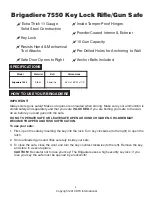
Brigadiere 7550 Key Lock Rifle/Gun Safe
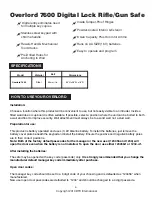
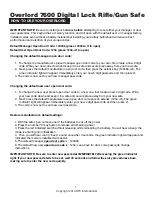
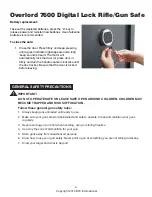
Overlord 7600 Digital Lock Rifle/Gun Safe
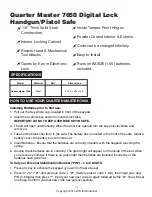
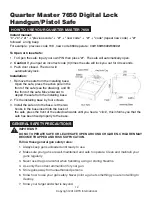
Quarter Master 7650 Digital Lock Handgun/Pistol Safe
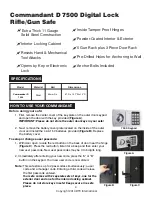
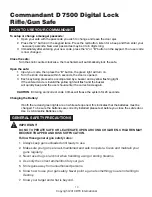
Commandant D 7500 Digital Lock Rifle/Gun Safe
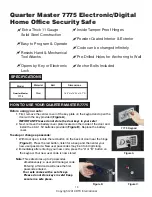
Quarter Master 7775 Electronic/Digital Home Office Security Safe
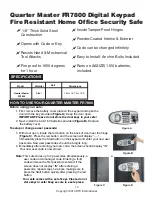
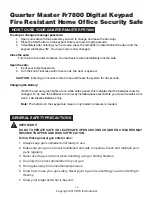
Quarter Master FR7800 Digital Keypad Fire Resistant Home Office Security Safe
Quarter Master 7825  Electronic/Digital Home Office Security Safe
Quarter Master 7850  Electronic/Digital Home Office Security Safe
Quarter Master 7700 Digital Keypad Premium Home Office Security Wall Safe
Quarter Master 7750 Digital Keypad Deluxe Home Office Security Wall Safe
SureDrop 7875 Digital Keypad Depository Safe
SureDrop 7900 Digital Keypad Double Depository Safe
SureDrop 7925 Digital Keypad Deluxe Depository Safe
Quarter Master 7950 Digital Keypad Laptop Safe


Summary of Contents for Brigadiere 7550

Page 1: ...00 Digital Keypad Fire Resistant Home Office Security Safe Quarter Master 7825 Electronic Digital Home Office Security Safe Quarter Master 7850 Electronic Digital Home Office Security Safe Quarter Mas...

Page 2: ...Office Security Safe 15 16 Quarter Master 7825 Electronic Digital Home Office Security Safe 17 18 Quarter Master 7850 Electronic Digital Home Office Security Safe 17 18 Quarter Master 7700 Digital Ke...

Page 3: ...ponsible for any expenses incurred by the customer under the terms of this warranty nor shall it be responsible for any damages consequential special contingent or otherwise or expenses or injury aris...

Page 4: ...nition is stored safely and separately and that your safe IS LOCKED If you are bolting your safe to the wall do so before you load guns into the safe DO NOT OPERATE SAFE OR LEAVE SAFE OPEN AROUND CHIL...

Page 5: ...ur guns are well maintained and safe to operate Clean and maintain your guns regularly 3 Never use drugs or alcohol when handling using or storing firearms 4 Use only the correct ammunition for your g...

Page 6: ...ration for use This product is battery operated and uses 1 9V Alkaline battery To install the batteries just remove the battery cover plate beneath the keypad and install the battery Ensure the positi...

Page 7: ...e to a new one first create a new 4 digit code Write your new code down and keep it in a safe and secure place away from your new safe 2 Next press the default manufacturer user open door code plus an...

Page 8: ...PERATE SAFE OR LEAVE SAFE OPEN AROUND CHILDREN CHILDREN MAY BECOME TRAPPED AND RISK SUFFOCATION Follow these general gun safety rules 1 Always keep guns unloaded until ready to use 2 Make sure your gu...

Page 9: ...s in your safe 2 Next remove the battery cover plate located on the inside of the outer door and install the 4 AA 1 5V batteries provided Figure B Replace the battery cover To setup or change a user p...

Page 10: ...correct code again CAUTION Entering an incorrect code 3 times will freeze the system for 20 seconds Changing the Battery If both the red and green lights are on while safe opened this indicates that t...

Page 11: ...matically When the door has opened turn the key anti clockwise and remove it Take out the black liner from in the safe The battery box is located in the front of the safe remove battery cover the batt...

Page 12: ...se let the two hooks in the base insert into the back of the safe press the front of the safe downwards until you hear a click this informs you that the safe has been fixed properly to the base 1 2 3...

Page 13: ...s in your safe 2 Next install the 4 AA 1 5V batteries provided Figure B Replace the battery cover To setup or change a user passcode 1 With door open locate the red button on the back of door near the...

Page 14: ...seconds Changing the Battery If both the red and green lights are on while safe opened this indicates that the batteries must be changed To be sure the batteries are correctly installed please test b...

Page 15: ...ded Figure A IMPORTANT Please do not store the door keys in your safe 2 Next remove the battery cover plate located on the inside of the door and install the 4 AA 1 5V batteries provided Figure B Repl...

Page 16: ...ct code again CAUTION Entering an incorrect code 3 times will freeze the system for 20 seconds Changing the Battery If both the red and green lights are on while safe opened this indicates that the ba...

Page 17: ...NT Please do not store the door keys in your safe 2 Next remove the battery cover plate located on the inside of the door and install the 4 AA 1 5V batteries provided Figure C Replace the battery cove...

Page 18: ...h and the buzzer will quickly beep and the user should enter the correct code again CAUTION Entering an incorrect code 3 times will freeze the system for 20 seconds Changing the Battery If both the re...

Page 19: ...safe stores up to 2 passcodes simultaneously a user code and a manager code Entering a third code will erase the first passcode entered Your safe comes with a set of keys Please do not store keys in s...

Page 20: ...shing light If the entered code is invalid the yellow light will flash and the buzzer will quickly beep and the user should enter the correct code again CAUTION Entering an incorrect code 3 times will...

Page 21: ...the key into the door lock and open the door Figure C IMPORTANT Please do not store the door keys in your safe 2 Next remove the battery cover plate located on the inside of the door and install the...

Page 22: ...nvalid the yellow light will flash and the buzzer will quickly beep and the user should enter the correct code again CAUTION Entering an incorrect code 3 times will freeze the system for 20 seconds Ch...

Page 23: ...d open the door Figure A B IMPORTANT Please do not store the door keys in your safe 2 Next remove the battery cover plate located on the inside of the door and install the 4 AA 1 5V batteries provided...

Page 24: ...ow light will flash and the buzzer will quickly beep and the user should enter the correct code again CAUTION Entering an incorrect code 3 times will freeze the system for 20 seconds Changing the Batt...

Page 25: ...pen the door with the key provided Figure A Keep the door open IMPORTANT Please do not store the door keys in your safe 2 Next install the 4 AA 1 5V batteries provided Figure B Replace the battery cov...

Page 26: ...stem for 20 seconds Changing the Battery If both the red and green lights are on while safe opened this indicates that the batteries must be changed To be sure the batteries are correctly installed pl...

Page 27: ...Figure A IMPORTANT Please do not store the door keys in your safe 2 Next remove the battery cover plate located on the inside of the door and install the 4 AA 1 5V batteries provided Figure B Replace...

Page 28: ...yellow light will flash and the buzzer will quickly beep and the user should enter the correct code again CAUTION Entering an incorrect code 3 times will freeze the system for 20 seconds Changing the...

Reviews: