Step 6.
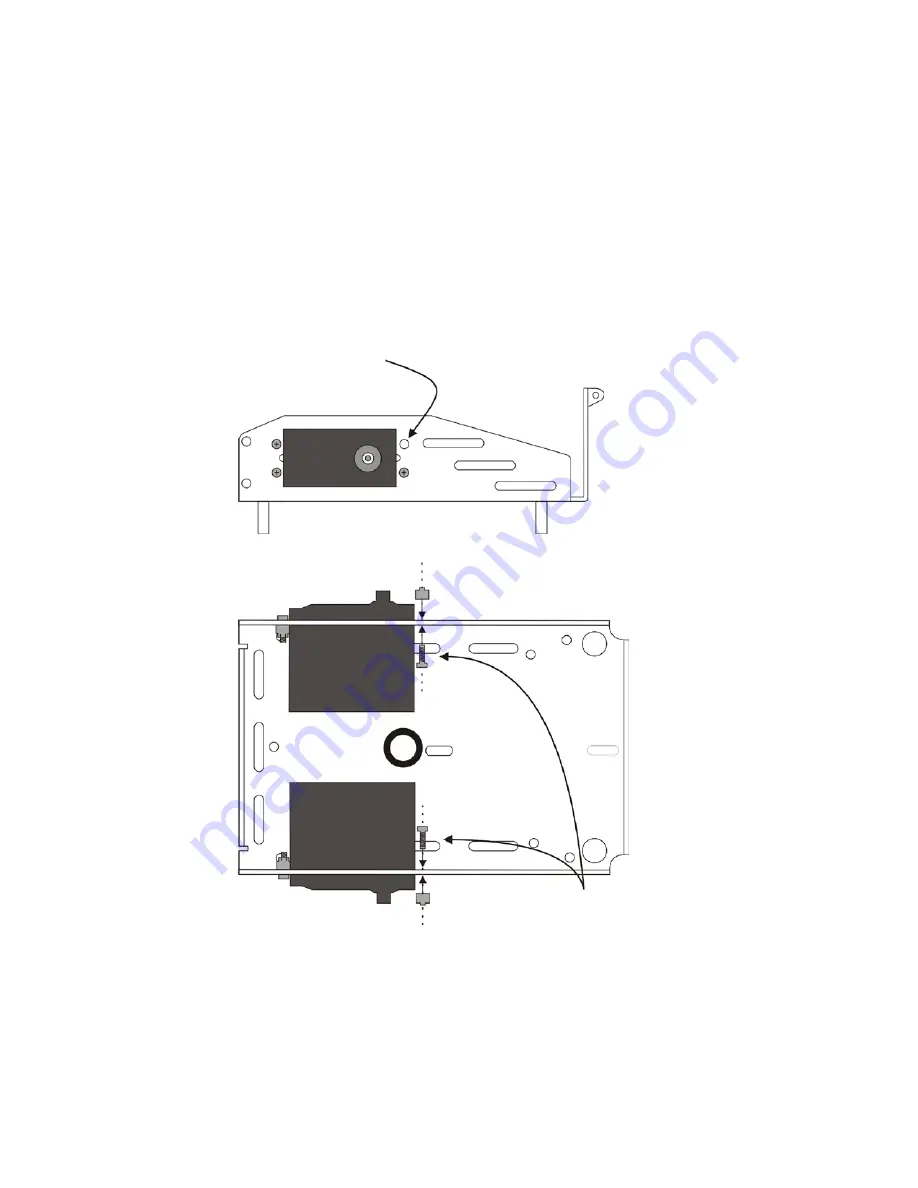
Check to make sure all 4 standoffs needed for re-mounting your control board are in place. If
they aren’t, install them. Now, remove (and set aside) the (2) #4-40 screws and nuts that are
closest to the bottom edge of the chassis, as shown in Figure 3 (a).
Step 7.
Remove the (2) pan head screws that are closest to the top of the chassis and replace them
with the (2) ½” flathead screws included with your Li-ion kit, as shown in Figure 3 (b). The
flathead screws should be installed with screw-heads facing the inside of the chassis and the
nuts attached on the outside.
Note: If your robot uses encoders, it may be easier to
remove them in order to perform this step, though it should not be required. If you
remove them, don’t forget to re-attach them before continuing on to Step 8; once
the Li-ion pack is installed some mounting holes become inaccessible.
Figure 3 – Prepare the Servo Screws
(a)
(b)
Small robot chassis, upside-down, side-view
Remove these
screws and nuts
from each servo.
Small robot chassis, upside-down, wheels removed
Top of chassis
On both servos, remove the pan head screws near
the top of the chassis. Insert the ½” flathead
screws, with screw-heads facing inside the chassis.
Tighten in place with nuts.
Copyright © Parallax Inc.
Li-ion Small Robot Power Pack-Charger (#28988)
v1.2 3/3/2015 Page 5 of 10


