Parallax, Inc
http://www.parallaxinc.com
http://www.stampsinclass.com
Whisker Kit Instructions (June 2000)
•
Page
2
Hardware and Circuits
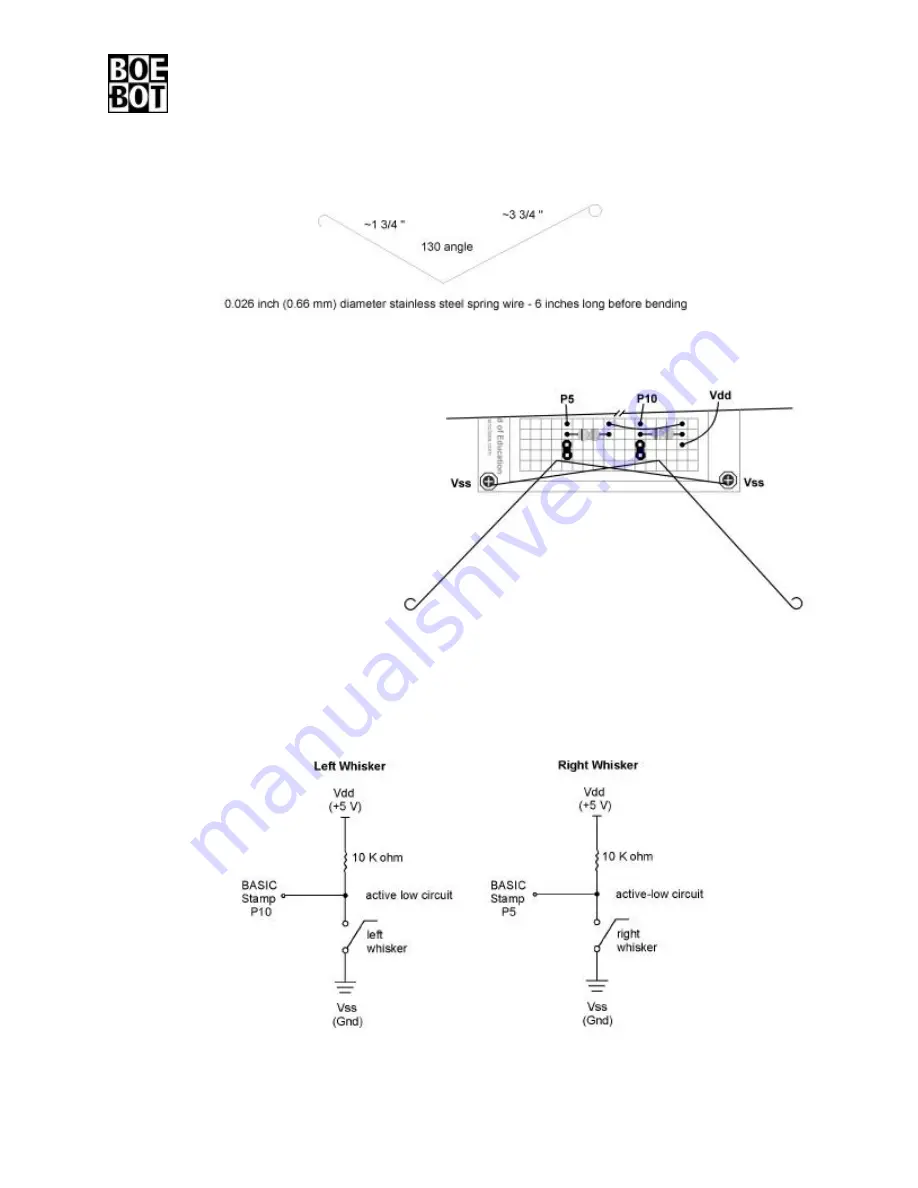
Below is a whisker diagram in case you decide to build your own. Any firm yet springy wire will do the job.
Whiskers are just physical extensions that actuate normally open switches, and they’re easy to build. Here’s how:
(a) Remove the two front screws that hold
your Board of Education to the front
standoffs.
(b) Screw in the male/female standoffs
included in the whiskers kit in place of
the screws that were removed in step (a).
(c) Sandwich the open ended loop of each
whisker between the top of the standoff
and the nylon washers included in the kit.
(d) Use the screws from step (a) to attach
the nylon washers and whiskers to the
standoffs from step (b).
(e) Each whisker should hang over the
breadboard so that it could touch one of
the three pin headers when pressed. See
Whiskers diagram.
Whiskers wiring diagram (note that the three-pin header has been
cut down to two-pin size in this drawing)
The Whisker schematics are shown below. This schematic does not show the servos. If you want to use the sample
code on the next page, make sure to also connect the servo control lines to P14 (right servo) and P15 (left servo).


