background image

26

www.paramondo.de

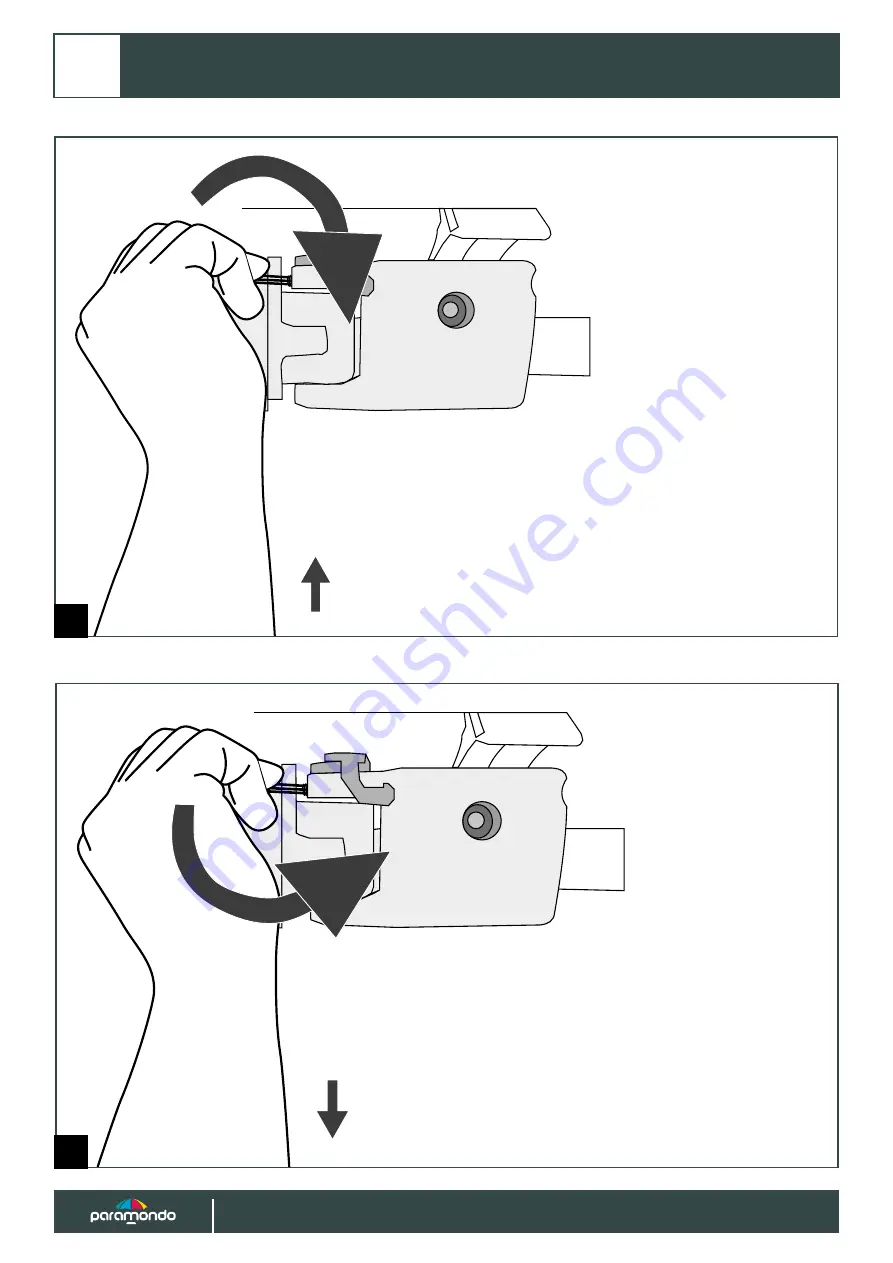
Gelenkarme ausrichten  • Aligning the articulated arms

5

5

3

4

Summary of Contents for 1000011412

Page 1: ...paramondo Montageanleitung installation instructions Facido 1000 Halbkassettenmarkise V1 08 10 2020...

Page 2: ...assembly Optional Deckenmontage 17 21 Optional ceiling assembly Neigungswinkel anpassen 22 24 Adjusting the inclination angle Gelenkarme ausrichten 25 27 Aligning the articulated arms Bedienung des V...

Page 3: ...die jegliches Ein und Ausfahren der Markise unm glich macht Elektroarbeiten Die elektrische Festinstallation muss gem den gesetzlichen und rtlichen Bestimmungen durch eine zugelassene Elektrofachkraft...

Page 4: ...yestergewebe besteht aus Kurzfaser F r das Acrylgewebe wird das Garn spinnd sengef rbt Eine Verfeinerung der Oberfl che sorgt daf r dass der Stoff wasserabweisende und schmutzabweisende Eigenschaften...

Page 5: ...chraube bricht oder das Mauerwerk versagt Die Auszugskr fte sagen aus wie stark Schraube und oder D bel senkrecht auf Zug beansprucht werden d rfen Das Befestigungsmaterial muss nach dem Montageunterg...

Page 6: ...be carried out by an authorised electrician Please follow the enclosed installation instructions of the electrical appliance Test run When opening the awning the first time nobody must be under the ar...

Page 7: ...ic is made out of short fibre For the acrylic fabric the yarn is spun dyed A refinement of the surface ensures that the fabric contains water repellent and dirt repellent properties as well as the pre...

Page 8: ...with 12 sentence n 1 3 of the regulation about the collection and disposal of used batteries and accumulators of the 27th March 1998 BGBl I S 658 it is pointed out to the customer that as final consum...

Page 9: ...Deckenhalter Ceiling bracket 210 cm L 500 cm 3x 501 cm L 600 cm 4x 210 cm L 500 cm 3x 501 cm L 600 cm 4x Sollten Sie weitere hier nicht aufgelistete Materialien erhalten haben schauen Sie bitte in de...

Page 10: ...tte beachten Sie dass eine Installation au er halb dieses Bereichs verboten ist Entscheidend sind die folgenden Tabellen Umrechnung 1 m 100 cm 1000 mm EN DE The optimal positioning of the brackets dep...

Page 11: ...10 cm 20 20 L L 2 301 400 x 160 cm 25 25 L L 2 301 400 x 210 cm 30 30 L L 2 310 400 x 260 cm 25 25 L L 2 360 400 x 310 cm 25 25 L L 2 401 500 x 160 cm 35 35 L L 2 401 500 x 210 cm 35 35 L L 2 Korrekte...

Page 12: ...g of the brackets 50 160 50 160 L 50 160 50 160 L 50 160 50 160 L 50 160 50 160 L 30 140 30 140 L 50 50 L L 2 25 25 L L 2 35 35 L L 2 401 500 x 260 cm 401 500 x 310 cm 410 500 x 360 cm 501 600 x 160 c...

Page 13: ...ich ist Wenn Sie eine motorbetriebene Markise haben schlie en Sie den Motor gem der separaten Installationsanleitung an die in der Umverpackung enthalten ist EN DE The minimum installation height of t...

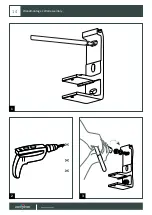
Page 14: ...14 www paramondo de Wandmontage Wall assembly 1 2 3...

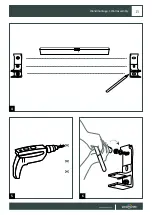
Page 15: ...www paramondo de 15 Wandmontage Wall assembly 4 5 6...

Page 16: ...16 www paramondo de Wandmontage Wall assembly 7 8...

Page 17: ...www paramondo de 17 Optional Deckenmontage Optional ceiling assembly 1 2 3...

Page 18: ...18 www paramondo de Optional Deckenmontage Optional ceiling assembly 4 5...

Page 19: ...www paramondo de 19 Optional Deckenmontage Optional ceiling assembly 6 8 7...

Page 20: ...20 www paramondo de Montage der Markise Assembly of the awning 1 2...

Page 21: ...ge der Markise Assembly of the awning 3 5 6 4 Sollten Sie eine Markise mit Motor haben fahren Sie bitte hier mit der Anleitung des Motors fort If you have an awning with motor please continue with the...

Page 22: ...e inclination angle 1 2 3 Wichtig Bitte nur mit komplett ausgefahrener Markise ein stellen Eine zweite Person muss das Ausfallprofil entlasten anheben Important Please only set with fully extended awn...

Page 23: ...www paramondo de 23 Neigungswinkel einstellen Adjusting the inclination angle 4 5...

Page 24: ...24 www paramondo de Neigungswinkel einstellen Adjusting the inclination angle 7 6...

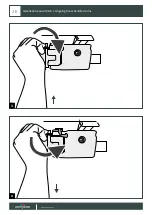
Page 25: ...articulated arms 1 2 Wichtig Bitte nur mit komplett ausgefahrener Markise einstellen Eine zweite Person muss das Ausfallprofil entlasten anheben Important Please only set with fully extended awning A...

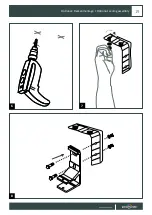
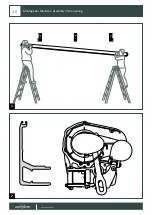
Page 26: ...26 www paramondo de Gelenkarme ausrichten Aligning the articulated arms 5 5 3 4...

Page 27: ...www paramondo de 27 Gelenkarme ausrichten Aligning the articulated arms 5...

Page 28: ...ann mit der im Lieferumfang enthaltenen Handkurbel ein und ausgefahren werden Die Abbildung zeigt das Volant Rollo mit Standardvolant EN DE The roller valance can be rolled in and out using the hand c...

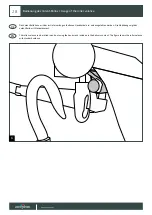
Page 29: ...bel kann sich der Endpunkt des Motors ndern Es kann daher erforderlich sein den Endpunkt gem den Anweisungen neu einzustellen The hand crank eye should only be used in case of emergency The awning can...

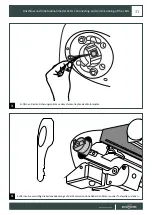
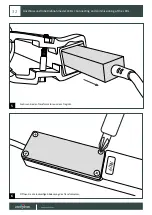
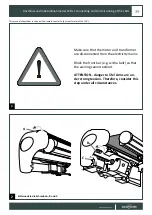
Page 30: ...Connecting and commissioning of the LEDs 2 A B C Stellen Sie sicher dass der Motor und der Transformator vom Stromnetz getrennt sind Blockieren Sie das Ausfallprofil das sind aber vor allem die Gelen...

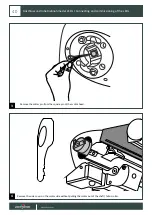
Page 31: ...rungssplint aus dem Vierkantzapfen des Motorkopfes Anschluss und Inbetriebnahme der LEDs Connecting and commissioning of the LEDs Entfernen Sie vorsichtig die Seitenabdeckung auf der Motorseite ohne d...

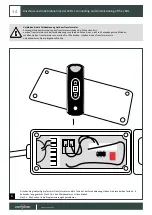
Page 32: ...w paramondo de 6 0 W 5 6 Nehmen Sie den Transformator aus dem Tragrohr ffnen Sie die r ckseitige Abdeckung des Transformators Anschluss und Inbetriebnahme der LEDs Connecting and commissioning of the...

Page 33: ...me der LEDs Connecting and commissioning of the LEDs 8 Verbinden Sie den Transformator wieder mit dem Stromnetz 7 Nehmen Sie die Fernbedienung Wenn Sie die Markise mit dem Funkmotor haben Dr cken Sie...

Page 34: ...bgeschlossen Verbinden Sie die Fernbedienung mit dem Transformator Achtung Nach dem Einschalten des Transformators haben Sie 5 Sekunden Zeit um den Transformator mit der Fernbedienung zu verbinden Wen...

Page 35: ...Dr cken Sie die Taste einmal 1 Sekunde Die LED leuchtet auf Dr cken Sie die Taste einmal 1 Sekunde Die LED leuchtet auf Dr cken Sie die Taste einmal 1 Sekunde Die LED erlischt Dr cken Sie die Taste un...

Page 36: ...or in das Tragrohr Wenn alles funktioniert den Transformator vom Stromnetz trennen 6 7 Dr cken Sie die Taste einmal 1 Sekunde Die LED erlischt Helligkeit der LED Die Stopptaste in der Mitte der Fernbe...

Page 37: ...n der Markise zu befestigen k nnen Sie die Nothandkurbel am Motor verwenden Sollten Sie keine Nothandkurbel besitzen ziehen Sie den Motor ca 1 cm aus der Welle Stecken Sie den Vierkantzapfen in das St...

Page 38: ...38 www paramondo de Anschluss und Inbetriebnahme der LEDs Connecting and commissioning of the LEDs 10 Befestigen Sie wieder die Schrauben A B und C B A C...

Page 39: ...trol to the transformer of the LEDs 1 Entfernen Sie die Schraube A B und C 2 A B C Make sure that the motor and transformer are disconnected from the electricity mains Block the front bar e g with a b...

Page 40: ...und Inbetriebnahme der LEDs Connecting and commissioning of the LEDs 3 Remove the cotter pin from the square pin of the motor head Remove the side cover on the motor side without pulling the motor out...

Page 41: ...www paramondo de 41 Anschluss und Inbetriebnahme der LEDs Connecting and commissioning of the LEDs 6 0 W 5 6 Take the transformer out from the square bar Open the backside cover of the transformer...

Page 42: ...ebnahme der LEDs Connecting and commissioning of the LEDs Switch on the main transformers cable back to the electricity 8 7 Take the remote control If you have the awning with the radio motor Press th...

Page 43: ...y 5 6 seconds The LEDs in the awning arms should blink After 5 6 seconds the programming is done Connect the remote control with the transformer Attention You have 5 seconds from switching on the tran...

Page 44: ...ioning of the LEDs Press the button once 1 second The LED will switch on Press the button once 1 second The LED will switch on Press the button once 1 second The LED will switch off Press the button a...

Page 45: ...verything works disconnect transformer from the power electricity 6 7 Press the button once 1 second The LED will switch off Brightness of the LED The stop button in the middle of the remote control h...

Page 46: ...re the side cover to the awning you can use the emergency hand crank on the motor If you do not have an emergency hand crank pull the motor about 1 cm out of the shaft Insert the square pin into the s...

Page 47: ...www paramondo de 47 Anschluss und Inbetriebnahme der LEDs Connecting and commissioning of the LEDs 10 Assembly all screws A B and C B A C...

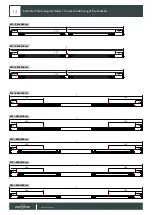
Page 48: ...tzung der Teleskopst tzen Es kann sonst zu k rperlichen oder baulichen Sch den kommen Attention It is absolutely necessary to ensure that the telescope supports are released from the front rail before...

Page 49: ...ontage der Teleskopst tzen Assembly of the telescope support 1 2 3 ffnen open Der Kopf der Teleskopst tze ist bereits im Ausfallprofill vormontiert The head of the telescope support is already preasse...

Page 50: ...50 www paramondo de 5 Montage der Teleskopst tzen Assembly of the telescope support...

Page 51: ...EN 13561 2015 Abschl sse au en und Au enjalousien Leistungs und Sicher heitsanforderungen Deutsche Fassung EN 13561 2015 DIN EN 60335 2 97 Sicherheit elektrischer Ger te f r den Hausgebrauch und hnlic...

Page 52: ...tive 2014 53 EU Applied harmonised standards DIN EN 13561 2015 External blinds and awnings Performance requirements including safety German version EN 13561 2015 DIN EN 60335 2 97 Household and simila...

Page 53: ...www paramondo de 53 Notizen Notes...

Page 54: ...54 www paramondo de Notizen Notes...

Page 55: ...www paramondo de 55 Notizen Notes...

Page 56: ...paramondoist eine eingetragene Marke der Schoenberger Germany Enterprises GmbH Co KG Zechstra e 1 7 82069 Hohensch ftlarn info paramondo de www paramondo de...

Reviews: