background image

15

RELATIONSHIP WITH POOL EQUIPMENT

Cleaning Systems Powered by the Filter Pump
Pumps must be capable of maintaining 20 psi (138 kPa) on the water valve(s) pressure gauge.
Your pump must be capable of maintaining 20 psi (138 kPa) at the water valve regardless of the additional features on your pool such as spas, solar 
heating systems, heat pumps, water features, chlorinators, or any other device that is powered by your pump.
Adding items to your filter system after construction (solar, heat pumps, water features, chlorinators, and any thing that takes pressure away from the 
nozzles) will have a negative effect on the cleaning system. Please contact your builder or Paramount before adding these items.
Keeping filter clean is required to maintain the 20 psi (138 kPa) at the water valve. A dirty filter will prevent your system from cleaning the pool.
The in-floor system comes with a pressure gauge on the water valve and although the system may operate at lower psi, the best cleaning results require 20 
to 24 psi (138-165 kPa) at the water valve pressure gauge. You will see reduced performance if the system is operated at less than ideal pressure.
The systems cleaning cycle is determined by many factors (landscape, temperature, weather and condition of pool equipment). To determine your 
cleaning cycle, run the pool until it is clean. In extreme conditions an extended cycle will be necessary.
It is important to keep the skimmer and pump basket(s) empty, so your pool equipment will power your in-floor system. Failure to do so will negatively 
affect the performance of your system.
When cleaning your cartridge or D.E. Filter care must be taken before removing the filter elements that the filter tank be drained and rinsed out. This 
is required to prevent dirt and debris from entering the return line and getting into your in-floor system or any other down-line components. 

OPTIONAL PARAMOUNT DEBRIS CANISTER 

Your pool may be equipped with the Paramount optional deck side debris canister (DDC), which would be located 
in the deck next to your pool or the equipment side debris canister (EDC) on the equipment pad. The debris 
canister is where the debris from your pool is gathered after it passes through the drain. It is important the debris 
is emptied from the debris canister’s catch basket regularly, just like your skimmer and pump baskets, so your pool 
equipment will continue to operate efficiently. The DDC has a patented water sealed easy to remove twist lock lid 
that needs no o-ring. The DDC canister’s water sealed lid has an equalizer running from the debris canister to the 
pool to keep water on top of the lid. The equalizer line must be kept clear from obstructions. 

Summary of Contents for Cyclean

Page 1: ...ax 480 753 3397 Paramount 1Paramount com www 1Paramount com 004 027 8742 00 REV032516 US and Foreign patents and patents pending see www 1paramount com about patents Cleaning System Manual OWNER S MANUAL For PCC2000 PV3 PVR Cyclean Pool Valet New Gen Pool Valet Vantage Vanquish VectorJet and EcoPool ...

Page 2: ...e frequency of periodic cleaning will vary depending on the amount and type of debris introduced into the pool or spa Clogging of the drain cover will increase the suction effect and increase the likelihood of death or serious injury from those hazards listed above A clogged drain can negatively affect the safety of the drain It is advisable to have a qualified pool or spa professional perform thi...

Page 3: ... are not damaged cracked broken loose clogged not properly secured or missing because these conditions increase the chance of death or serious injury from entrapment If a drain cover is discovered damaged cracked broken loose clogged not properly secured or missing you should Close the pool or spa immediately and Post a closure notice and keep the pool or spa closed until an appropriate ANSI APSP ...

Page 4: ...nd can be affected by seasonal weather conditions that may require extended periods of operation The cleaning performance directly relates to the type and design of your specific Paramount system It is recommended you call your pool builder or a professional service company if your pool requires attention WHAT YOU NEED TO KNOW Congratulations 4 What You Need to Know 4 what is a water valve 5 Uniqu...

Page 5: ... returns are placed at the end of the circuits WHAT IS A WATER VALVE Combination Water Valves 9 Port and 12 Port A 9 port system consists of 2 water valves a 6 port and a 4 port The 4 port valve has 3 circuits to the pool and 1 circuit that powers the 6 port valve for a total of 9 circuits going to the pool On this type of system the 3 circuits on the 4 port valve fire twice as often as the other ...

Page 6: ...cement module design allows for easy installation The gauge on your water valve is important and tells you how the system is operating Gauges should be replaced when they become unreadable or inaccurate Never use Teflon tape on a replacement gauge use a thread sealant that is approved for plastic such as Teflon paste Hand tighten gauge as over tightening can crack the water valve lid ...

Page 7: ...ort Band Clamp Complete Includes Knob Nut 005 302 3570 00 Band Clamp Knob 005 302 3600 00 Band Clamp Nut 005 302 0640 00 Base O Ring 005 302 0100 00 Valve Base US 005 302 4002 03 2 Port Base 2 Black 005 302 4012 03 3 Port Base 2 Black 005 302 4018 03 4 Port Base 2 Black 005 302 4032 03 6 Port Base 2 Black Valve Base Metric 005 302 4006 03 2 Port Base 63 mm Black 005 302 4019 03 3 Port Base 63 mm B...

Page 8: ... is a quad ring and is almost square the height is slightly bigger than the width 2 Replace the o ring if it is stretched or damaged The o ring does not require any lubrication Lubricating The o ring can attract dirt and debris that could prevent it from sealing Never use petroleum jelly on plastic or rubber parts as this will damage them 3 Place the run pause switch in the run position then insta...

Page 9: ...ould fit in the base without forcing it If it does not seat easily then check the following 5 Figure 3 shows the piston portion of the current module design released 06 2011 These pistons are set at the factory Do not touch pull or turn these pistons Any handling will negatively affect the performance and fit of this product 6 If the flow optimizer Figure 4 prevents the module from seating properl...

Page 10: ... by connectors must be aligned over an open port and a closed port section MODULE ALIGNMENT 2 PORT 4 GEAR MODULE BASE Used for basin spa applications Eco Systems Swing Sweep Module Part 004 302 4400 00 Base Part 005 302 4002 03 2 005 302 4006 03 63mm 2 PORT 5 GEAR MODULE BASE Used on 12 port systems to feed the two 6 port valves Module Part 004 302 4402 00 Base Part 005 302 4002 03 2 005 302 4006 ...

Page 11: ...tems feeds 6 port valve Module Part 004 302 4406 00 Base Part 005 302 4018 03 2 005 302 4020 03 63mm 6 port module alignment The 6 port module can be place in any position as long as the alignment pins line up and the module is seated securely in the valve body 6 PORT MODULE BASE Module Part 004 302 4408 00 Base Part 005 302 4032 03 2 005 302 4030 03 1 005 302 4038 03 63mm US notation of 2 is equi...

Page 12: ...ed when you desire the nozzles not in the up position to remain down or while servicing the system Note The run pause control switch can be used without turning off the pump but can cause damage to the water valve or module diaphragms if overused If you frequently use the run pause control switch you should turn off the pump first Always turn the run pause control switch to the run position when r...

Page 13: ...to remove a nozzle To make the nozzle removal easier use a pressure nozzle on a garden hose like you use to clean the side walk and blow the debris out between the nozzle and body before using the tool to remove the nozzle The nozzle is specific to the body it came out of Always put the nozzle back in the same body it came out of Nozzles may need to be removed from time to time for purposes of win...

Page 14: ...quire 3 full turns to remove If you experience difficulty unthreading the retainer ring tap on it gently This is best accomplished by tapping on the top of the tool The amount of force necessary can vary depending on how long the nozzle has been installed When replacing the threaded ring of the nozzle wrap it twice with Teflon tape This will make for easy removal in the future Turn it clockwise ap...

Page 15: ... condition of pool equipment To determine your cleaning cycle run the pool until it is clean In extreme conditions an extended cycle will be necessary It is important to keep the skimmer and pump basket s empty so your pool equipment will power your in floor system Failure to do so will negatively affect the performance of your system When cleaning your cartridge or D E Filter care must be taken b...

Page 16: ... mm Australia NOTICE Larger filter sizes will reduce the amount of cleaning needed Be sure your replacement filter is adequately sized for your existing pump Valves for a Single Pump System The skimmer suction should be restricted to make the main drain pull more because water takes the path of least resistance and in floor systems do most of their cleaning from the main drain Returns spa over flo...

Page 17: ...r it by pushing down on it a few times while pump is on to clear the obstruction No cleaning system is 100 Paramount s in floor guarantee is the strongest in the industry but some attention to the pool is required to keep your backyard oasis beautiful You must keep your chemicals at proper levels and brush any small areas that may have a build up of heavy sand or debris Keep in mind that when exce...

Page 18: ...odule removal procedure clean it by holding it in the pool sideways and move it back and forth quickly until it is clean If there are any pistons in the open position push them shut being sure not to rotate them Place the module back in the water valve see module installation procedure and turn the system pump on to determine if the cleaning nozzles are now functioning properly Depending on the ag...

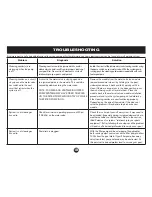
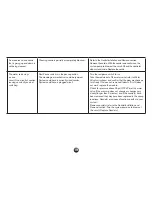
Page 19: ...could have incorrectly sized nozzles System could have a plugged circuit Turn the run pause switch to run Take the module out of the water valve refer to Water Valve Instructions and confirm that the gear mechanisms turn freely If it does not remove all debris If it still does not work replace the module Check for pressure above 25 psi 172 kPa at the water valve If the pressure does not change or ...

Page 20: ...20 IN FLOOR WARRANTY REGISTRATION For warranty information and registration visit www 1paramount com products warranty ...

Reviews: