background image

HEATER ASSEMBLY 

Tools Required:  

1 Phillips head screwdriver, 1 adjustable spanner 

1. Remove the protective paperboard off the 

top of glass tube

Assemble the reflector into the frame parts 

using two-side bolts, then use the nuts to 

firm the top.

2.  Using  wing  nuts  to  firm  the  reflector 

completely. 

- 9 -

    INJECTOR

3. Inner regulator is stored inside. Pl connect 

the  regulator  with  1  pound  gas  cylinder 

tightly.(Cylinder is not provided)

4.  Assembling is completed. Start to operate 

by reading the following operation manual 

Summary of Contents for PH05-S

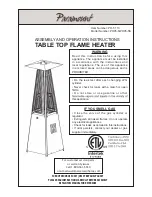
Page 1: ...cylinder or regulator Extinguish all naked flames do not operate any electrical appliances Check for leaks as detailed in this instructions If odor persists contact your dealer or gas supplier immedi...

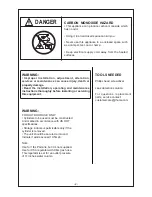
Page 2: ...e instructions thoroughly before installing or servicing this equipment WARNING FOR OUTDOOR USE ONLY Cylinders to be used must be constructed And marked in accordance with US DOT speci cations Storage...

Page 3: ...t is raining and do not let any liquid splash to the glass tube when the heater is working Keep the children away from the heater always be carefully not to knock down the heater which will break the...

Page 4: ...cylinder housing Shut off the valve of gas cylinder or the regulator before moving the appliance The tubing or the flexible hose must be changed within the prescribed intervals Use only the type of g...

Page 5: ...OF OUTDOOR AREAS APPLIANCE STAND AND LOACTION The appliance is for outdoor use only Do not use it for indoor or in an enclosed area Always maintain proper clearance from combustible materials i e top...

Page 6: ...y leaking fitting carefully turn gas again and recheck Never leak test while smoking INSTALLATION Important safety requirements THIS APPLIANCE OUTDOOR USE ONLY 1 This appliance shall not be installed...

Page 7: ...s Bottom Plate Control Box Middle Plate Support Upper Plate Plate cover Glass tube Damper Reflector 1 1 1 4 1 1 1 1 1 1 2 3 5 6 7 8 9 10 Preassembled in the Middle plate Preassembled in the Middle pla...

Page 8: ...stening Side panel Front panel Screw M4 Knob Nuts AA battery 3 8 4 4 3 1 66 1 1 1 11 12 13 14 15 16 17 18 19 20 Connect with damper and reflector A chain is preassembled in this panel All preassembled...

Page 9: ...reflector into the frame parts using two side bolts then use the nuts to firm the top 2 Using wing nuts to firm the reflector completely 9 INJECTOR 3 Inner regulator is stored inside Pl connect the r...

Page 10: ...he ignition chamber and has power Ensure The anode faces outside Ensure that the control knob is OFF Slowly open the gas cylinder valve Press and turn the control knob to LIGHT position push the ignit...

Page 11: ...sively uneven Heater makes popping noises Spider and insects can nest in burner or orifices This dangerous condition can damage heater and render it unsafe for use Clean burner holes by using a heavy...

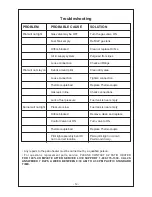
Page 12: ...an or replace Orifice Purge air from lines Check all fittings Clean dirty area Tighten connection Replace Thermocouple Check connections Fuel tank is near empty Fuel tank is near empty Remove clean an...

Page 13: ...service please call our toll free number 1 800 561 5550 Customer Service JR Home Products Unit 1 5628 Riverbend Drive Burnaby BC V3N 0C1 Toll Free 1 800 561 5550 E mail customercare jrhome com Warrant...

Reviews: