background image

HEATER ASSEMBLY

STEP 1: 

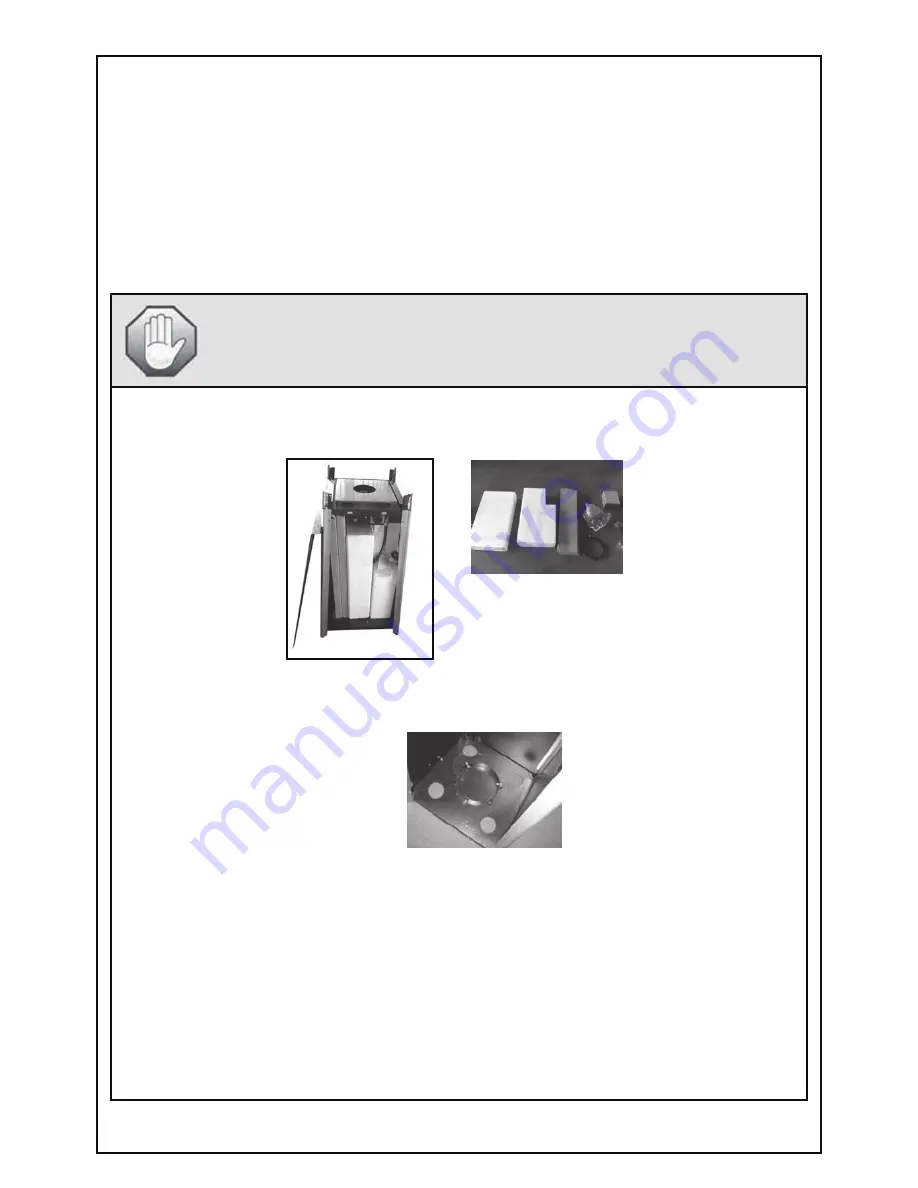
Locate the Tank Housing Assembly (1). Open the front panel and remove the 

cartons containing all parts needed for assembly of the appliance.

PREPARATION FOR ASSEMBLY

Before beginning assembly of this appliance, make sure all parts are present. Compare 

all parts with Parts List as shown on page 6 of this manual. If any part is missing or 

damaged, do not attempt to assemble this product. Contact customer service for 

replacement parts. Assembly should be performed on a flat, level, non-abrasive 

surface.

ESTIMATED ASSEMBLY TIME: 45 minutes

Tools Required for Assembly (NOT included):

Philips Head Screwdriver 

Leak Detection Solution 

STEP 2: 

Locate the Stability Ring (2). Fit the Stability Ring (2) onto the bottom of the 

inside of the Tank Housing Assembly (1) and attach with 3 bolts and nuts provided in 

the bag with the Stability Ring.

STEP 3: 

Locate the Wheel Kit with Hardware (3). Loosen and remove the nuts and bolts 

(4 nuts/bolts on each wheel) that come already assembled to the wheels. Locate the 

brackets on the rear bottom legs of the Tank Housing Assembly (1) (Fig. A). Align 

wheels with the holes in brackets. Before you attach the wheels to the brackets, the 

wheel should sit flat on the ground (Fig. B). Attach the wheels to the brackets using the 

nuts and bolts that you have loosened and removed from the wheels. Once you 

attach the wheels, the wheels should now sit slightly above the ground (Fig. C) as 

wheels should only engage for moving heater when the heater is tipped backwards 

slightly—if wheels are flat on the ground once attached to the brackets with heater in 

UPRIGHT position, then wheels are NOT correctly mounted on the brackets. 

- 7 -

Summary of Contents for PH08-S BK

Page 1: ...esult in bodily injury and or property damage PRECAUTIONS vapours and liquids in the vicinity of this or any other appliance Any LP cylinder not connected for use shall not be stored in the vicinity o...

Page 2: ...removed The unit should be secured or moved indoors if winds exceed 19 5mph Note Use the 20lb LPG tank but it is not supplied Use for CSA regulator with 0 6m gas house This regulator is set for an ou...

Page 3: ...se Do not use heater when it is raining and always be careful to not let any liquids splash onto the glass tube when the heater is working Keep children away from the heater and be careful not to knoc...

Page 4: ...ylinder is disconnected and removed from the appliance Do not store a spare LP gas cylinder under or near this heater Never fill the cylinder beyond 80 percent full The appliance is for outdoor use on...

Page 5: ...ntinues to leak 5 Never leak test while smoking INSTALLATION Important Safety Rules This appliance is for OUTDOOR USE ONLY 1 This appliance shall not be installed or used indoors in buildings garages...

Page 6: ...bolts nuts preassembled on wheels 8 pieces 4 sets 1 1 2 pcs 1 set 1 1 8 pcs 4 sets 8 4 1 M3 16 Screws 14 39 To be used to secure Mesh Guards to body of the appliance Screws used in assembly of the ap...

Page 7: ...the inside of the Tank Housing Assembly 1 and attach with 3 bolts and nuts provided in the bag with the Stability Ring STEP 3 Locate the Wheel Kit with Hardware 3 Loosen and remove the nuts and bolts...

Page 8: ...gether Repeat this with the other 3 sets 4 sets total 8 M3 16 screws total STEP 5 Once you have the assembled sets of the Aluminum Tubes slide the bottom of the assembled set note that the bottom will...

Page 9: ......

Page 10: ...r pieces will go at the top As you are hanging the mesh guards use the Guard Connectors 11 to secure each edge of the wider guard to the edge of the narrower guard Fig C STEP 11 Locate the Guard Faste...

Page 11: ...be will be extremely hot when it is working never try to touch it and keep children away from the heater objects or the ground Never use the heater if the glass tube has a crack or chip LIGHTING INSTR...

Page 12: ...etween Uses Turn the control knob to OFF position Turn the LP cylinder to the OFF position Store the heater upright in an area sheltered away from weather conditions such as rain sleet hail and snow I...

Page 13: ...will not light Turn the gas valve ON Purge air from lines Dirt or film on reflector and flame screen Clean reflector and flame screen Thick black smo ke Blockage in burner Turn off the heater and let...

Page 14: ...ervice please call our toll free number 1 800 561 5550 Customer Service JR Home Products Unit 1 5628 Riverbend Drive Burnaby BC V3N 0C1 Toll Free 1 800 561 5550 E mail customercare jrhome com Warranty...

Reviews: