background image

Parasit Studio

Fitting everything inside the enclosure

Getting everything mounted inside the enclosure can be a bit tricky 
because of all the pots, leds and switches. Here's what I do.

1. Solder the middle leg of the potentiometers to the PCB first 

(that way the pots won't fall out when you try to insert the 
board into the enclosure, but they will still have some 
movement for adjustment).

2. Place the switches inside the enclosure.
3. Put the LED's in the PCB (without soldering).
4. Carefully put everything together and make sure that 

everything lines up.

5. Solder everything in place.

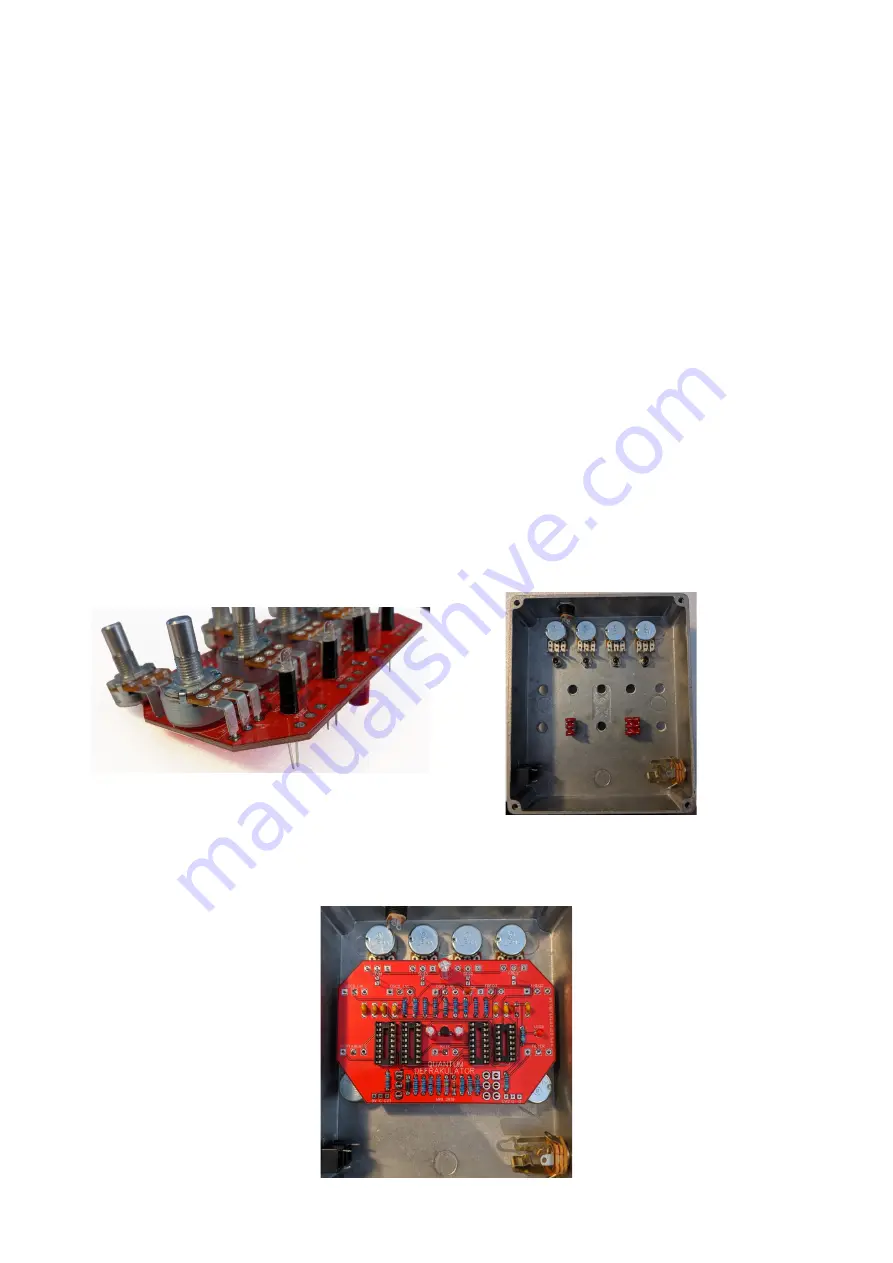
In this picture example I put the top four pots inside the enclosure 
first, since the DC jack was in the way, but it's much easier to 
solder them to the PCB insted which I was doing on later builds. 
This shows the 2.0 PCB, but the same method goes for version 3.0

When using a pot cover I usually keep the legs of the pots a bit 
liften from the hole so that the pot sits flush against the PCB.

Summary of Contents for MK3

Page 1: ...he correct version of the build document to match the version of your PCB The Quantum Defrakulator is a drone synthesizer with 3 square wave oscillators and one LFO low frequency oscillator Each oscil...

Page 2: ...ow you can push a momentary button to manually toggle through the steps of the sequencer when the LFO is off If the button is pressed while the LFO is on it will temporarily stop the sequencer While t...

Page 3: ...l jumper and petting your cat dog while building Always use sockets for IC chips to avoid heating them directly It also makes it much easier to swap them out if needed Pay special attention to the ori...

Page 4: ...is not critical Things not included in the BOM that you will also need 1x Hammond BBDD JJ enclosure 1x DC jack 1x 6 3mm mono jack for the output 12x knobs 4x LED bezels optional 2x 3 5mm jacks option...

Page 5: ...t 2 Place the switches inside the enclosure 3 Put the LED s in the PCB without soldering 4 Carefully put everything together and make sure that everything lines up 5 Solder everything in place In this...

Page 6: ...witch to disengage the battery while not in use CV jack Wiring To hook up the CV control voltage input jacks connect the CV pad on the PCB to the tip of a 3 5mm jack or jack of your choice Make sure t...

Page 7: ...ack to your own preference Make sure your printer is printing 100 print size and isn t doing any scaling Use at your own risk This template is approximate The pot and switch placements are exactly the...

Page 8: ...Parasit Studio Schematic...

Page 9: ...npedals com forum index php board 84 0 If you have bought the Musikding kit and have recieved a faulty or missing component please contact musikding directly kontakt musikding de Terms of use PCB s fr...

Reviews: