English
3/8
PCW420-650
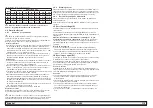
The specifi c weight values at different temperatures for glycol percent-
age values are given in the table.
%
glicol
Temperature [°C]
-10
0
10
20
30
40
50
0%
1.0024
1.0008
0.9988
0.9964
0.9936
0.9905
0.9869
10%
1.0177
1.0155
1.0130
1.0101
1.0067
1.0030
0.9989
20%
1.0330
1.0303
1.0272
1.0237
1.0199
1.0156
1.0110
30%
1.0483
1.0450
1.0414
1.0374
1.0330
1.0282
1.0230
!
Caution: When fi lling the system, take into account the ca-
pacity of the expansion vessel as well.
3.4 Electrical circuit
3.4.1
Checks and connections
!
Before carrying out any operation on the electrical system, make
sure that the appliance is disconnected from the electrical power sup-
ply.
All electrical connections must comply with the applicable regulations
in force in the country of installation.
Initial checks
1) The power supply voltage and frequency must correspond to the
values stamped on the chiller nameplate. The power supply charac-
teristics must not deviate, even for brief periods, from the tolerance
limits indicated on the electrical diagram , which are +/- 10% for the
voltage; +/- 1% for the frequency.
2) The power supply must be symmetrical (the effective voltages and
the phase angles of consecutive phases must be equal). The maxi-
mum permissible voltage imbalance is 2%.
Connection
1) The electrical power supply must be connected to the chiller using a
4-wire cable, comprising 3 phase conductors and an earth conduc-
tor, with no neutral. For minimum cable section, see par. 7.4.
2) Pass the cable through the cable entry on the rear panel of the ma-
chine and connect the phase and neutral to the terminals of the main
isolator switch (QS); connect the earth wire to the earth terminal (PE).
3) Ensure that supply cable has at its source protection against direct
contact of at least IP2X or IPXXB.
4) On the supply line to the chiller, install a residual-current circuit
breaker with a trip rating of (RCCB - IDn = 0.3A), with the current
rating indicated in the reference electrical diagram, and with a short
circuit current rating appropriate to the short circuit fault current
existing in the machine installation area.
The nominal current In of the magnetic circuit breaker must be equal
to the FLA with an intervention curve type D.
5) Max. grid impedance value = 0.274 ohm.
Subsequent checks
Check that the machine and the auxiliary equipment are earthed and
protected against short circuit and/or overload.
!
Once the unit has been connected and the upstream main switch
closed (thereby connecting the power supply to the machine), the
voltage in the electrical circuit will reach dangerous levels. Maximum
caution is required!
3.4.2 General
alarm
All the chillers are equipped with an alarm signalling system (see electri-
cal diagram), comprised of a switching free contact in a terminal block:
this may be used for the connection of an external audible or visual
alarm, or used to provide an input signal for a logic control system such
as a PLC.
3.4.3 ON/OFF
remoto
All the chillers can be connected to a remote ON/OFF control.
See the electrical diagram for the connection of the remote ON-OFF
contact.
3.5 Centrifugal version (C)
Used when ducting of the hot air coming from cooling is required.
In fact, the centrifugal fans are able to give the air a useful static pres-
sure that overcomes the pressure losses due to ducting.
Important: Units equipped with centrifugal fans cannot be installed in
open air without ducting. To work correctly, the centrifugal fans require
a minimum counterpressure preventing the electric motor from ”over-
revving” and its consequent breaking.
Rules for ducting
1) Each fan must be individually ducted: the fans must be able to work
independently.
2) The ducting must have air fl ow are as equal to those of the fans
installed on the unit.
3.6 Water-cooled version (W)
In the water-cooled version, the chillers require a water circuit that
takes the cold water to condenser.
The water version chiller is equipped with a pressure regulating valve
at the condenser inlet, whose function is to regulate the water fl ow in
order to always obtain optimum condensation.
Preliminary checks
If the water supply to the condenser is by means of a closed circuit,
perform all the preliminary checks listed for the main water
circuit (para. 3.3.1).
Connection
1) It is advisable to equip the cooling water circuit with shutoff valves,
enabling the machine to be cut out in case of maintenance.
2) Connect the water delivery/return pipes to the special connections
located on the back of the unit.
3) If the cooling water is “expendable” it is advisable to equip the
circuit with a fi lter at the condenser inlet, in order to reduce the risk
of the surfaces becoming dirtied.
4) If the circuit is of the closed type, make sure it is fi lled with water
and the air properly vented.
Summary of Contents for Hyperchill PCW420
Page 2: ......
Page 35: ......
Page 37: ...Ap ndice Appendix Appendice Anexo DATE 14 02 2022 Rev 17 CODE 398H272297...
Page 38: ......
Page 51: ...13 7 5 Circuit diagram PCW420 650 NP PCW650 PCW650 A1...
Page 52: ...14 7 6 Wiring diagram PCW420 510 PCW420 650 Sheet 1 of 11...
Page 53: ...15 7 6 Wiring diagram PCW420 510 PCW420 650 Sheet 2 of 11...
Page 54: ...16 7 6 Wiring diagram PCW420 510 PCW420 650 Sheet 3 of 11...
Page 55: ...17 7 6 Wiring diagram PCW420 510 PCW420 650 Sheet 4 of 11...
Page 56: ...18 7 6 Wiring diagram PCW420 510 PCW420 650 Sheet 5 of 11...
Page 57: ...19 7 6 Wiring diagram PCW420 510 PCW420 650 Sheet 6 of 11...
Page 58: ...20 7 6 Wiring diagram PCW420 510 PCW420 650 Sheet 7 of 11...
Page 59: ...21 7 6 Wiring diagram PCW420 510 PCW420 650 Sheet 8 of 11...
Page 60: ...22 7 6 Wiring diagram PCW420 510 PCW420 650 Sheet 9 of 11...
Page 61: ...23 7 6 Wiring diagram PCW420 510 PCW420 650 Sheet 10 of 11...
Page 62: ...24 7 6 Wiring diagram PCW420 510 PCW420 650 Sheet 11 of 11...
Page 63: ...25 7 6 Wiring diagram PCW650 PCW420 650 Sheet 1 of 11...
Page 64: ...26 7 6 Wiring diagram PCW650 PCW420 650 Sheet 2 of 11...
Page 65: ...27 7 6 Wiring diagram PCW650 PCW420 650 Sheet 3 of 11...
Page 66: ...28 7 6 Wiring diagram PCW650 PCW420 650 Sheet 4 of 11...
Page 67: ...29 7 6 Wiring diagram PCW650 PCW420 650 Sheet 5 of 11...
Page 68: ...30 7 6 Wiring diagram PCW650 PCW420 650 Sheet 6 of 11...
Page 69: ...31 7 6 Wiring diagram PCW650 PCW420 650 Sheet 7 of 11...
Page 70: ...32 7 6 Wiring diagram PCW650 PCW420 650 Sheet 8 of 11...
Page 71: ...33 7 6 Wiring diagram PCW650 PCW420 650 Sheet 9 of 11...
Page 72: ...34 7 6 Wiring diagram PCW650 PCW420 650 Sheet 10 of 11...
Page 73: ...35 7 6 Wiring diagram PCW650 PCW420 650 Sheet 11 of 11...
Page 74: ......
Page 75: ......


