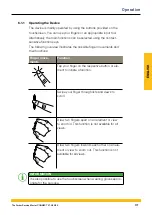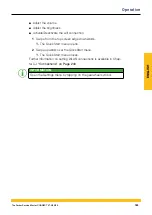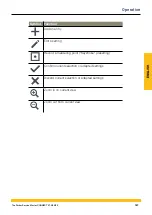
ENGLISH
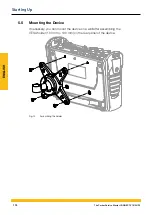
Mount the device in the following sequence:
1
Assemble the VESA holder at the installation location. Observe
the information in the manual supplied with the VESA holder.
2
Mount the device on the VESA holder.
3
Screw the device using four retaining screws and an appropriate
tool.
Ä
The device is mounted.
INFORMATION
The maximum screw-in depth for the retaining screws is 6 mm. The
VESA holder and screws necessary for assembly (M4 metric) are
included in the supply package.
175
The Parker Service Master CONNECT V1.0/04/20
Starting Up
Summary of Contents for Service Master CONNECT
Page 1: ...The Parker Service Master CONNECT Bedienungsanleitung Operating Manual ...
Page 107: ...DEUTSCH Abb 55 Gerät Device 107 The Parker Service Master CONNECT V1 0 04 20 Bedienung ...
Page 133: ...DEUTSCH 12 3 Maßzeichnungen 133 The Parker Service Master CONNECT V1 0 04 20 Anhang ...
Page 134: ...DEUTSCH 134 The Parker Service Master CONNECT V1 0 04 20 Anhang ...
Page 135: ...DEUTSCH 135 The Parker Service Master CONNECT V1 0 04 20 Anhang ...
Page 137: ...DEUTSCH 137 The Parker Service Master CONNECT V1 0 04 20 Anhang ...
Page 245: ...ENGLISH Fig 55 Device 245 The Parker Service Master CONNECT V1 0 04 20 Operation ...
Page 271: ...ENGLISH 12 3 Dimensional Drawings 271 The Parker Service Master CONNECT V1 0 04 20 Appendix ...
Page 272: ...ENGLISH 272 The Parker Service Master CONNECT V1 0 04 20 Appendix ...
Page 273: ...ENGLISH 273 The Parker Service Master CONNECT V1 0 04 20 Appendix ...
Page 275: ...ENGLISH 275 The Parker Service Master CONNECT V1 0 04 20 Appendix ...


