


13
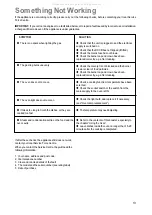
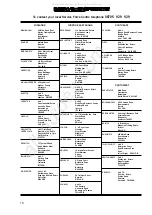
Something Not Working
SYMPTOM
n
There is no spark when lighting the gas
n
The gas ring burns unevenly
n
The oven does not come on
n
The oven light does not come on
n
It takes too long to finish the dishes, or they are
cooked too fast.
n
Steam and condensation settle on the food and the
oven cavity.
SOLUTION
u
Check that the unit is plugged in and the electrical
supply is switched on
u
Check that the RCCB has not tripped (if fitted)
u
Check the mains fuse has not blown
u
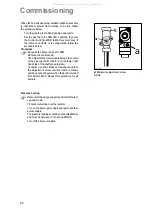
Check the burner cap and crown have been
replaced correctly, e.g. after cleaning.
u
Check the main jet is not blocked and the burner
crown is clear of food particles.
u
Check the burner cap and crown have been
replaced correctly, e.g. after cleaning.
u
Check a cooking function / temperature have been
selected.
u
Check the socket switch or the switch from the
mains supply to the oven is ON.
u
Check the light bulb, and replace it if necessary
(see "Oven lamp replacement")
u
The temperature may need adjusting
u
Refer to the contents of this booklet, especially to
the chapter Using the Oven.
u
Leave dishes inside the oven no longer than 15-20
minutes after the cooking is completed.
If after these checks, the appliance still does not work,
contact your local Service Force Centre.
When you contact the Service Centre, they will need the
following information:
1. Your name, address and post code.
2. Your telephone number
3. Clear and concise details of the fault
4. The model and the serial number (see rating label)
5. Date of purchase
If the appliance is not working correctly, please carry out the following checks, before contacting your local Service
Force Centre.
IMPORTANT:
If you call out an engineer to a fault listed below, or to repair a fault caused by incorrect use or installation,
a charge will be made even if the appliance is under guarantee.
All manuals and user guides at all-guides.com


