


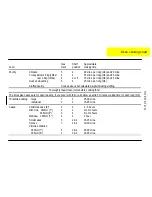


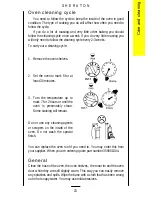


Helpful hints
1
Keep flames under the base of the pans. If the
flames lick round the sides of the pans you are
wasting gas.
2
Only heat the amount of liquid you need. Do
not overfill pans.
3
Cover pans with a lid whenever possible. The
food will heat up more quickly and there will be
less steam in the kitchen.
4
Try cooking more than one vegetable in the
same pan, for example potatoes and carrots.
5
Cut vegetables into smaller pieces. This way
they will cook more quickly.
6
A pressure cooker will save time and energy.
S H E R A T O N
11
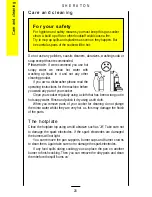
The hotplat
e


