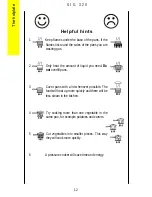
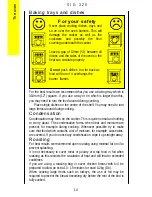
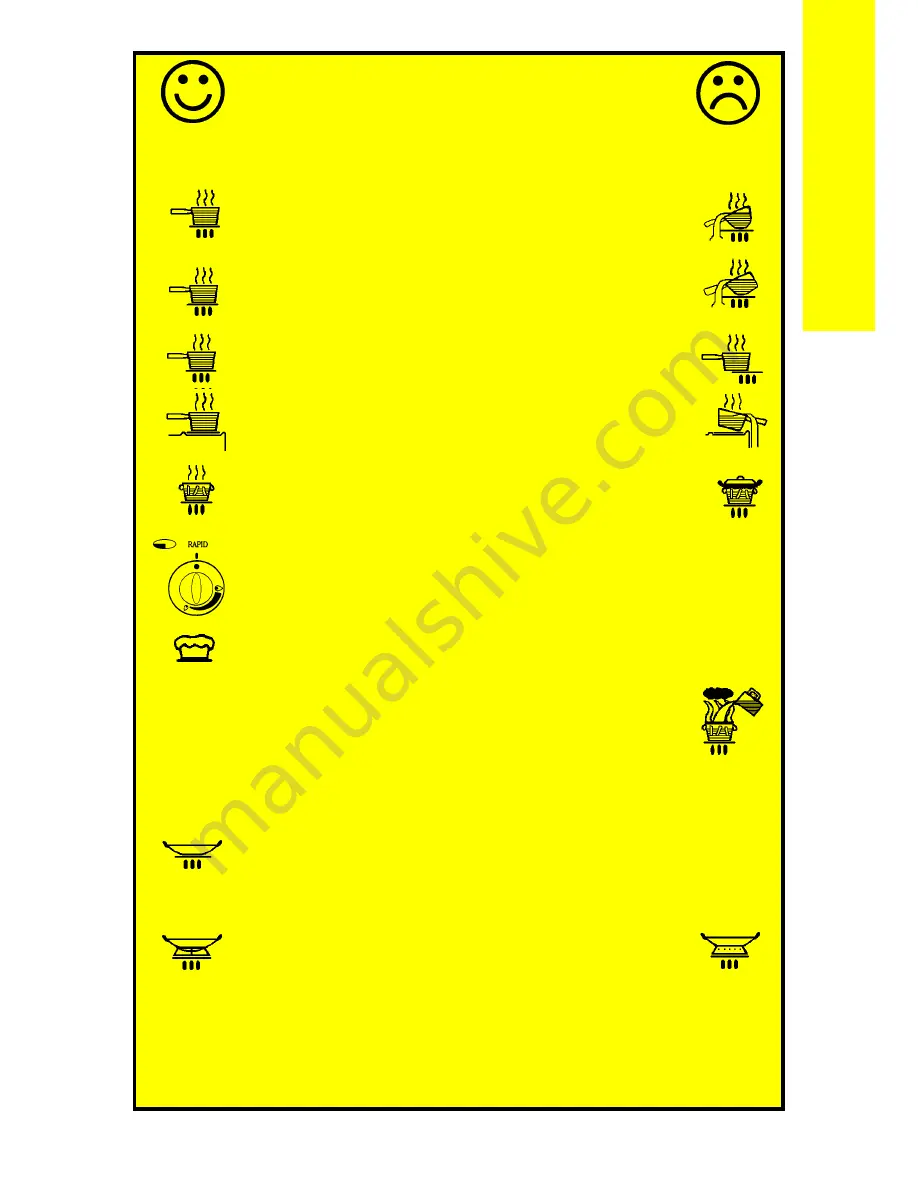
background image

11

S I G   3 2 0

For your safety

1

Take care to avoid burns and scalds when you are
reaching across the hotplate.

2

Use pans with flat bases. They are more stable than
pans which are warped.

3

Do not use pans with very heavy handles which cause
the pan to tip.

4

Put pans on the centre of the burners.

5

Position pan handles so they cannot be accidentally
knocked.

 
6

Take extra care when you are deep fat frying. Do not
cover the pan with a lid.

Do not leave a pan unattended. If the pan catches fire,
leave it where it is and turn off all controls.

Place a damp cloth or a fitting lid over the pan to
smother the flames.

Never put water on the fire.

Leave the pan to cool for 30 minutes.
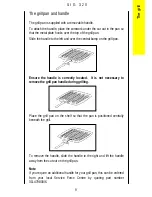
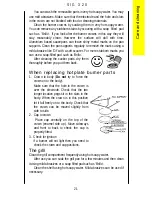
7

If you are using a Wok we recommend it has a flat base
as it will stand stable on the pan supports. If you use a
round based Wok with a collar support, the collar must
be of the open wire work type. A closed collar will affect
the performance of the burner. Before you use the Wok
make sure that the collar is stable on the pan supports.
Always follow the instructions that come with the Wok.
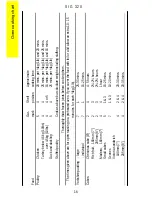
8

Do not use the lid as a work surface or chopping board.
This could damage the glass and reduce its strength.

The hotplate

Summary of Contents for SIG 320

Page 1: ...Owners handbook and Installation instructions SIG 320...

Page 2: ...e have included several drawings to show the right and wrong way of doing things The right way will have a smiling face by it A sad face shows something is wrong Do not remove the rating plate from th...

Page 3: ...ng chart 15 Slow cooking 18 Care and cleaning 20 Installing the cooker 25 General information 27 What is wrong and why 29 Servicing 30 Installation instructions 32 Technical data 33 Safety requirement...

Page 4: ...lit release the button Warning If the ignition button is not pressed immediately a build up of gas may cause the flame to spread 4 S I G 3 2 0 Lighting the cooker For your safety If you close the lid...

Page 5: ...ay cause the flame to spread Oven To light 1 Open the oven door 2 Push in the control knob and turn it to gas mark 9 Press the ignition button When the burner has lit release the button There will onl...

Page 6: ...the off position This is shown by a large dot 6 S I G 3 2 0 Lighting the cooker For your safety When you are lighting any burner check that it has lit before you leave the cooker When you are turning...

Page 7: ...setting to cook thicker food such as chicken after you have browned it on the high setting Cooking positions You can put the grill shelf in either of the two positions Most food should be cooked on t...

Page 8: ...sing the oven Preheating You don t usually need to preheat the grill You may wish to preheat it for a couple of minutes when you are cooking steak or when browning food Positioning food on the grid Pl...

Page 9: ...ure the handle is correctly located It is not necessary to remove the grill pan handle during grilling Place the grill pan on the shelf so that the pan is positioned centrally beneath the grill To rem...

Page 10: ...can adjust the heat by turning the control between the highest and lowest settings These are shown as a large and a small flame symbol Burner sizes The hotplate has three burner sizes to suit differen...

Page 11: ...ave it where it is and turn off all controls Place a damp cloth or a fitting lid over the pan to smother the flames Never put water on the fire Leave the pan to cool for 30 minutes 7 If you are using...

Page 12: ...overfill pans 3 Cover pans with a lid whenever possible The food will heat up more quickly and there will be less steam in the kitchen 4 Try cooking more than one vegetable in the same pan for exampl...

Page 13: ...the higher shelf to finish cooking Preheating You do not need to preheat the oven when casseroling and so on Preheat the oven for baking or when you are cooking sensitive food such as Yorkshire puddi...

Page 14: ...ommend open roasting using minimal fat or oil to prevent splashing It is not necessary to cover meat or poultry or wrap food in foil when roasting as this restricts the circulation of heat and will le...

Page 15: ...positions give the best results Put the dishes in the centre of the shelf You can change the gas marks and cooking times to suit your own tastes It is important to check that food is piping hot before...

Page 16: ...roughly thaw frozen joints before cooking them The times given above are for open roasting in a preheated oven If you cover the food with foil or a lid allow an extra 10 15 minutes for each kg 1lb Yor...

Page 17: ...ce on baking tray Puddings Milk pudding Baked sponge pudding Baked custard 2 4 3 3 3 3 2 hrs 45 60 mins 50 60 mins Yeast mixtures Bread 0 45kg 1lb loaves 0 90kg 2lb loaves Rolls and buns 8 8 8 3 3 2 3...

Page 18: ...for the last half hour if it is normally served golden brown Food preparation slow cooking Joints of meat and poultry l Do not cook meat joints over 2 7kg 6lb l Do not cook poultry over 2kg 4lb 8oz l...

Page 19: ...ake the pudding in the usual way l Cook for 30 minutes at gas mark 6 then reduce to the slow cook setting General points for slow cooking Frozen foods Thaw thoroughly before cooking Thickening Toss me...

Page 20: ...is strongly recommended that only hot soapy water is used for cleaning the door handle ANY OTHER CLEANING MATERIALS WILL DULL THE BRASS PLATED FINISH The hotplate Clean the hotplate top using a mild a...

Page 21: ...them thoroughly before you put them back When replacing hotplate burner parts 1 Crown to body Do not try to force the crown on to the body Make sure that the hole in the crown is over the electrode Ch...

Page 22: ...Do not put dishes too high in the oven If you do they may stick to the oven roof Cover your roasting tins with foil This will prevent fat splashing Use a roasting tin which is just large enough for t...

Page 23: ...n to mark 5 for at least 30 minutes 3 Turn the temperature up to mark 7 for 2 hours or until the oven is presentably clean Do not use any cleaning agents or scrapers on the inside of the oven Do not w...

Page 24: ...s at the bottom of the door 5 Clean the outer and inner glass using hot soapy water and mild abrasives such as Cif DO NOT try to clean the aluminium foil which is inside the door The foil is there to...

Page 25: ...ust be installed and serviced by a competent person as stated in the Gas Safety Installation Use regulations current editions and the IEE Wiring Regulations It is important that the cooker is suitable...

Page 26: ...catch fire for example wood or curtains behind the cooker l Base units which are higher than the hotplate must be 100mm away l If a cooker hood is fitted read the cooker hood installation instruction...

Page 27: ...ition system doesn t work ypu probably need to replace the battery The battery is at the base of the cooker on the left hand side of the front When you need to replace the battery open the main oven d...

Page 28: ...For your safety Do not try to disconnect the cooker from the gas supply if the supply pipe does not have a bayonet connection as described in the installation instruction If this is the case contact t...

Page 29: ...ly You can do this by making sure that other gas appliances such as your central heating or gas fire are working Problem Food is cooking too quickly or too slowly Check l Check that you are using the...

Page 30: ...n under the heading What is wrong and why When you report a problem try to describe the nature of the fault Always give your cooker s full name model and serial number Make a note of this information...

Page 31: ...training purposes The Gas Consumers Council The Gas Consumers Council GCC is an independent organisation which protects the interests of gas users If you need advice you will find the telephone number...

Page 32: ...Gas and L P Gas versions of this appliance are available Check that this model is suitable for the type of supply available In the interest of safety this appliance must be installed and or serviced b...

Page 33: ...Rc B S P female Electric None IGNITION Spark generator APCO 6BG 6893 Battery 1 5 Volt AA size GRILL Natural Gas L P Gas Heat Input 3 3kW 11263 Btu h 3 0kW 215g h Injector Marking 138 88 HOTPLATE Natu...

Page 34: ...ning the appliance should have an air supply in accordance with BS 5440 Part 2 Current Edition All rooms require an openable window or equivalent and some rooms will require a permanent vent as well F...

Page 35: ...t less than 400mm above the hotplate then a minimum space of 100mm must be maintained between the sides of the unit and the appliance see Fig 1b Curtains must not be fitted immediately behind the appl...

Page 36: ...be read in conjunction with the leaflet packed with the stability bracket 1 Place the appliance in its intended position and level appliance 2 Mark off 250mm from the left hand side of the appliance a...

Page 37: ...battery See Fig 4 4 Close the lid of the battery holder 6 PRESSURE TESTING 1 The oven injector is used as a pressure test point Remove the oven furniture Remove oven burner box retaining clips one spr...

Page 38: ...HECKING THE MAIN OVEN 1 Turn the oven thermostat knob to Mk 9 and press the ignition button As soon as the burner is alight the button can be released 2 There should now be a low gas rate to the burne...

Page 39: ...our local Service Force Centre quoting the relevant part number No OFF DESCRIPTION 2 Oven shelves 1 P C Guarantee card 1 Hotplate operation card 1 Grill pan 311409401 1 Grill pan grid 311419801 1 Gril...

Page 40: ...urner Crown Rapid N G Burner Crown Rapid L P G Burner Crown Normal Burner Crown Simmer Pan Support 1 2 1 1 1 2 1 2 354000610 354000609 354000608 359039100 337000302 337000402 337000502 359033202 NOTE...

Reviews: