background image

JINCHI05 REV E. 11/11/2014 

M

ULTIFUEL 

G

RATE


Your  Parkray  Stove  is  fitted  with  a  locomotive 
type grate. So that de-ashing can be carried out 
cleanly and easily, it is riddled from the outside 
of the stove with the doors closed. The grate is 
designed  to  burn  both  wood  and  solid  mineral 
fuels. 


G

RATE 

O

PERATION 

&


B

URNING 

W

OOD 

L

OGS


Place  the  operating  tool  over  the  riddling  spigot 
and push the operating tool up and away from you. 
When left in this position, air is restricted through 
the bed of the fire providing a solid base to build up 
a bed of ash. Surplus ash can be removed either by 
gentle riddling or with a shovel.  
 

G

RATE 

O

PERATION 

&


B

URNING 

S

OLID 

M

INERAL 

F

UELS


Place  the  operating  tool  over  the  riddling  spigot 
and  pull  it  down  towards  you.  When  left  in  that 
position, air is directed under and up through the 
slots in the fire bed, giving the optimum conditions 
for burning solid fuels.  
It  is  important  that  the  riddling  tool  is  used  to 
remove the ash to ensure airflow through the fire 
bed and allow the fire to burn over the entire area 
of the grate.  
The  ashpan  should  be  emptied  at  least  daily  and 
ash  should  never  be  allowed  to  build  up  over  a 
period of time as this will result in damage to the 
fire  bars.  The  flat  end  of  the  riddling  tool  can  be 
used to carry the ashpan. 
It  might  prove  beneficial,  when  burning  more 
reactive  fuels,  to  leave  the  grate  in  a  “neutral” 
position,  thus  directing  some  under  fire  air  and 
some over fire air to the fire bed. 

L

IGHTING THE 

A

PPLIANCE


First, load the fire with starting fuel, i.e. paper, dry 
sticks  and/or  firelighters  in  the  mode  chosen, 
either wood or solid mineral fuel. Light the fire at 
the base leaving all air controls open. Allow the fuel 
to  reach  a  steady  glow  and  build  the  fire  up 
gradually.  Once  you  have  a  good  fire  established 
across the grate bed, further fuel can be added as 
required.  
 

L

OADING THE 

A

PPLIANCE 

(W

OOD

)


With a full load of wood, the stove will need to be 
refuelled  approximately  once  every  hour  and  a 
half.  
Wood can be stacked higher in the stove than solid 
mineral fuel but care must be taken that logs do not 
touch the baffle. 
 

L

OADING THE 

A

PPLIANCE 

(S

OLID 

M

INERAL 

F

UEL

)


Solid mineral fuel should be placed in the stove so 
that there is no more than a 30° incline of the fuel 
bed  from  front  to  back.  It  should 

not 

be  stacked 

touching  the  rear  edge  of  the  baffle  as  this  may 
result in damage to the stove.  
With a full load of fuel, the  stove  will need to be 
refuelled approximately once every 4 hours 
 

A

IR 

C

ONTROLS 

(W

OOD

)


Wood  burns most  efficiently  with  the  primary  air 
control in the closed position and the secondary air 
control  approximately  60%  open.  Moving  the 
secondary air control will control the burn rate of 
the Stove.  
The secondary air control should not be completely 
closed  unless  the  primary  air  lever  is  also  in  the 
closed position.  
Wood burns best on a bed of ash and it is therefore 
only necessary to remove surplus ash from on top 
of the grate occasionally. Do not  let the ash level 
under the grate reach above the primary air inlet. 
If  allowed  to  build-up,  ash  will  stifle  the  airflow 
through the grate.  
Burn only dry, well-seasoned wood, which should 
have  been  cut,  split  and  stacked  for  at  least  12 
months, with free air movement around the sides 
of the stack to enable it to dry out. Burning wet or 
unseasoned  wood  will  create  tar  deposits  in  the 
stove  and  chimney  and  will  not  produce  a 
satisfactory heat output. 
 

A

IR 

C

ONTROLS 

(S

OLID 

M

INERAL 

F

UEL

)


Solid  mineral  fuel  burns  most  efficiently  with  the 
secondary air control in the closed position.  Always 

Summary of Contents for Chevin Inset 5 MKII

Page 1: ...1 JINCHI05 REV E 11 11 2014 Chevin Inset 5 MKII Model CVSCHI05FM Instructions for Installation Operation Maintenance Servicing Approved for use in the United Kingdom and the Republic of Ireland ...

Page 2: ...ls Consumables are deemed to be Glass Seals Gaskets Grate Components Log Retainers Baffles and the surface finish of the appliance The Warranty will only be valid if the appliance is installed by an appropriately qualified engineer in accordance with the manufacturer s instructions and to the appropriate Building Regulations and or Local By Laws and serviced within 12 months of installation Parkra...

Page 3: ... on or near this appliance Do not place furniture or other items within 1 metre of the front of this appliance See the note on material clearances on page 13 Extractor Fans and or Cooker Hoods must not be installed in the same space or room as this can cause the appliance to emit fumes into the room Do not obstruct the ventilation required for the safe use of this appliance COMPETENT PERSONS SCHEM...

Page 4: ...times FUME EMISSION Properly installed and operated this appliance will not emit fumes Occasional fumes from de ashing and refueling may occur Persistent fume emission must not be tolerated This appliance should not be operated with the door open If fume emission does persist then the following action should be taken immediately Open Doors and windows to ventilate room Let the fire out or eject an...

Page 5: ... in steadily and to give a long service life of the paint finish During this curing in process you may notice an unpleasant smell It is non toxic but for your comfort we would suggest that during this period you leave all doors and windows open AIR CONTROLS This stove has been designed to burn cleaner and more efficiently than a conventional wood burning stove If used correctly this stove will bur...

Page 6: ...rols open Allow the fuel to reach a steady glow and build the fire up gradually Once you have a good fire established across the grate bed further fuel can be added as required LOADING THE APPLIANCE WOOD With a full load of wood the stove will need to be refuelled approximately once every hour and a half Wood can be stacked higher in the stove than solid mineral fuel but care must be taken that lo...

Page 7: ...n and adjust the secondary air to give the desired heat output Never leave the stove unattended until you are certain that the flames are fully established Avoid refuelling on to a low fire bed as this may cause excessive smoke emission Ensure there are sufficient embers to ignite the new fuel rapidly Alternatively add some more kindling before adding larger pieces of firewood Do not add firewood ...

Page 8: ...Scotland and Wales this power rests with Ministers in the devolved administrations for those countries Separate legislation the Clean Air Northern Ireland Order 1981 applies in Northern Ireland Therefore it is a requirement that fuels burnt or obtained for use in smoke control areas have been authorised in Regulations and that appliances used to burn solid fuel in those areas other than authorised...

Page 9: ...itable for use in a shared flue Read and follow the operating instructions Use only recommended fuels This stove has been designed and assembled so that it may be used to burn wood logs in a Smoke Control Area Find out if you are in a Smoke Control Area by contacting your Local Authority The Chevin Inset 5 has been fitted with a permanent bypass that prevents closure of the secondary air slider Re...

Page 10: ...ting the chimney flue system Make provision to access the chimney flue system for cleaning and the removal of debris If there is no existing chimney then either a prefabricated block chimney in accordance with Building Regulations Approved Document J or a twin walled insulated stainless steel flue to BS4543 can be used These chimneys must be fitted in accordance with the manufacturer s instruction...

Page 11: ... satisfactory installation of the stove although detail may need slight modification to suit particular local site conditions In all cases the installation must comply with current Building Regulations Local Authority Byelaws European and National Standards and other specifications or regulations as they affect the installation of the stove It should be noted that the Building Regulations requirem...

Page 12: ...e way It is essential that all connections between the stove and chimney flue are sealed and made airtight Both the chimney and any flue pipe must be accessible for cleaning and if ANY parts of the chimney cannot be reached through the stove with baffle removed a soot door must be fitted in a suitable position to enable this to be done AIR SUPPLY Where necessary any air opening must be kept clear ...

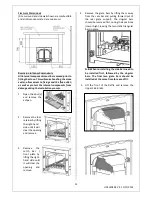
Page 13: ... retainer by lifting the right hand side until it will clear the opening and remove 3 Remove the catch bar front plate by lifting the right hand side until it will clear the opening and remove 4 Remove the grate bars by lifting them away from the cam bar and pulling forward out of the rear grate support The singular bars should be removed first noting their positions low or high leaving the two st...

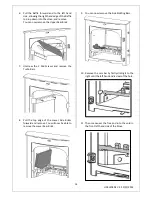
Page 14: ...ck 7 Unscrew the 2 M6 Screws and remove the Turbo Bars 8 Pull the top edge of the Lower Side Bricks forward and remove You will now be able to remove the Lower Rear Brick 9 You can now remove the Side Riddling Bars 10 Remove the cam bar by firstly sliding it to the right until the left hand end is clear of the hole 11 Then maneuver the free end into the void in the front left hand side of the Stov...

Page 15: ... the hearth or paintwork on the stove and making sure that the 12mm rope seal is compressed forming a tight seal between the stove and fireplace 4 Drill into the existing fireback through the fixing holes in the body see below using a 6mm drill bit 5 Place the screws provided into the fixing holes and gently tighten until the stove feels secure 6 Fill the fixing holes with fire cement to form an a...

Page 16: ...e appliance to heat up slowly ensuring that no products of combustion enter into the room When the appliance has reached working temperature open the Door and carry out a spillage test using a smoke match around the door opening If there is excessive spillage please allow the appliance to cool and then re check the chimney flue system and ventilation Do not run the stove at full output for at leas...

Page 17: ... these can scratch the glass and make subsequent cleaning more difficult Wet logs on heated glass a badly aimed poker or heavy slamming of the doors could crack the glass panels The glass will not fracture from heat Should you need to replace a glass panel please ensure you purchase a new Gasket at the same time Please check periodically that the glass clips and screws have not become loose They s...

Page 18: ...cleaner if required If the Gasket is torn or damaged we recommend that is replaced to ensure that no products of combustion enters the room when the appliance is used Brush down the outer surface and touch up the paint if necessary Burn the appliance at a low rate after maintenance to allow any new seals paint or glue cure properly The appliance may emit unpleasant odours during this process pleas...

Page 19: ...ES AND STOVE CARE Single Door Assembly Single Door HCE09008 Glass Clip HHR08146 Glass Clip Screw FSJM05008SS Single Door Glass HCE09102 Single Door Gasket HCE09101 Door Handle Assembly TDI05ARRT011MB Rope Sealing Kit SCPCB900SDRSK REVC ...

Page 20: ...Double Door Glass HCE09031 Double Door Gasket HCE09030 Right Hand Door HCE09009 Rope Sealing Kit SCPCB900DDRSK Glass Clip HHR08046 Glass Clip Screw FSJM05008SS Double Door Glass HCE09031 Double Door Gasket HCE09030 Door Handle Assembly TDI05ARRT012MB Door Handle Assembly Door Handle Boss AVI05010MB Door Handle Stainless AVA08020MB Hex Screw FSHM08050 ...

Page 21: ...ars Side CNN05004 A B Upper CNS04013 Lower CNS04012 Ashpan HCN05ARRT033 Operating Tool HFR07040 Secondary Air Control Support Plate HCN05050 Slider Plate HH06086 Gasket HH06088 Slider Shaft HCN05016 Slider Knob HCE06059S Upper Side Brick HCN05073 A B Lower Side Brick HCN05071 A B Door Hinge HH06050 Hinge Pin FRRE08 1 75 Catch Bar Single Door HCN05ARRT0019 Double Door HCN05ARRT020 Primary Air Contr...

Page 22: ...de Appliance Description Serial Number COMMISSIONING CHECK Complete Sign YES NO Does the chimney flue system meet the appropriate standard Has the chimney flue system been swept and passed the soundness test Has this appliance passed the flue draught test Please write down the flue draught reading Has this appliance passed the smoke test Has this appliance passed the spillage test Have you explain...

Page 23: ...Servicing Company Engineer Signature 9th Service Date of Service Date of next Service Servicing Company Engineer Signature 2nd Service Date of Service Date of next Service Servicing Company Engineer Signature 4th Service Date of Service Date of next Service Servicing Company Engineer Signature 6th Service Date of Service Date of next Service Servicing Company Engineer Signature 8th Service Date of...

Page 24: ...24 JINCHI05 REV E 11 11 2014 ...

Reviews: