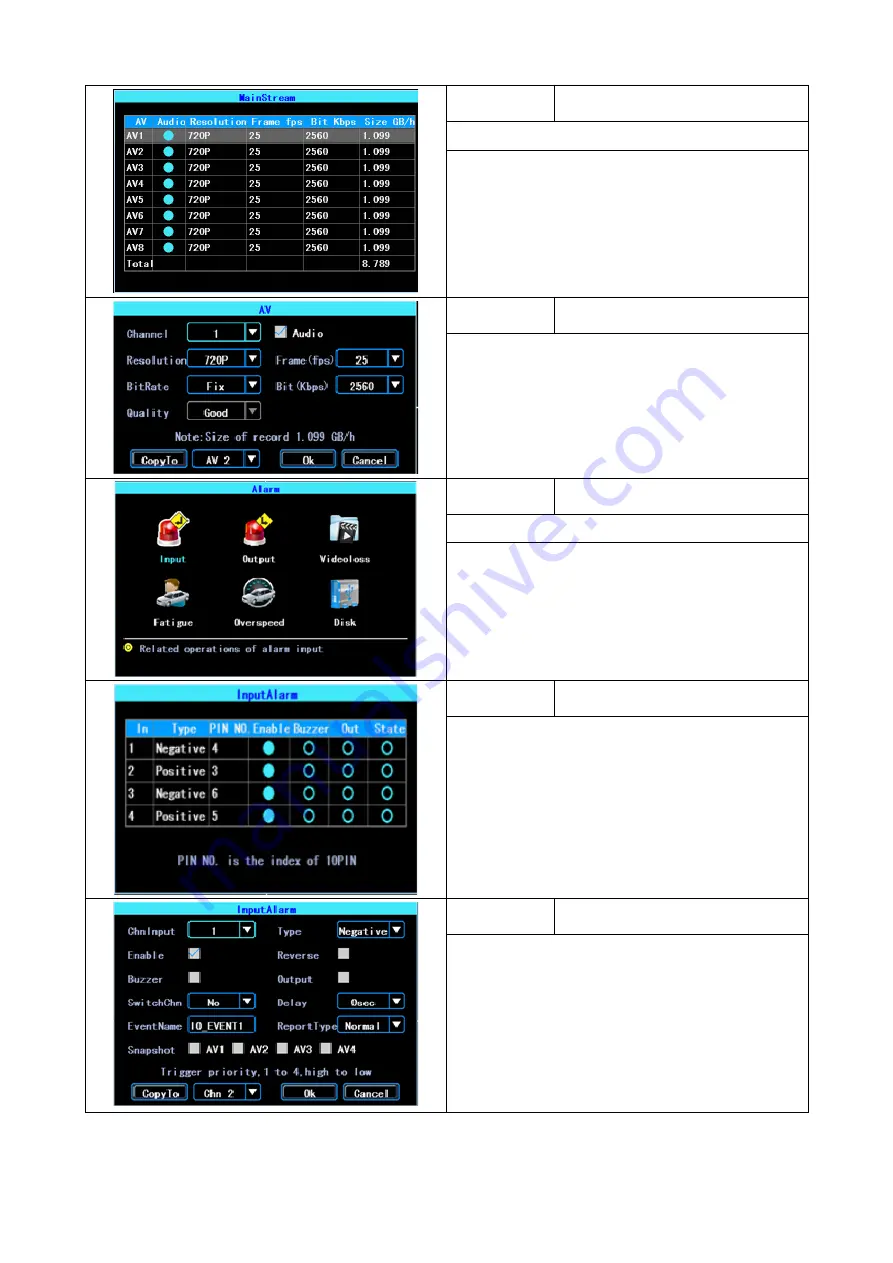
Step 9.
Record Quality
Path: Menu - Record - Mainstream
Highlight the individual camera (AV) and press
“ENTER” to adjust the setting.
Step 10.
Record Quality
The record settings can be altered individually for each
camera.
Adjust the setting to suit the camera type fitted.
Note: Higher settings will affect the storage capacity
record times.
When complete, highlight “OK” and press enter.
Step 11.
Alarm Triggers
Path: Menu - Alarm - Input
The DVR has 4 inputs.
Inputs 2 & 4 are positive type input.
1 & 3 are optional Positive/Negative type input.
Step 12.
Trigger selection
Navigate to the desired trigger input and press
“ENTER”
Screen shows current settings and state (on/off) for each
trigger. This screen can be used to test trigger inputs
(STATE) for correct detection.
Step 13.
Trigger setting
Chn Input -
AV input device.
Type
- Trigger input positive or negative.
Enable
- Turn trigger on/off.
Reverse
- Mirror/oppose trigger operation.
Buzzer
- Sound buzzer upon trigger activation.
Output
- Activate output upon trigger activation
SwitchChn
- Switch monitor to full screen AV channel
Delay
- Remain triggered after removal of trigger
When complete, highlight “OK” and press enter.


