GB/IE/
CY
10
Additional Safety rules
Check that your mains voltage is the same
as that marked on the rating plate.
If you use a cable reel, run all the cable off
the reel. The minimum conductor cross
section used should be 1.5 mm
2
.
If you use this electric hammer drill
outdoors you must connect it using a
suitable H07RN-F 3G 1.5 mm
2
extension
cable with a spray-water protected plug.
Make sure of your footing, particularly when
working free-handed on ladders or
scaffolding.
Use a detector to localize pipes and/or
cables in walls with concealed electric,
water or gas lines. Avoid any contact with
conducting electrical parts or lines.
Wear ear-muffs to protect your hearing:
Risk of progressive loss of hearing!
Wear goggles and use a breathing mask on
dusty jobs.
Never use the machine near vapors or
combustible liquids.
Always unplug the machine before cleaning
it or changing drill bits etc.
Keep the power cable safe from damage.
Oil and acids can damage cables.
Never overload the machine.
Important!
Follow all safety regulations in your country
appli cable to the installation, use and
maintenance of the machine.
Chisel bits and drill bits can be
inadvertently thrown out from the machine
and cause serious injury:
- Always check that the chisel bit or drill bit
is firmly locked in the chuck before you
start work.
- Check the chuck for wear or damage at
regular intervals.
Do not start a hammering tool until it is
pressed against a workpiece (wall, ceiling,
etc.).
Always unplug the hammer drill when you
have finished working and remove the
chisel bit or drill bit from the tool.
Always unplug the machine before
changing chisel bits or drill bits etc.
Protect eyes and assistants from small
flying parts and splinters. Wear a helmet!
Erect a screen wall!
Work gloves protect you against skin
abrasions.
Vibrations can be harmful to the hand-arm
system: Keep the impact time of vibrations
to a minimum.
Always keep the power cable away from
where you want to drill.
Keep the machine out of childrenʼs reach.
Always hold the machine with two hands
when it is running and make sure of your
footing.
Make sure that the switch on the machine
is set to the correct position for the work
you want to perform before you put the
machine into operation. If the switch is not
in the correct position you risk suffering
bodily injury when the machine starts to
run.
Save this instructions.
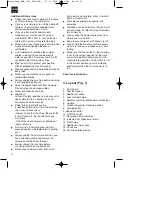
3. Layout (Fig. 1)
1. Dust
guard
2. Locking
sleeve
3. Additional
handle
4. Lock for depth stop
5. Selector switch for drill/hammer drill/chisel
6. Handle
7. Clockwise/counter-clockwise
switch
8. Locking
button
9. Speed controller
10. ON/OFF switch
11. Operating status indicator
12. Indicator for carbon brush wear
13. Depth stop
14. Additional scroll chuck
15. Chuck key
16. Dust absorption device
Anleitung_BMH_1100_4258398:_ 21.11.2008 7:40 Uhr Seite 10
Summary of Contents for BMH 1100
Page 1: ...Anleitung_BMH_1100_4258398 _ 21 11 2008 7 39 Uhr Seite 1 ...
Page 2: ...18 30 42 54 67 Anleitung_BMH_1100_4258398 _ 21 11 2008 7 39 Uhr Seite 2 ...
Page 5: ...5 10 A 5 C E D B Anleitung_BMH_1100_4258398 _ 21 11 2008 7 40 Uhr Seite 5 ...
Page 80: ...80 Anleitung_BMH_1100_4258398 _ 21 11 2008 7 41 Uhr Seite 80 ...
Page 81: ...81 Anleitung_BMH_1100_4258398 _ 21 11 2008 7 41 Uhr Seite 81 ...
Page 82: ...Anleitung_BMH_1100_4258398 _ 21 11 2008 7 41 Uhr Seite 82 ...


