PAAP 12 A1
GB
│
IE
│
NI
│
CY
│
9
■
Before use
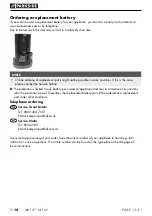
Removing/charging/inserting the
battery pack
NOTE
►
The battery is supplied partially charged .
Before first use, charge the battery in the
charger for at least 1 hour . This guarantees
full battery performance . You can charge the
lithium-ion battery at any time without
shortening its service life . Interrupting the
charging process does not damage the
battery .
NOTE
►
Never charge the battery pack if the ambient
temperature is below 10°C or above 40°C .
If a lithium-ion battery is to be stored for an
extended period, the charge level should be
checked regularly . The optimum charge level
is between 50% and 80% . The storage
climate should be cool and dry and the
ambient temperature should be between
0°C and 50°C .
CAUTION!
►
Always unplug the appliance before you
remove the battery pack from or connect
it to the charger .
♦
To remove the battery pack , press the
release button and pull the battery pack
out of the appliance .
♦
Insert the battery pack into the high-speed
charger .
♦
Insert the power plug into the socket . The
charge control LED lights up red .
♦
The green charge control LED indicates that
charging is complete and the battery pack
is ready for use .
♦
Unplug the high-speed charger from the wall
socket .
♦
Push the battery pack into the appliance .
Checking the battery charge level
When the appliance is switched on, the remaining
charge is shown on the battery LED as follows:
RED/ORANGE/GREEN = maximum charge
RED / ORANGE = medium charge
RED = low charge – charge the battery
Assembly/disassembly of the
polishing disc
♦
Press the spindle lock and hold it down .
♦
Screw the polishing disc clockwise onto the
screw thread .
♦
Proceed in the reverse order to remove the
polishing disc .
Fitting the attachments
ATTENTION!
►
Be sure to remove the battery pack before
fitting or removing the attachments , ,
, .
♦
The polishing disc and supplied attachments
, , , are fitted with corresponding
Velcro fasteners .
♦
To change them, lift the side of the attachment
, , , and pull it off the polishing
disc .
♦
First choose a sandpaper for sanding and
press it onto the polishing disc . Make sure
it is properly centred .
♦
Now select the polishing hood (orange) for
pre-polishing and push it onto the polishing
disc . Make sure it is properly centred .
♦
Now select the polishing hood (black) for
final polishing and press it onto the polishing
disc . Make sure it is properly centred .
♦
For the final finish, select the fake fur attachment
and press it onto the polishing disc .
Make sure it is properly centred .
Fitting the additional handle
♦
The additional handle can be screwed onto
the left or right side of the appliance head,
depending on the mode of operation .
Summary of Contents for PAAP 12 A1
Page 3: ...A B ...
Page 34: ...PAAP 12 A1 30 DE AT CH ...


